Products
AI Platform
Asana Foundations
Company Type
Visit our pricing page for more information.
Projects allow you to organize the tasks related to a specific initiative, goal, or big piece of work into various views, including list, board, timeline, and Gantt.
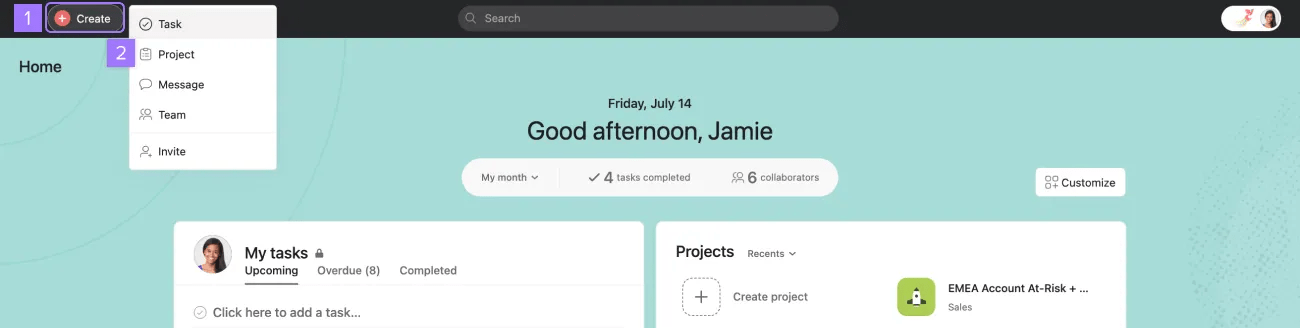
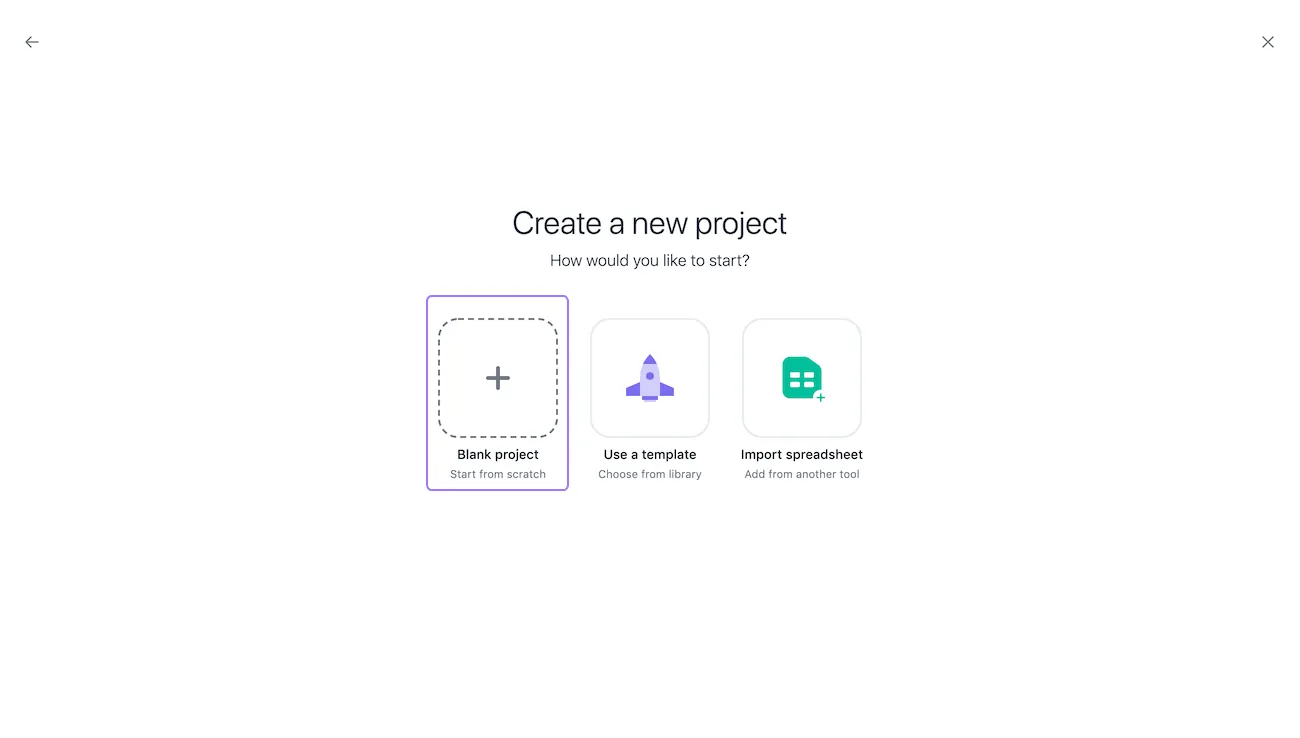
A new screen will present you with 3 options: create a Blank project, Use a template, or Import a spreadsheet.
Click Blank project to start from scratch.
In organizations, you must belong to a team before you can create a project.
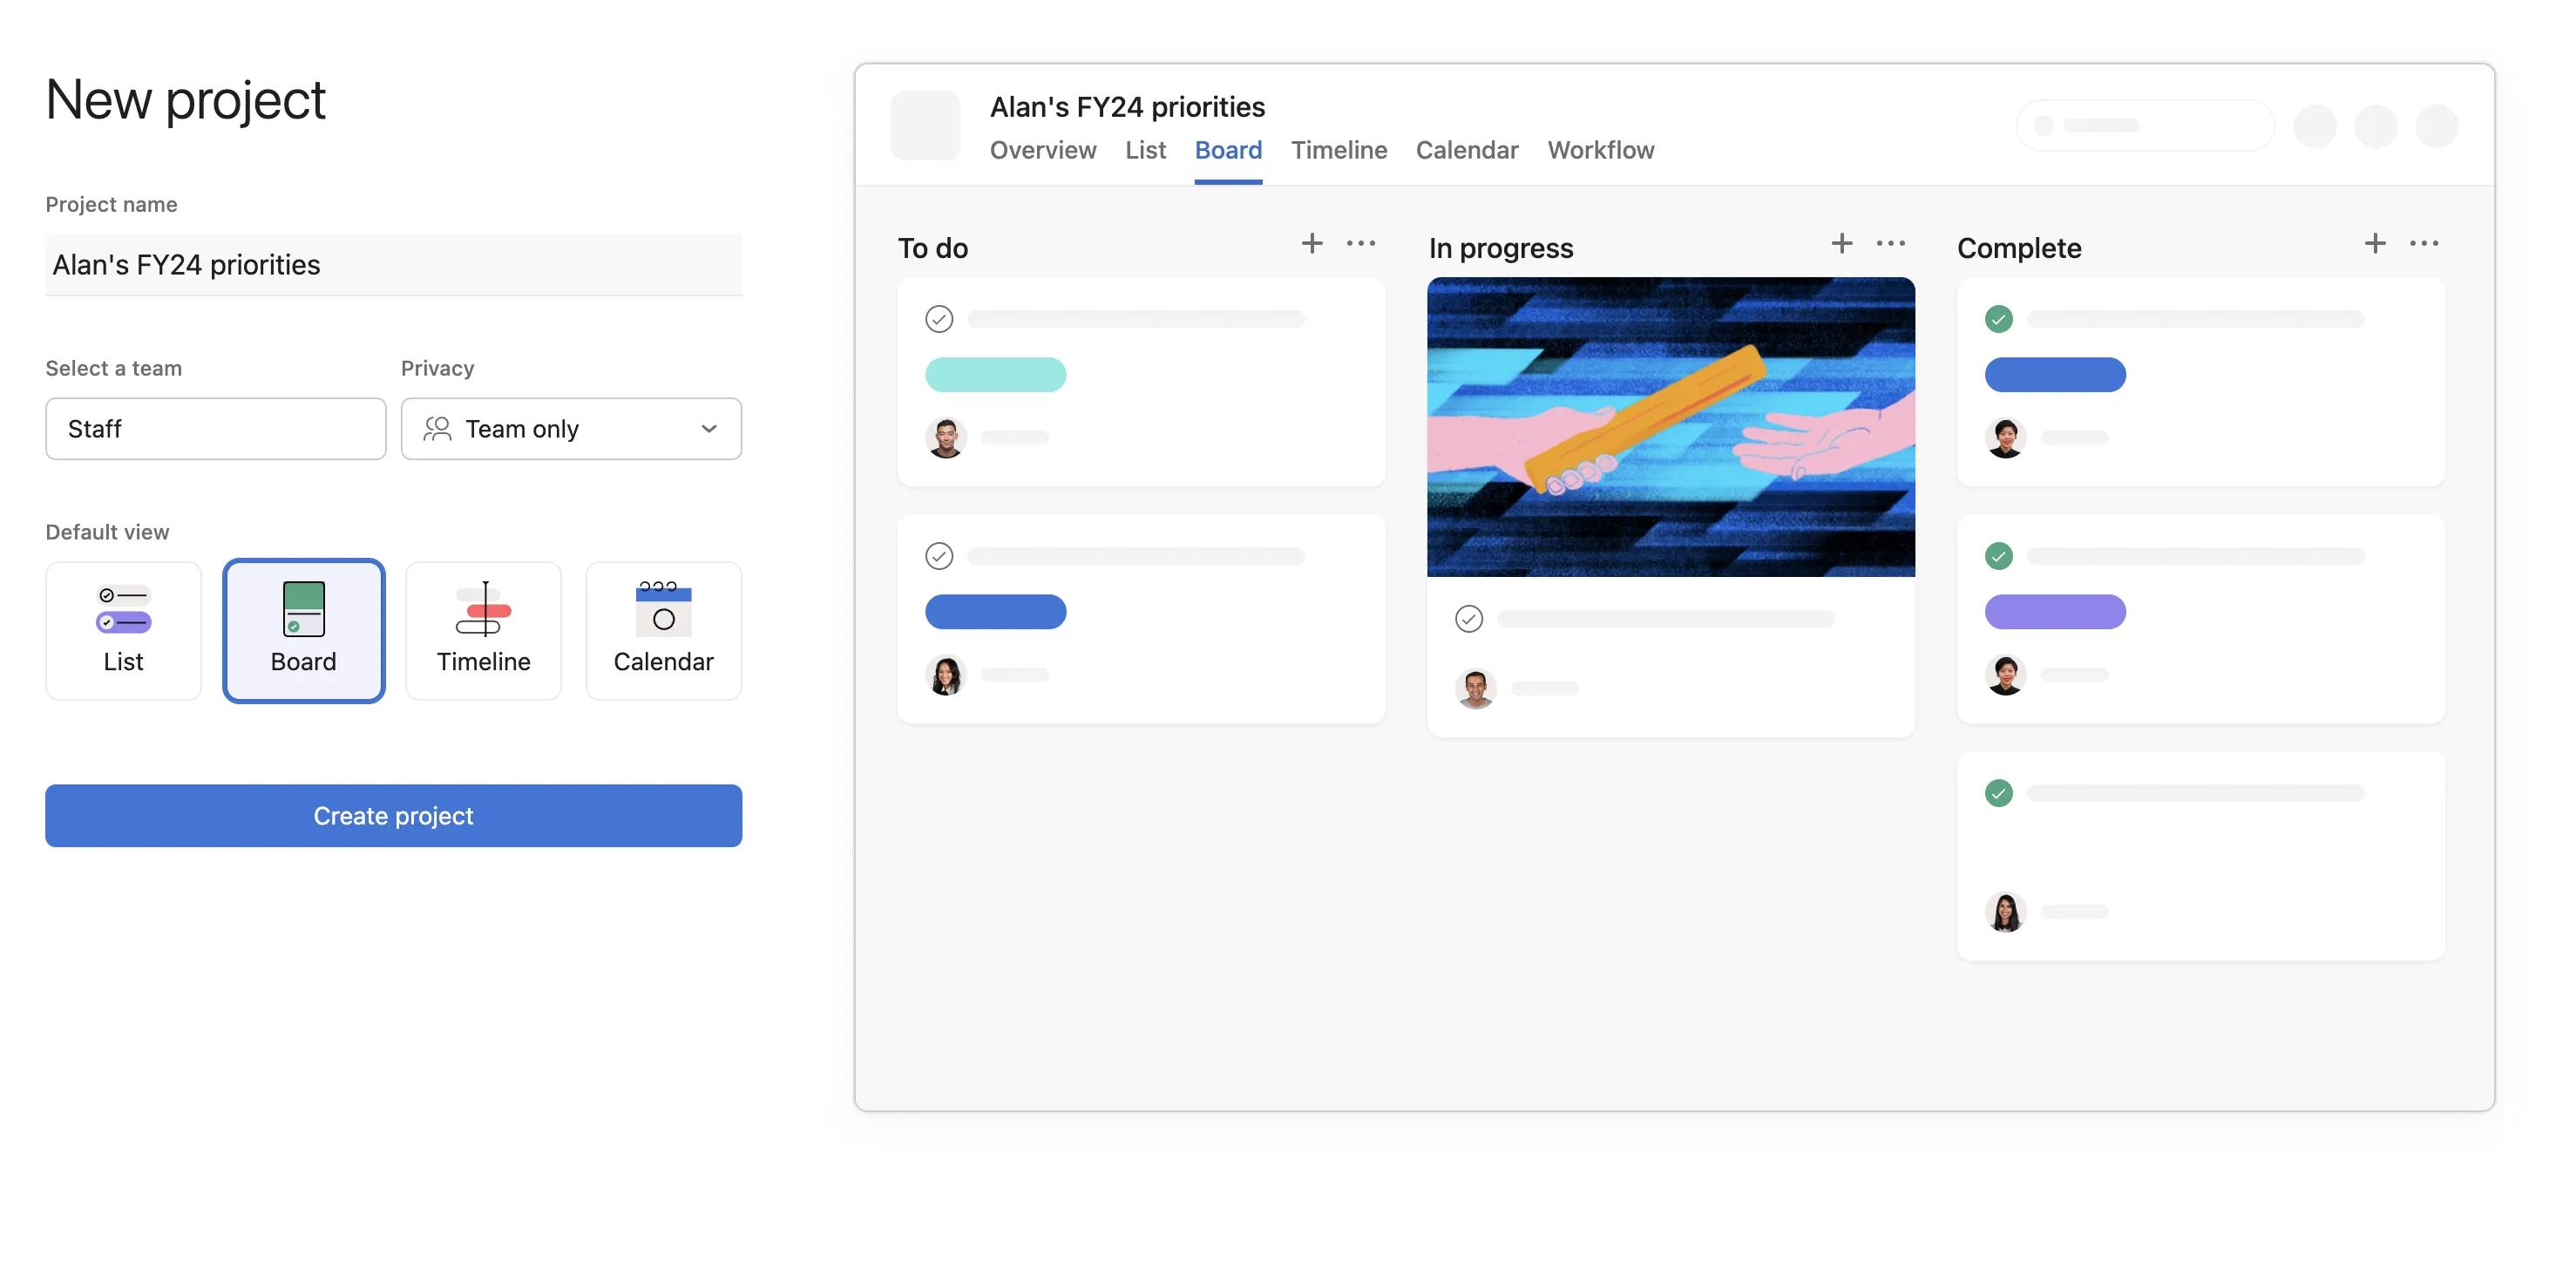
Your new project will load in the main pane and appear in the sidebar.
Note
In organizations, the create project button will auto-populate with the team highest in your sidebar. Click the Team field to manually select which team your project will be created in.
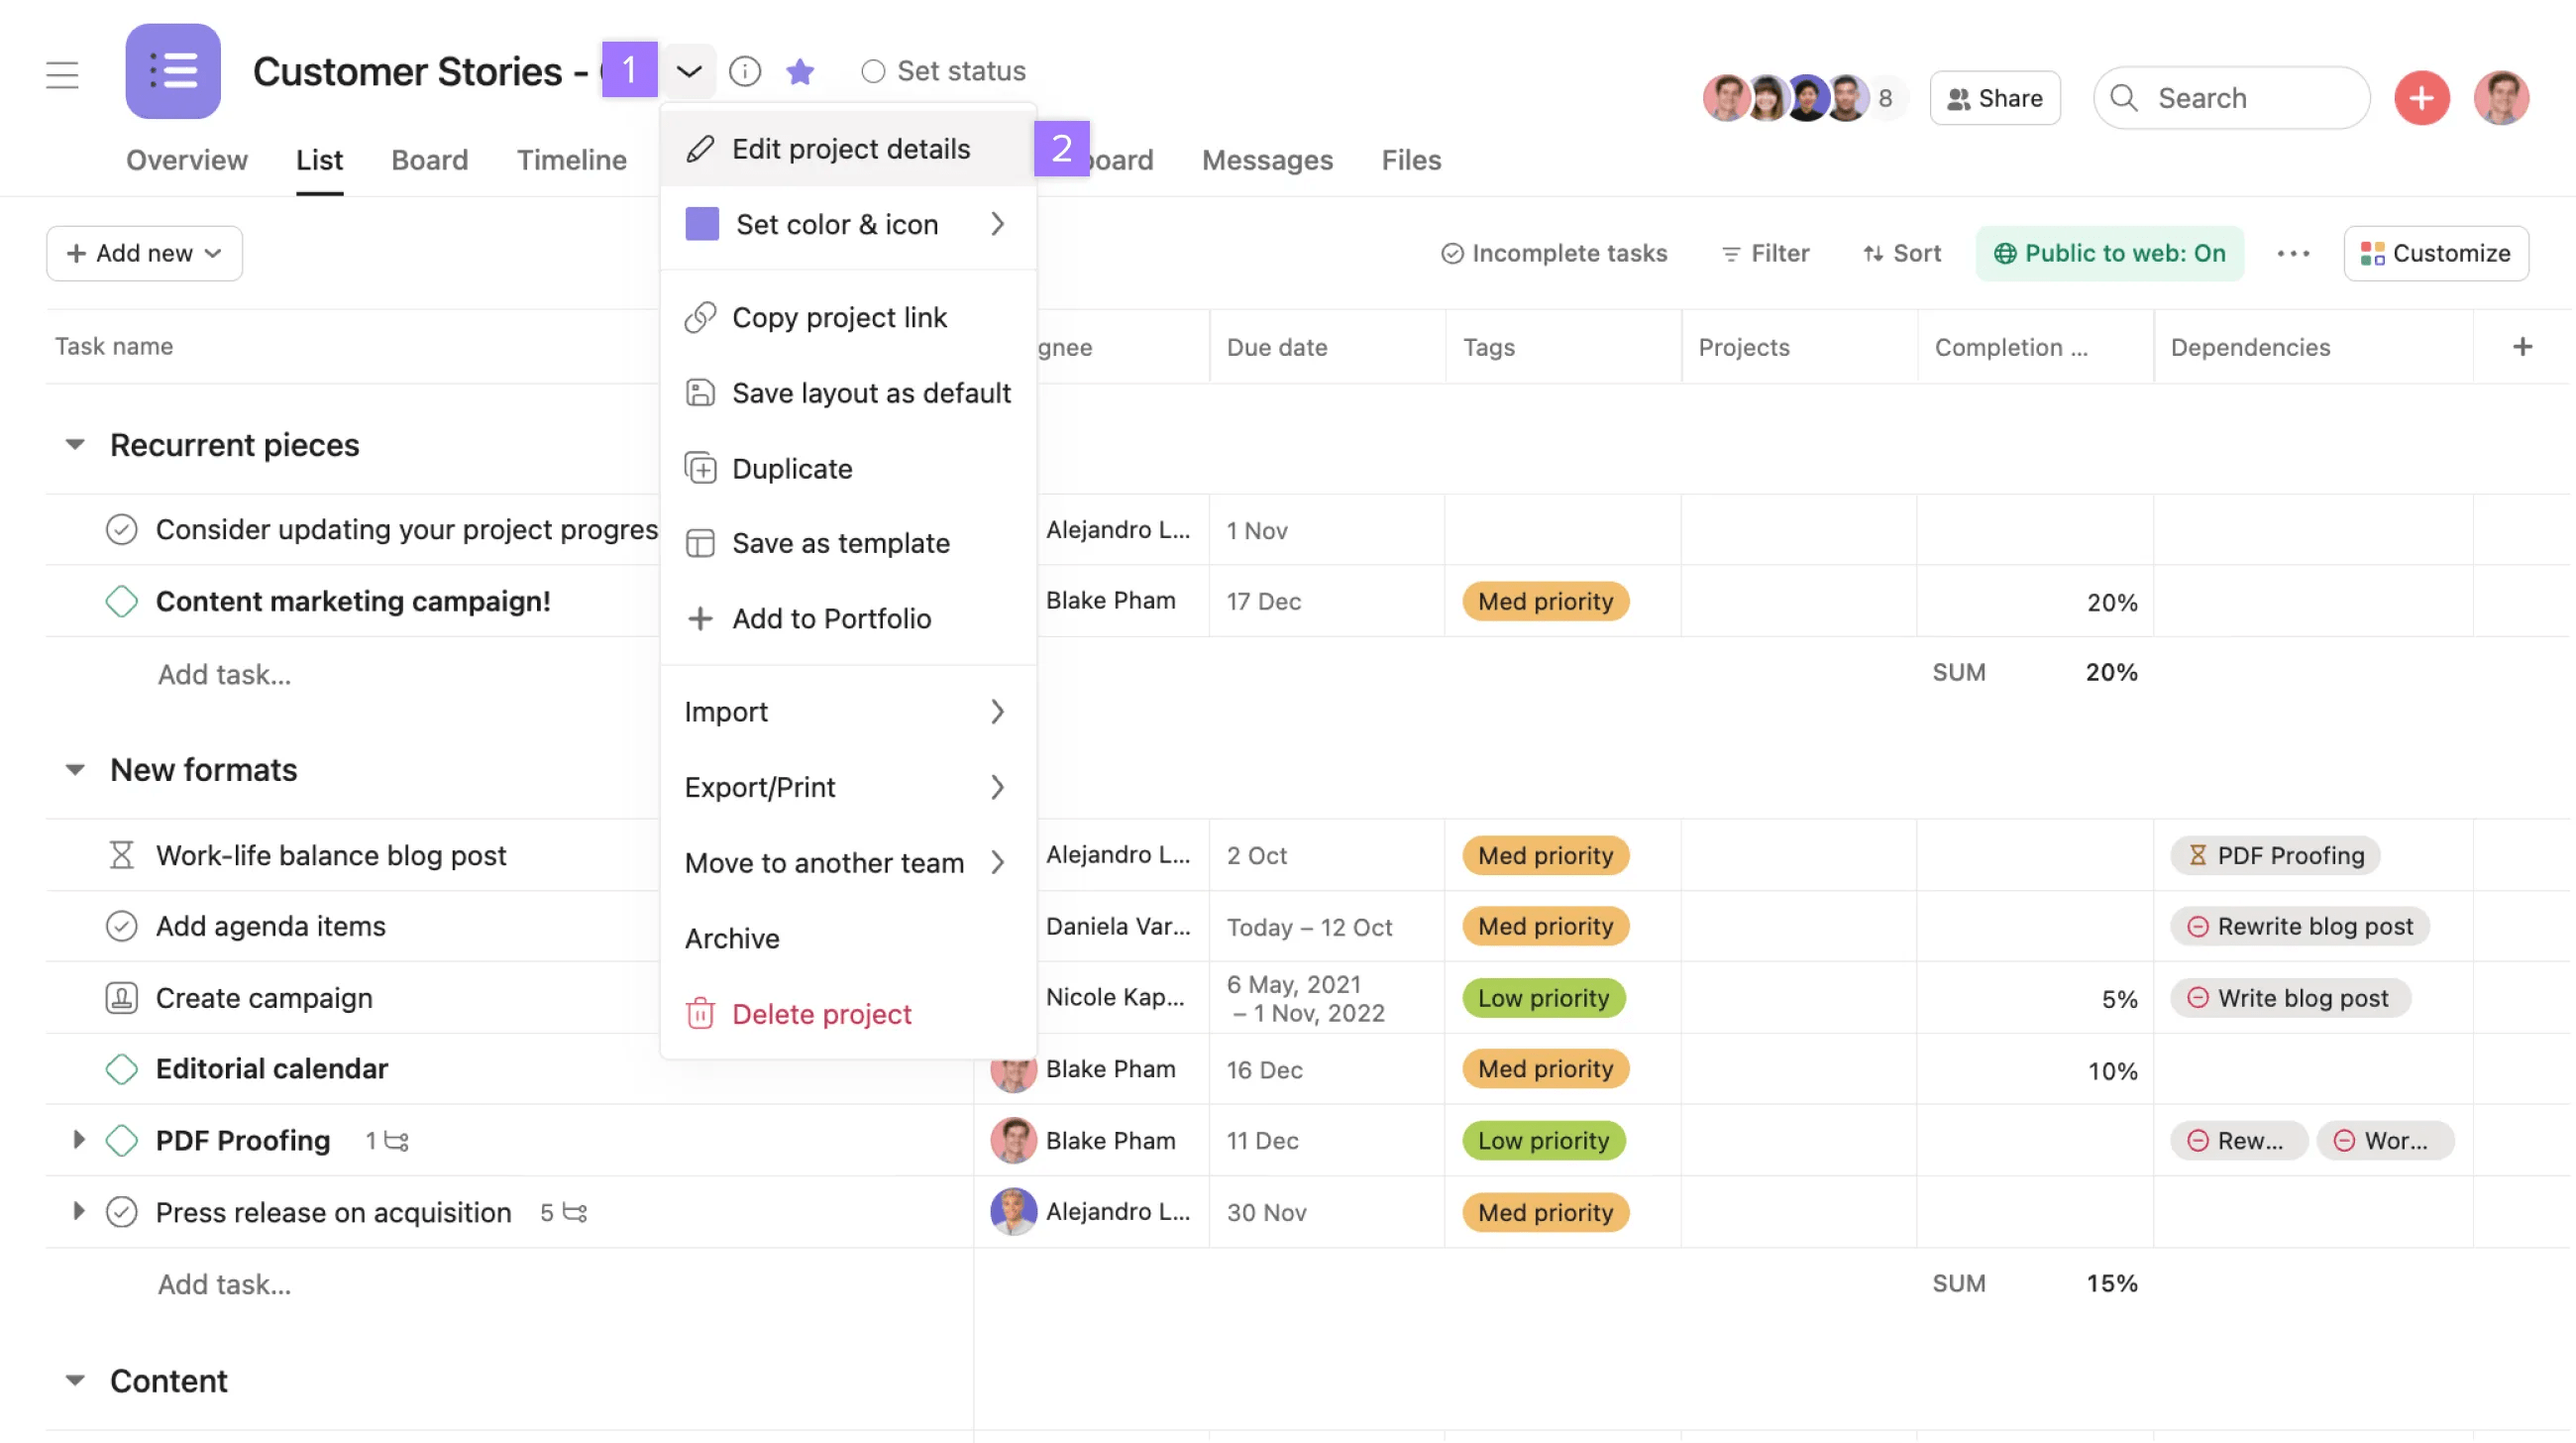
You can take many actions on your projects in Asana. Search views and My tasks will have variations of these actions.
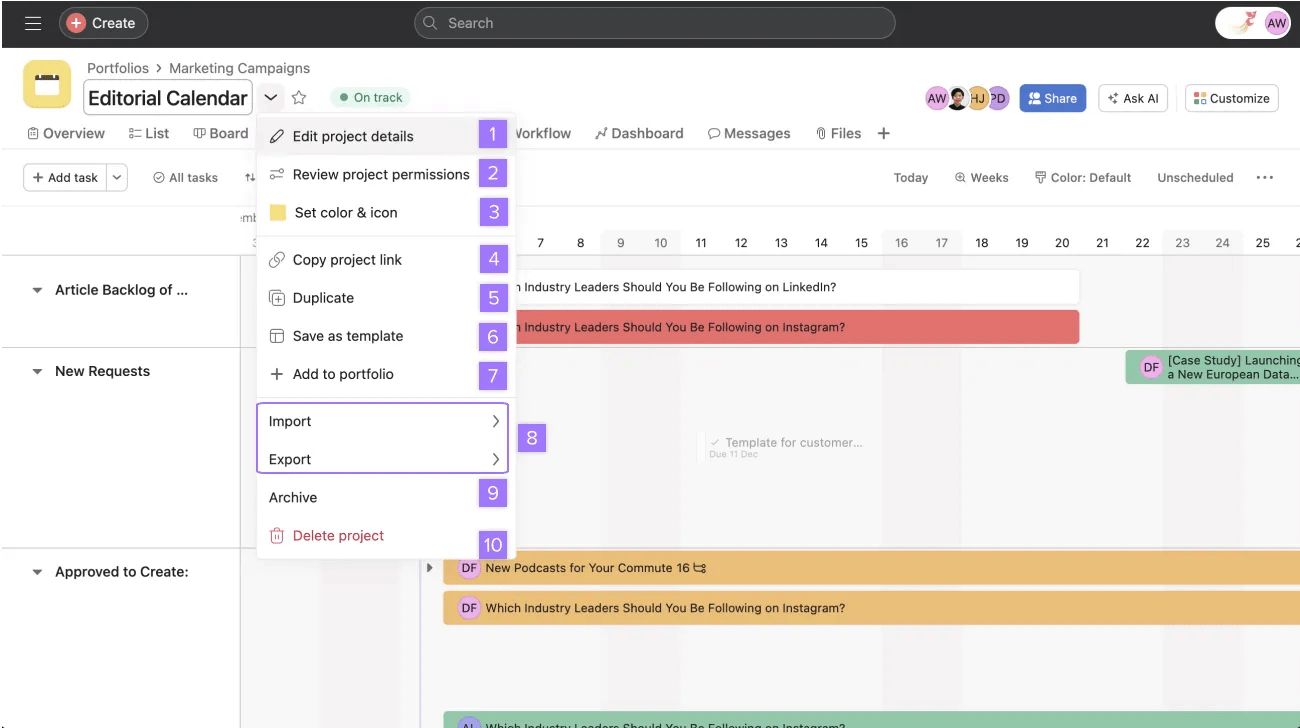
Favorite the project by clicking the star symbol beside the project name, adding it to your sidebar for easy access.
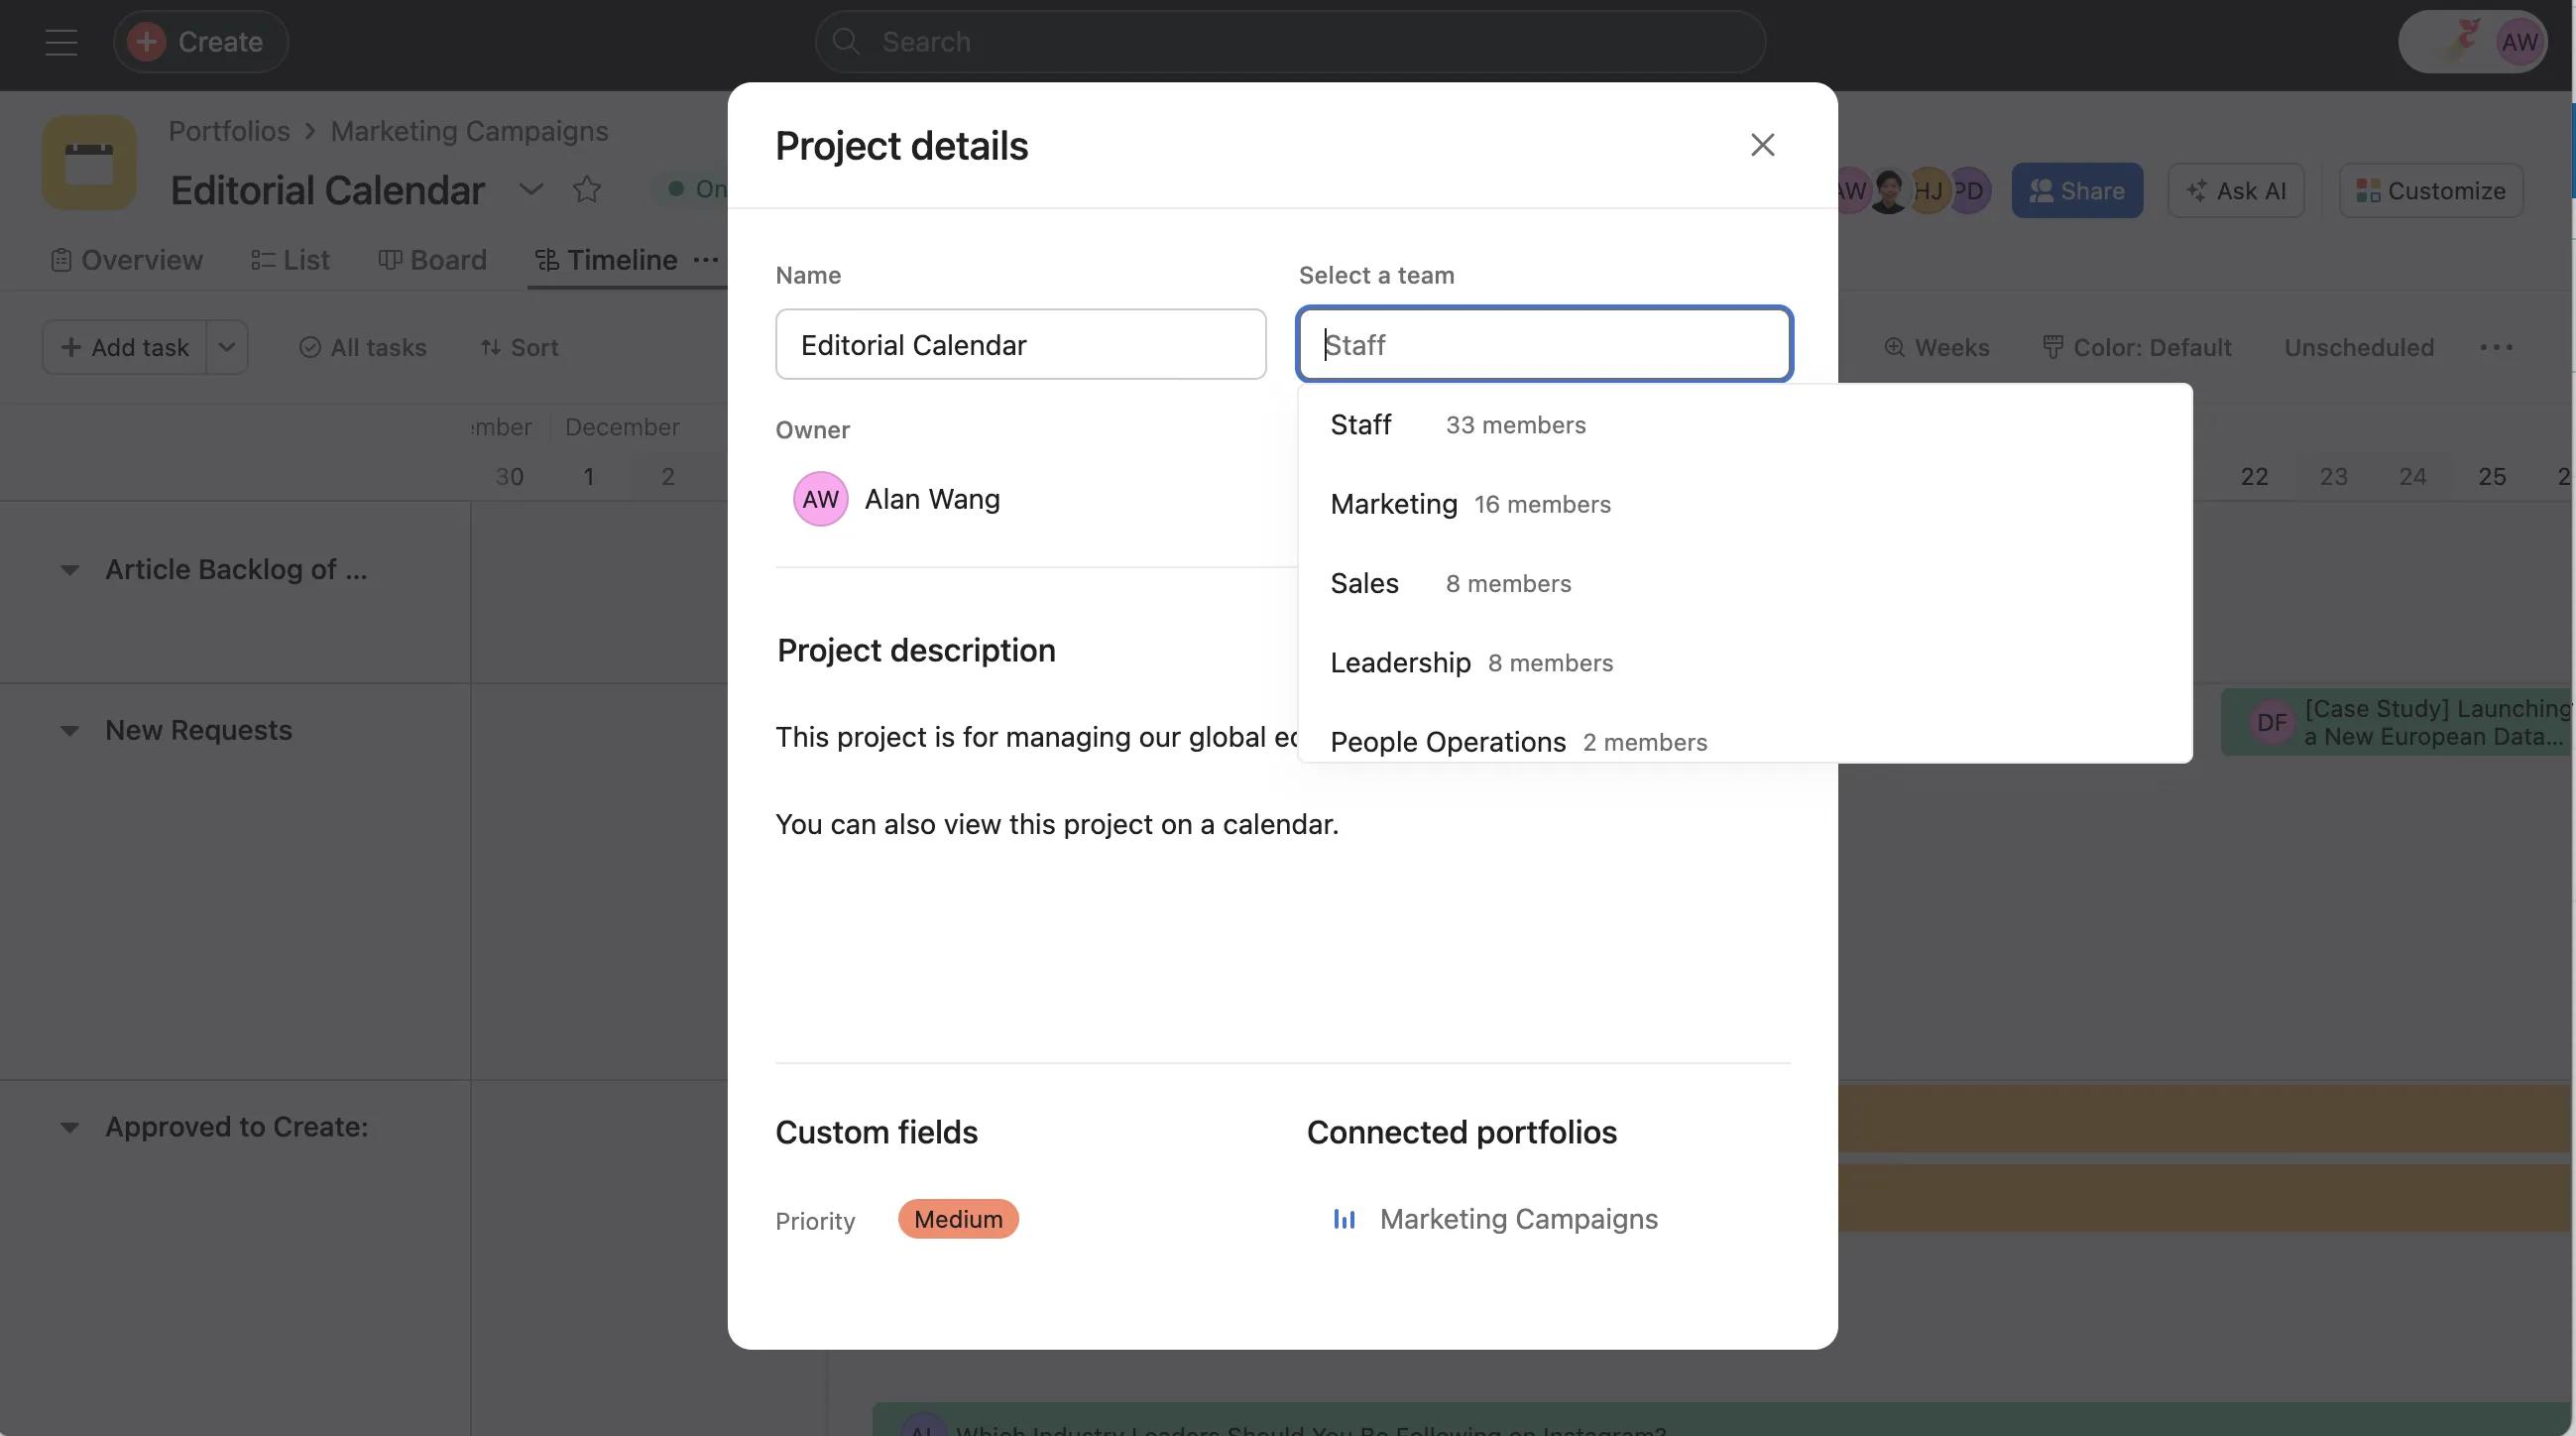
A project's name and description provide context on what the project is and what it aims to achieve. When you open a project, the project name is displayed prominently in the header.
Project descriptions support rich text and emojis.
You can personalize your project by using custom project icons. Upload a JPG or a PNG to replace the default project icon. These custom icons will appear in your sidebar, home, portfolios, and team pages, making it easier to find your projects.
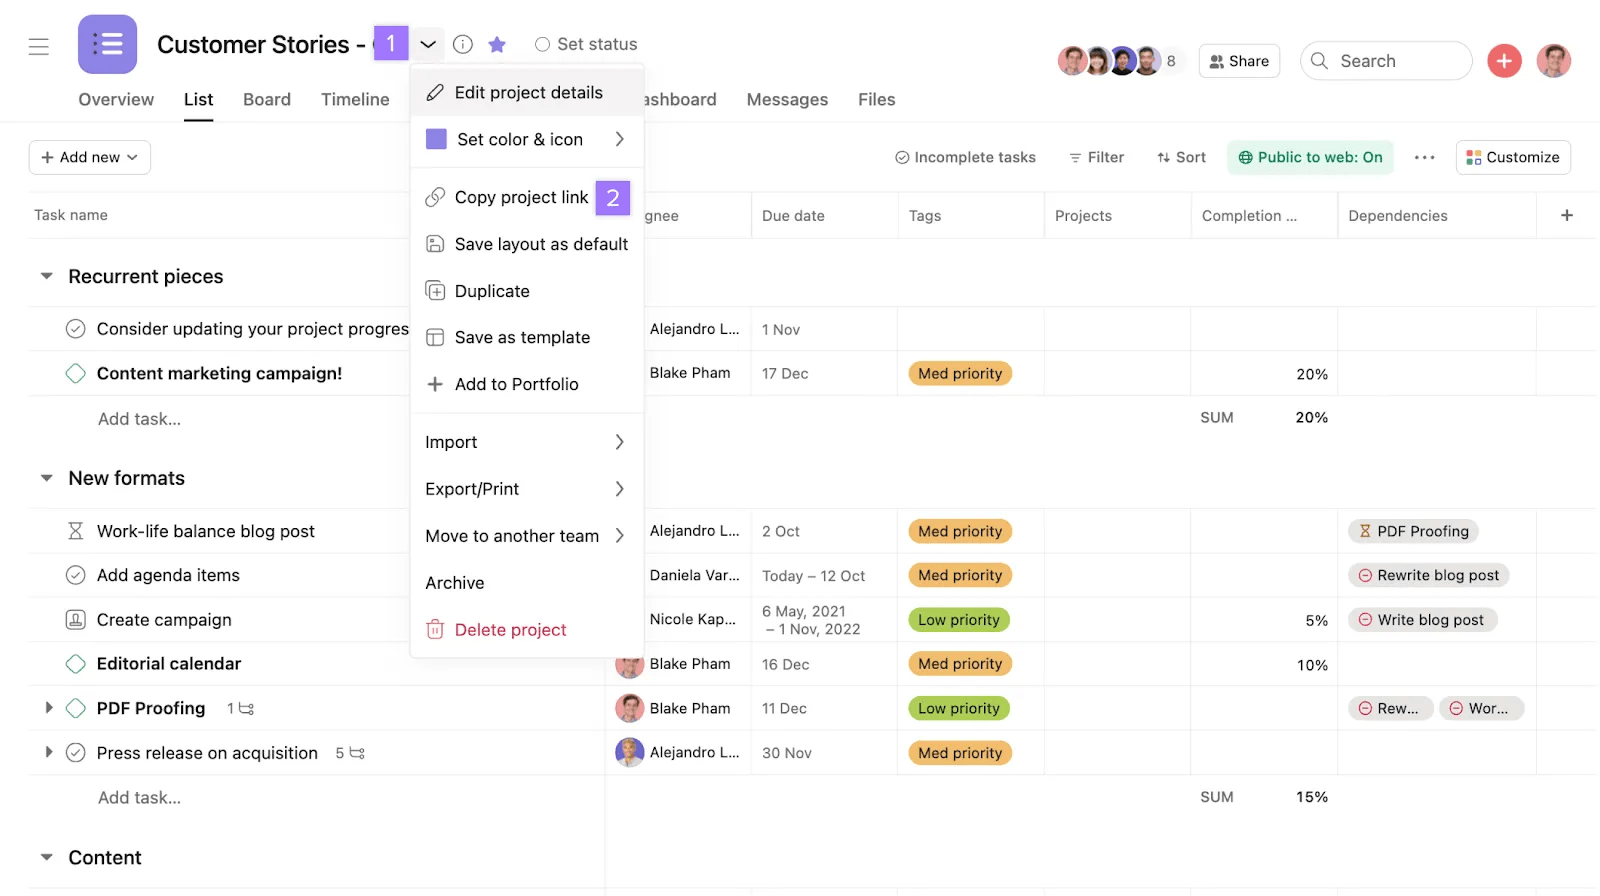
From the drop-down menu, click Set color & icon and go to the Custom icon tab to upload an image.
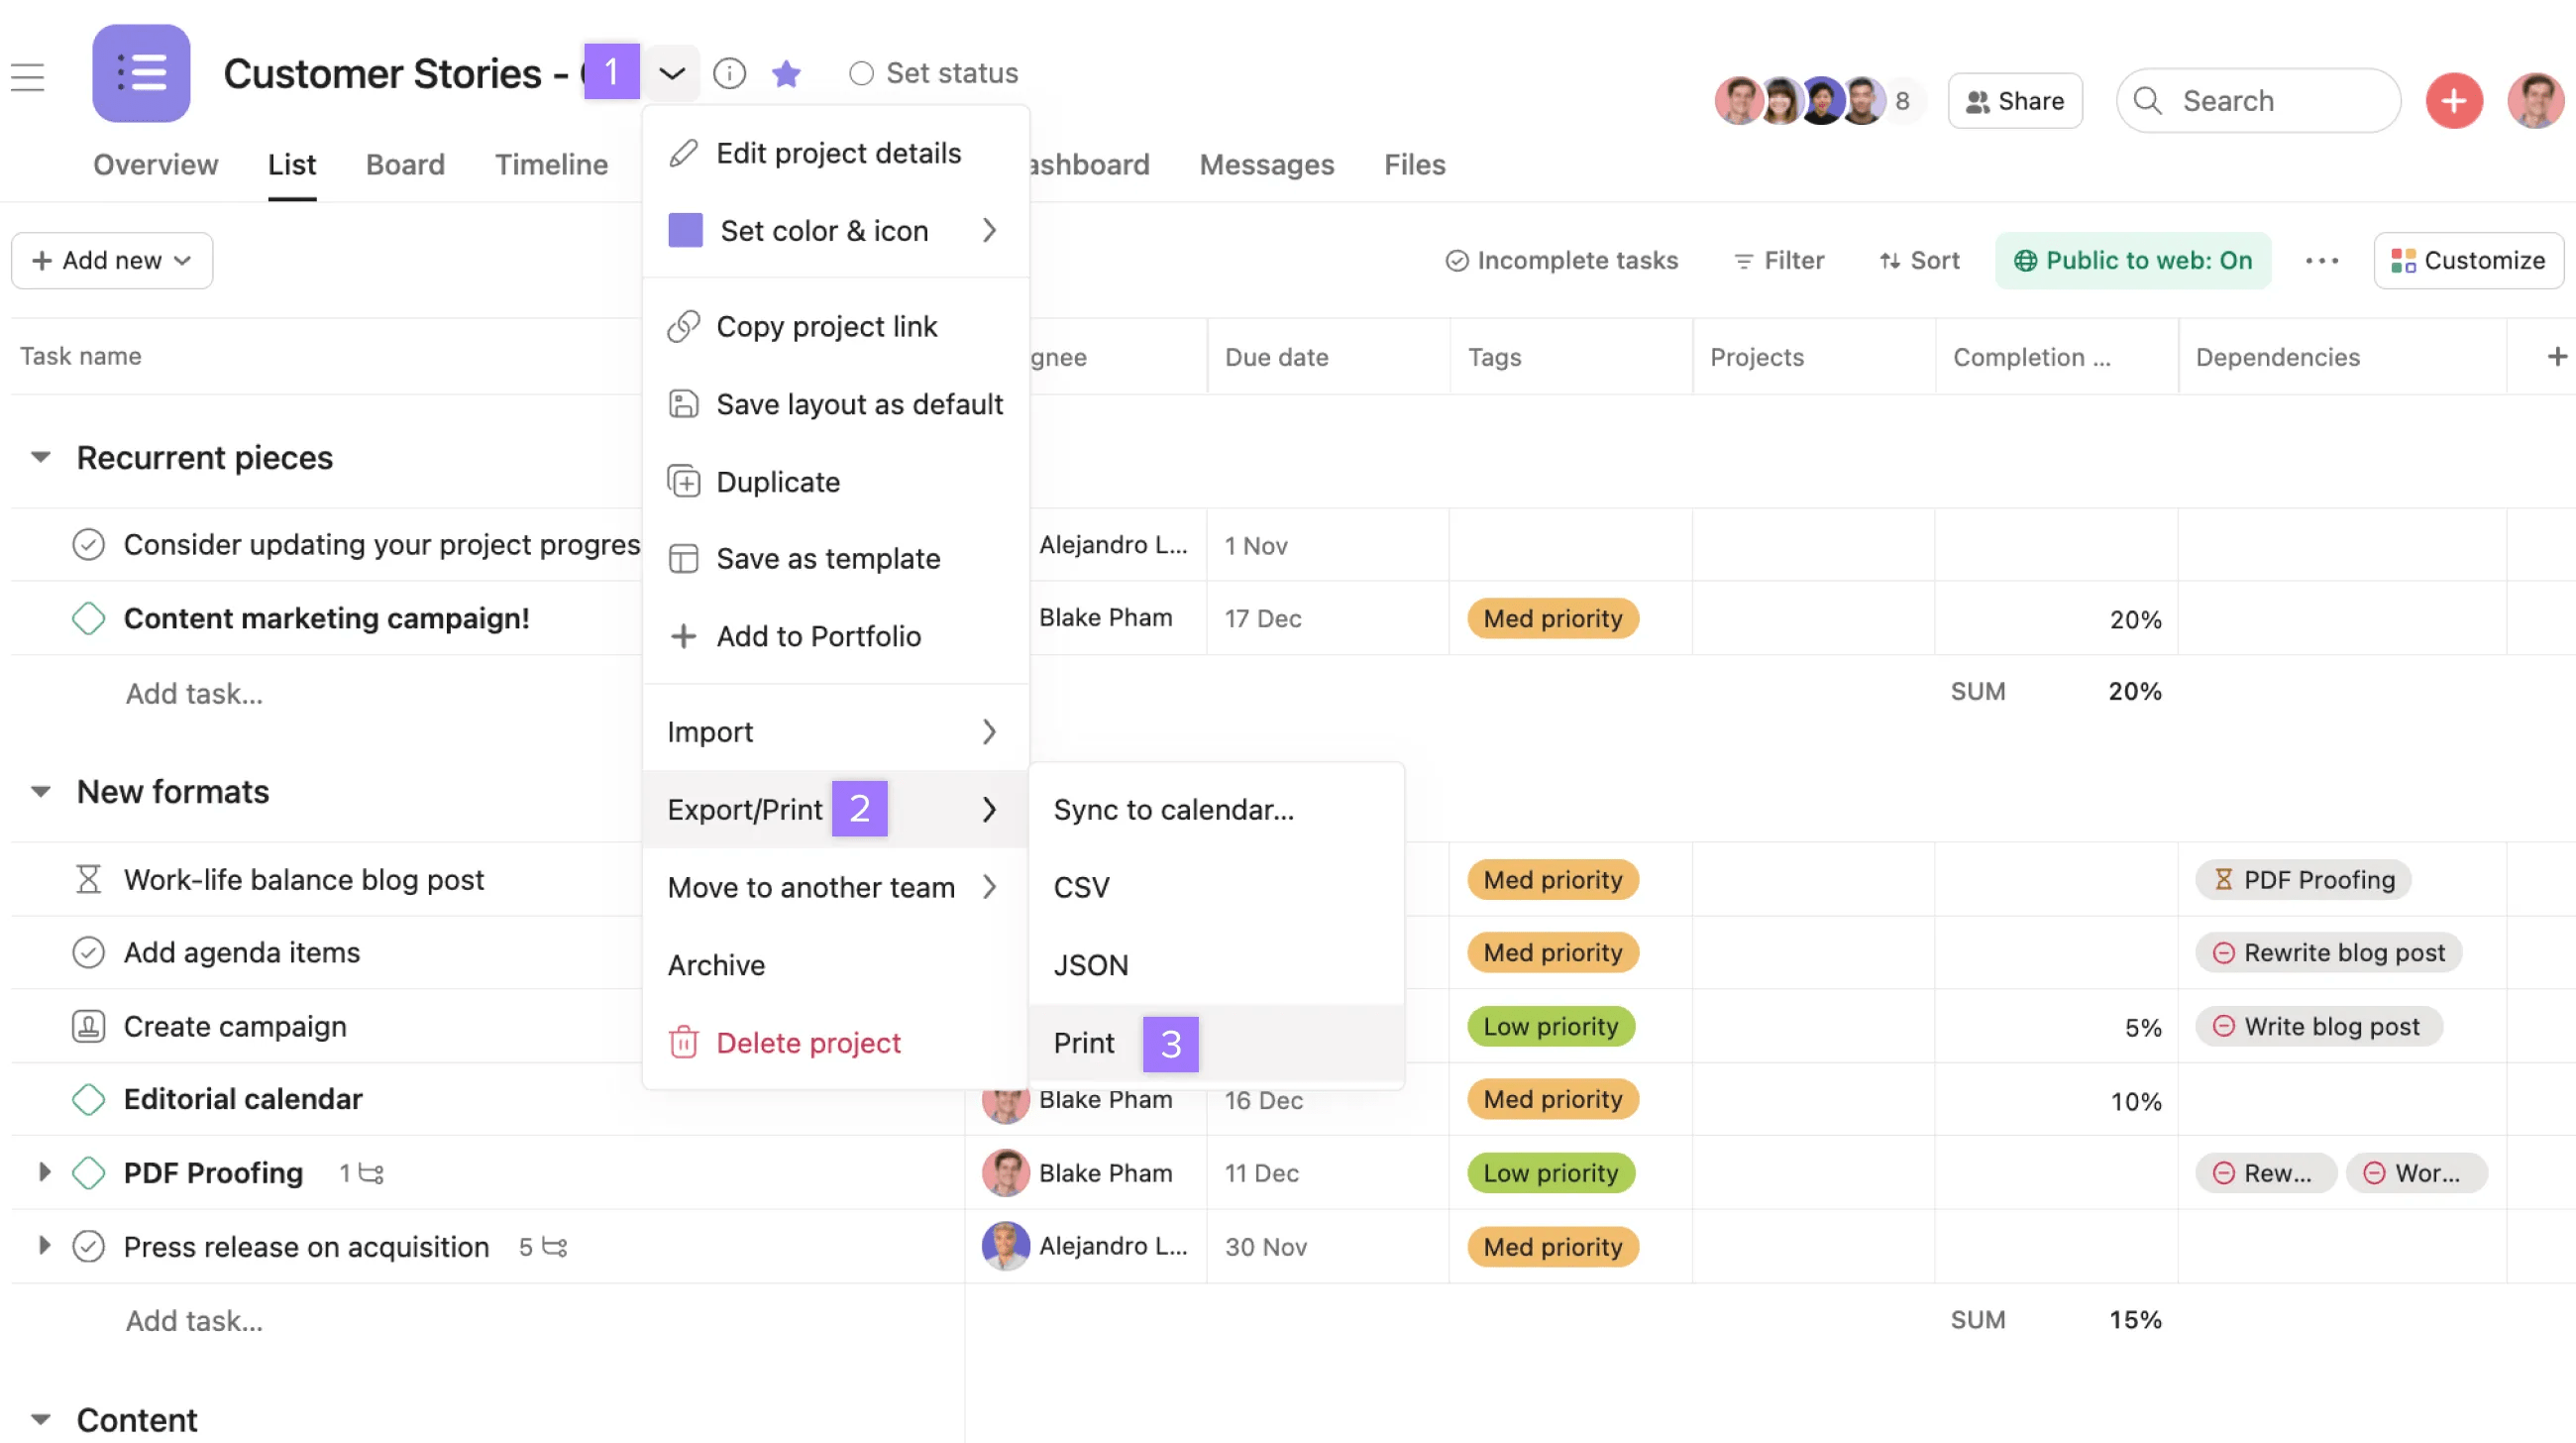
Your printed copy will include:
The printed version reflects the current view of your project or My tasks. If you want the printed version to be sorted or filtered, save the filtered or sorted view and then print.
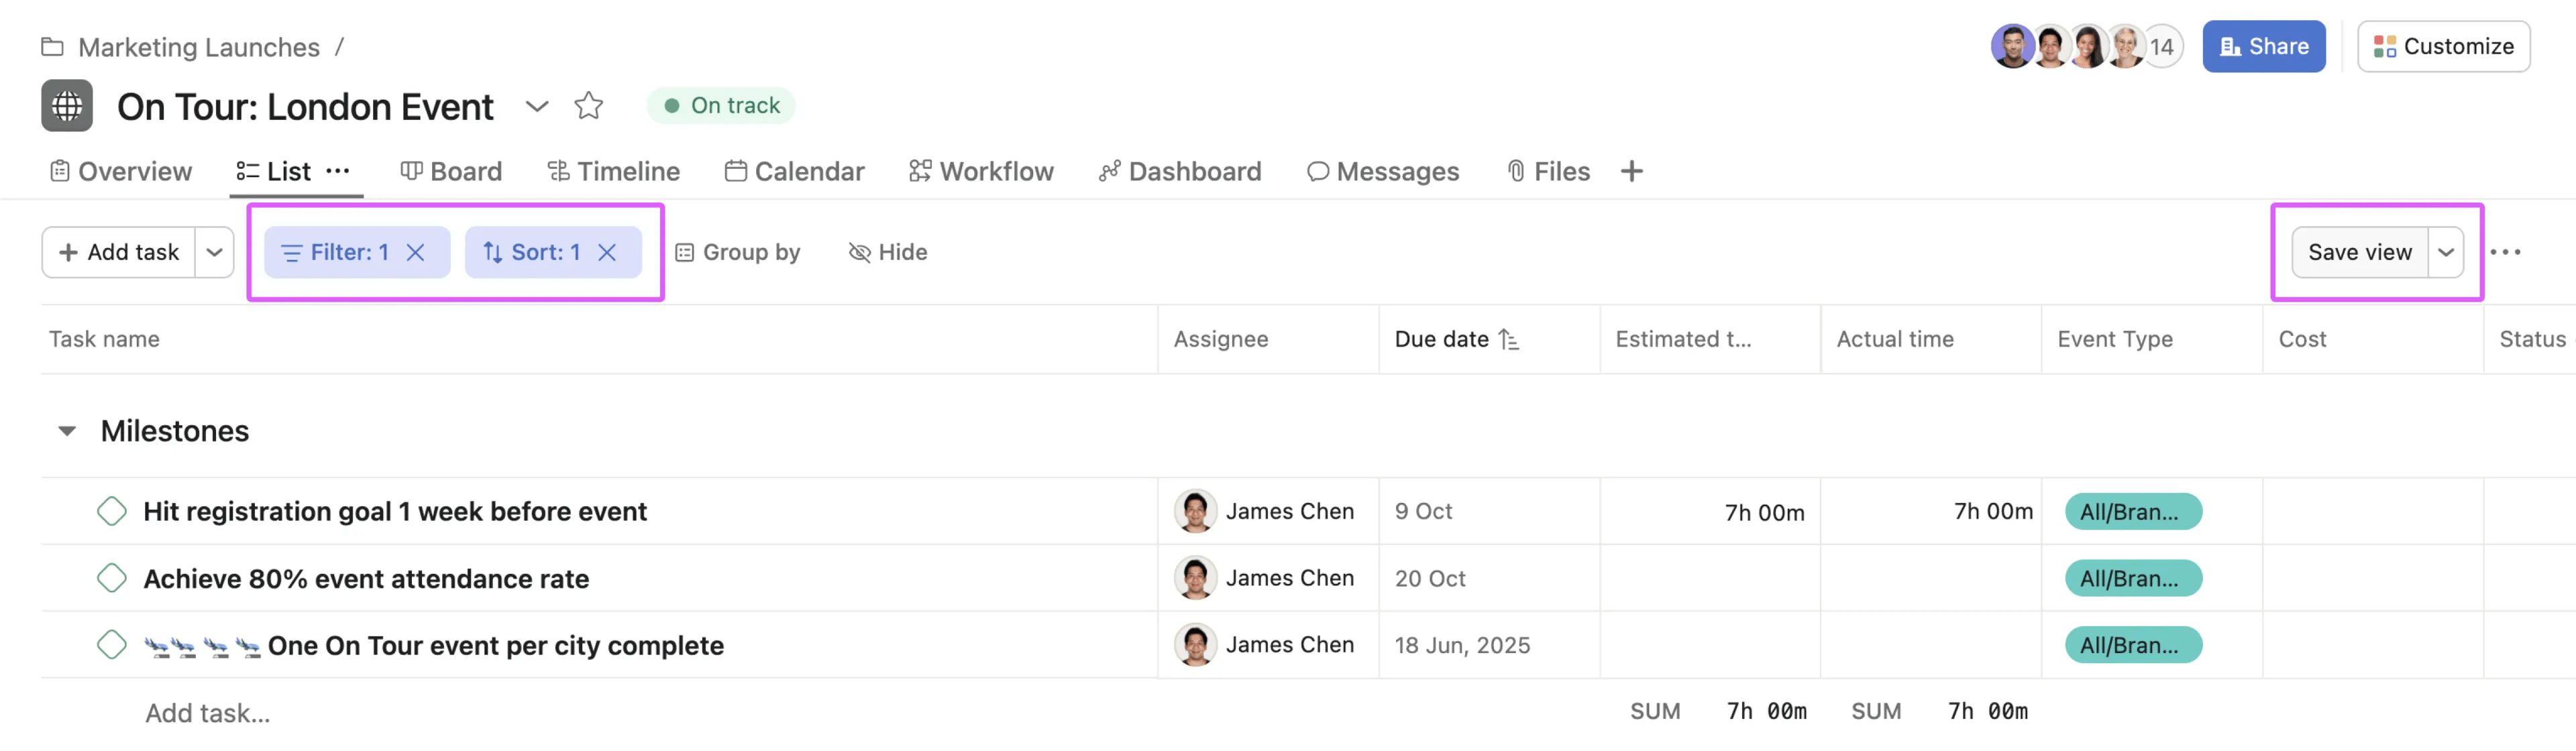
This example shows a project where filters and sorting are active. Click Save view on the right before printing, in order for the printed version to only show the filtered and sorted tasks.
You can also use the print option to save your project as a PDF. Most browsers will offer a "Save as PDF" option in their print dialog. Note that printing a project is currently not supported on the overview, timeline, workflow, dashboard, and Gantt view tabs.
Find projects you've created or that have been shared with you with the project directory. The project directory allows you to see all the projects you have access to. You can search using the search bar in the directory or by using filters.
Duplicate a project to use it as a template for common workflows.
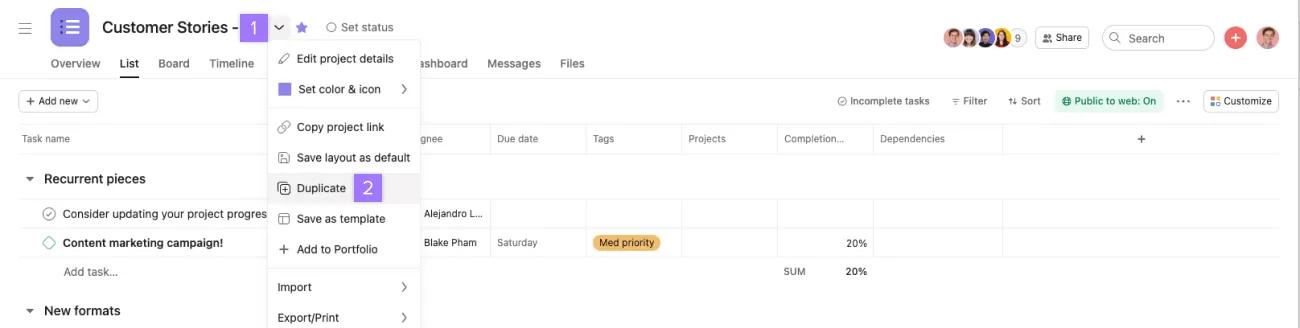

Check your desired fields; these will be included in your new project. Click Create New Project once finished.
For workflows you use all the time, consider using project templates instead of duplicating projects one by one.
Archiving projects allows you to focus on active projects. Only project admins can archive a project.
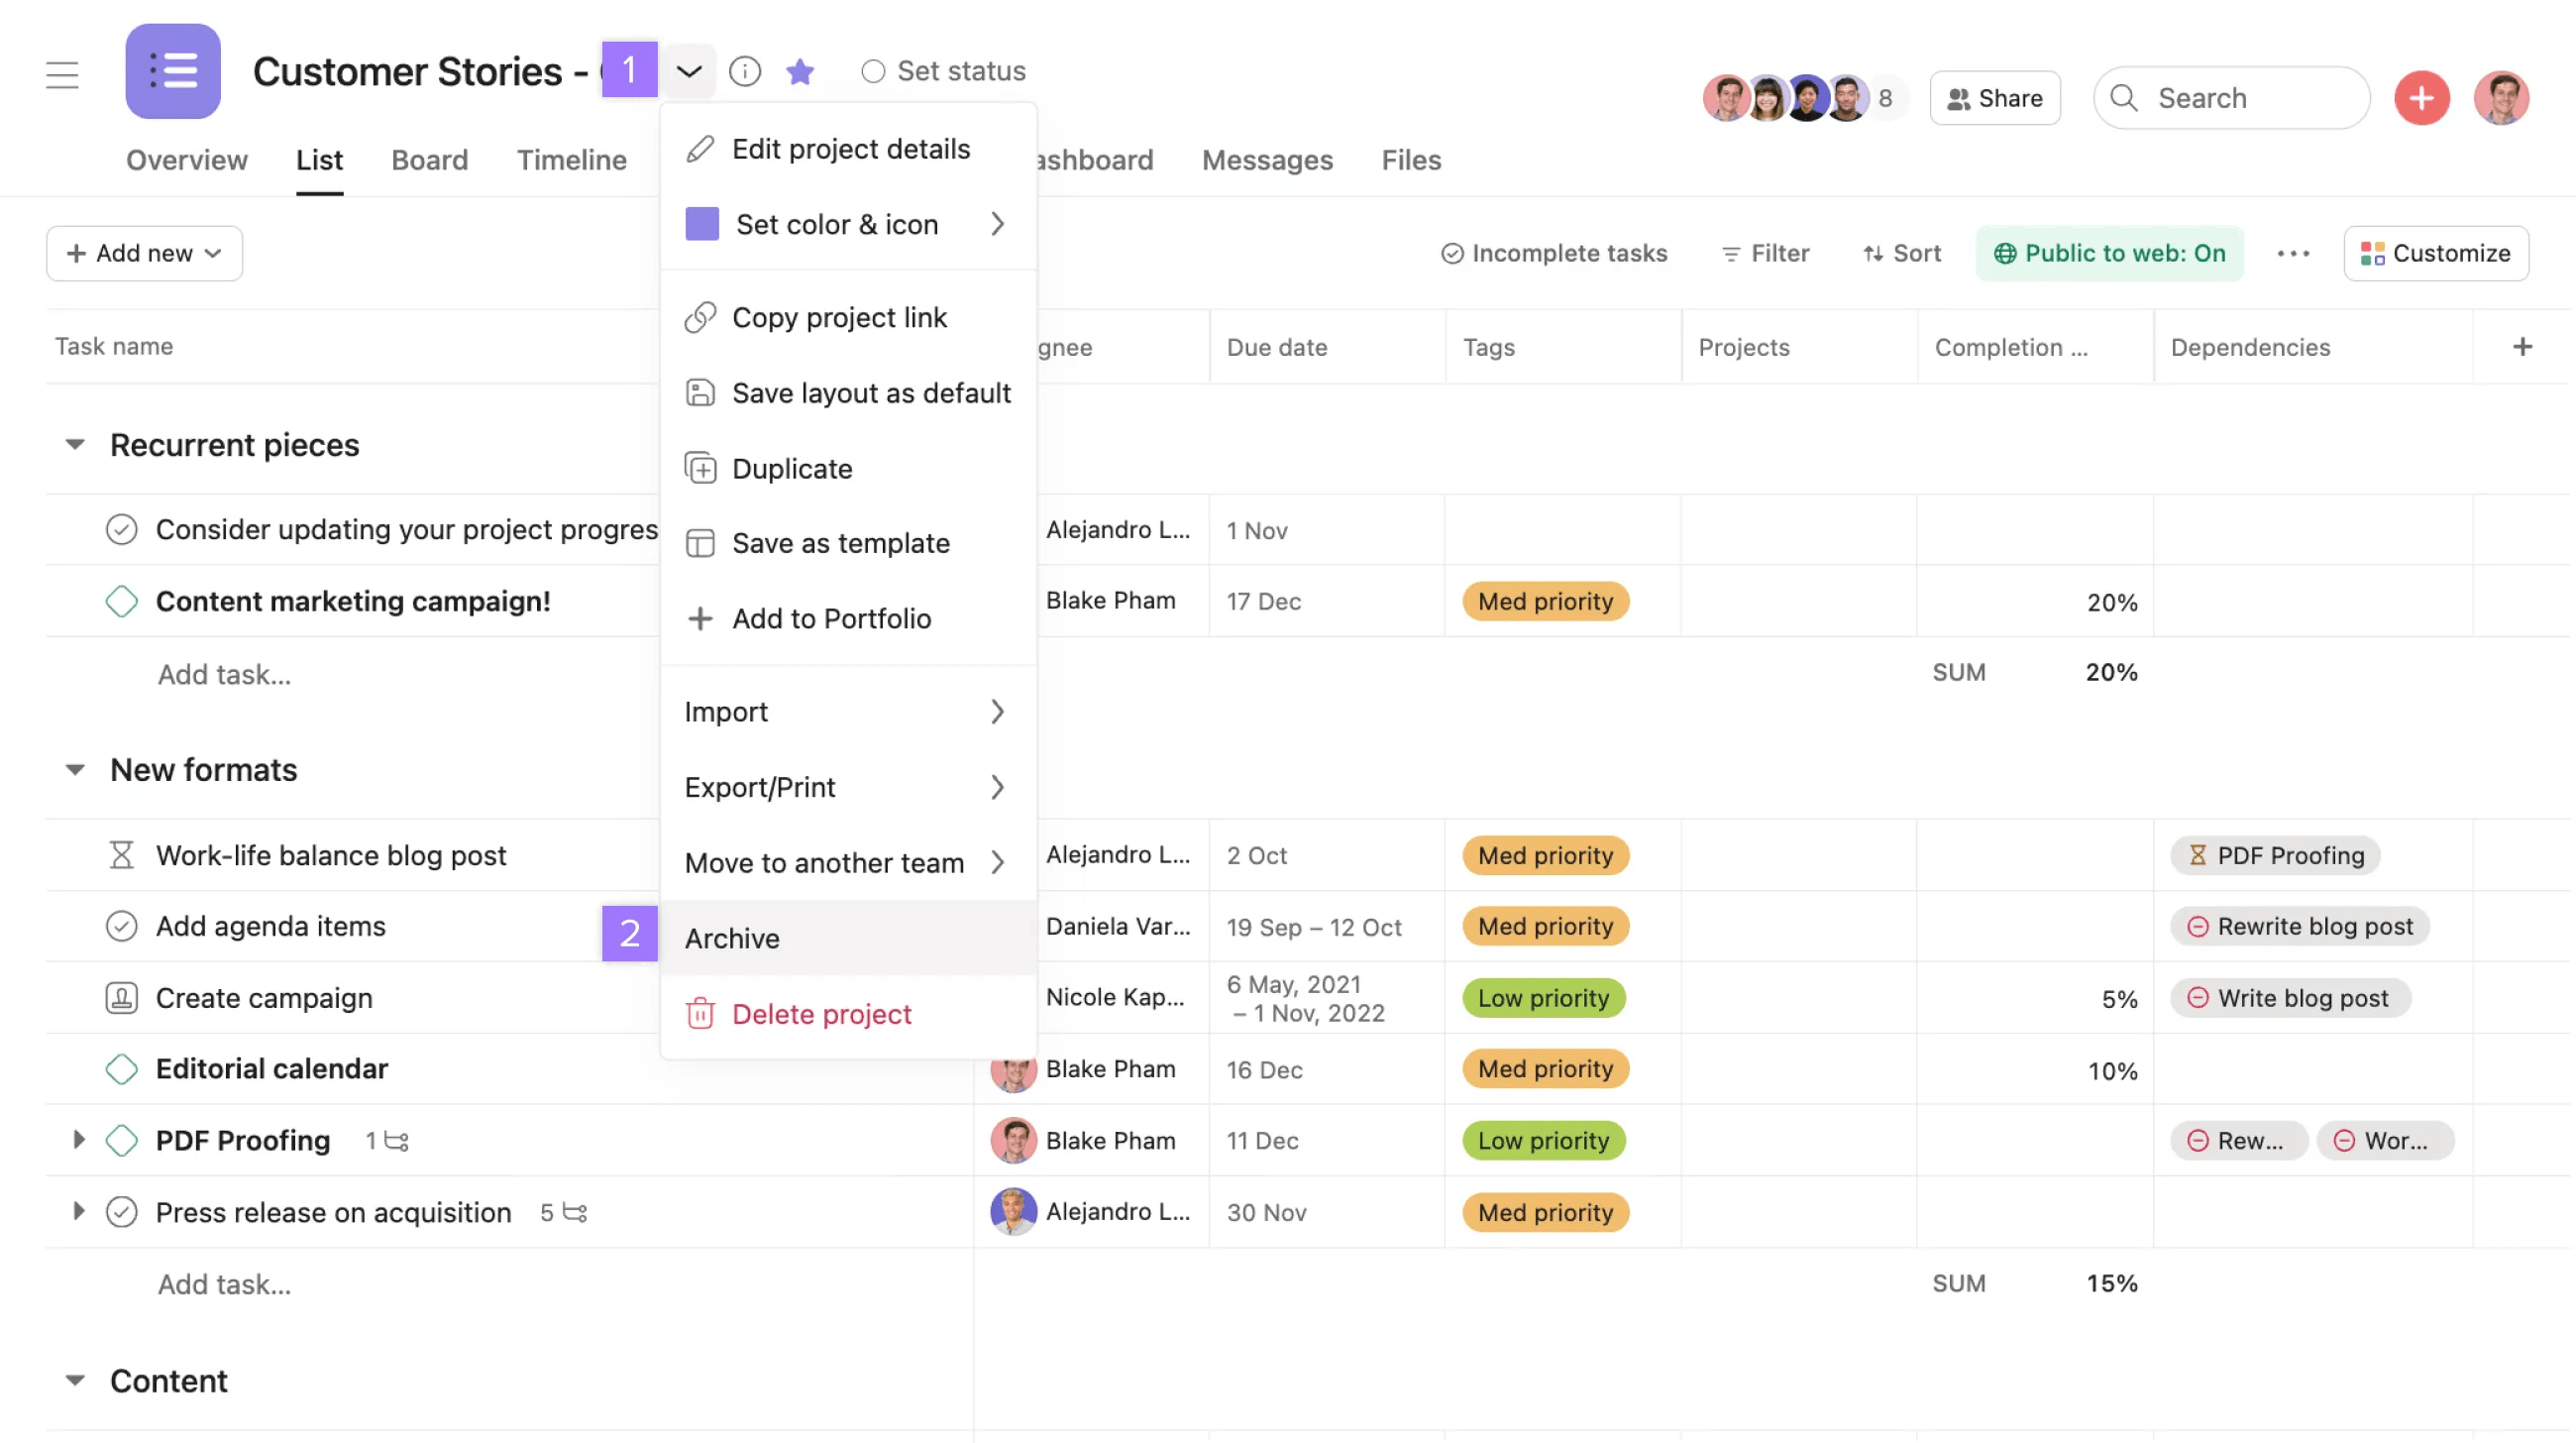
Anyone with a link to the archived project can access the project quickly. You can also find it through Search.
Tasks in archived projects that are assigned to you will still show in your My tasks.
Looking to mark a project as complete? We recommend completing a project in the project status, as archiving a project will not update its status.
You can always restore a project via the project header or the sidebar.
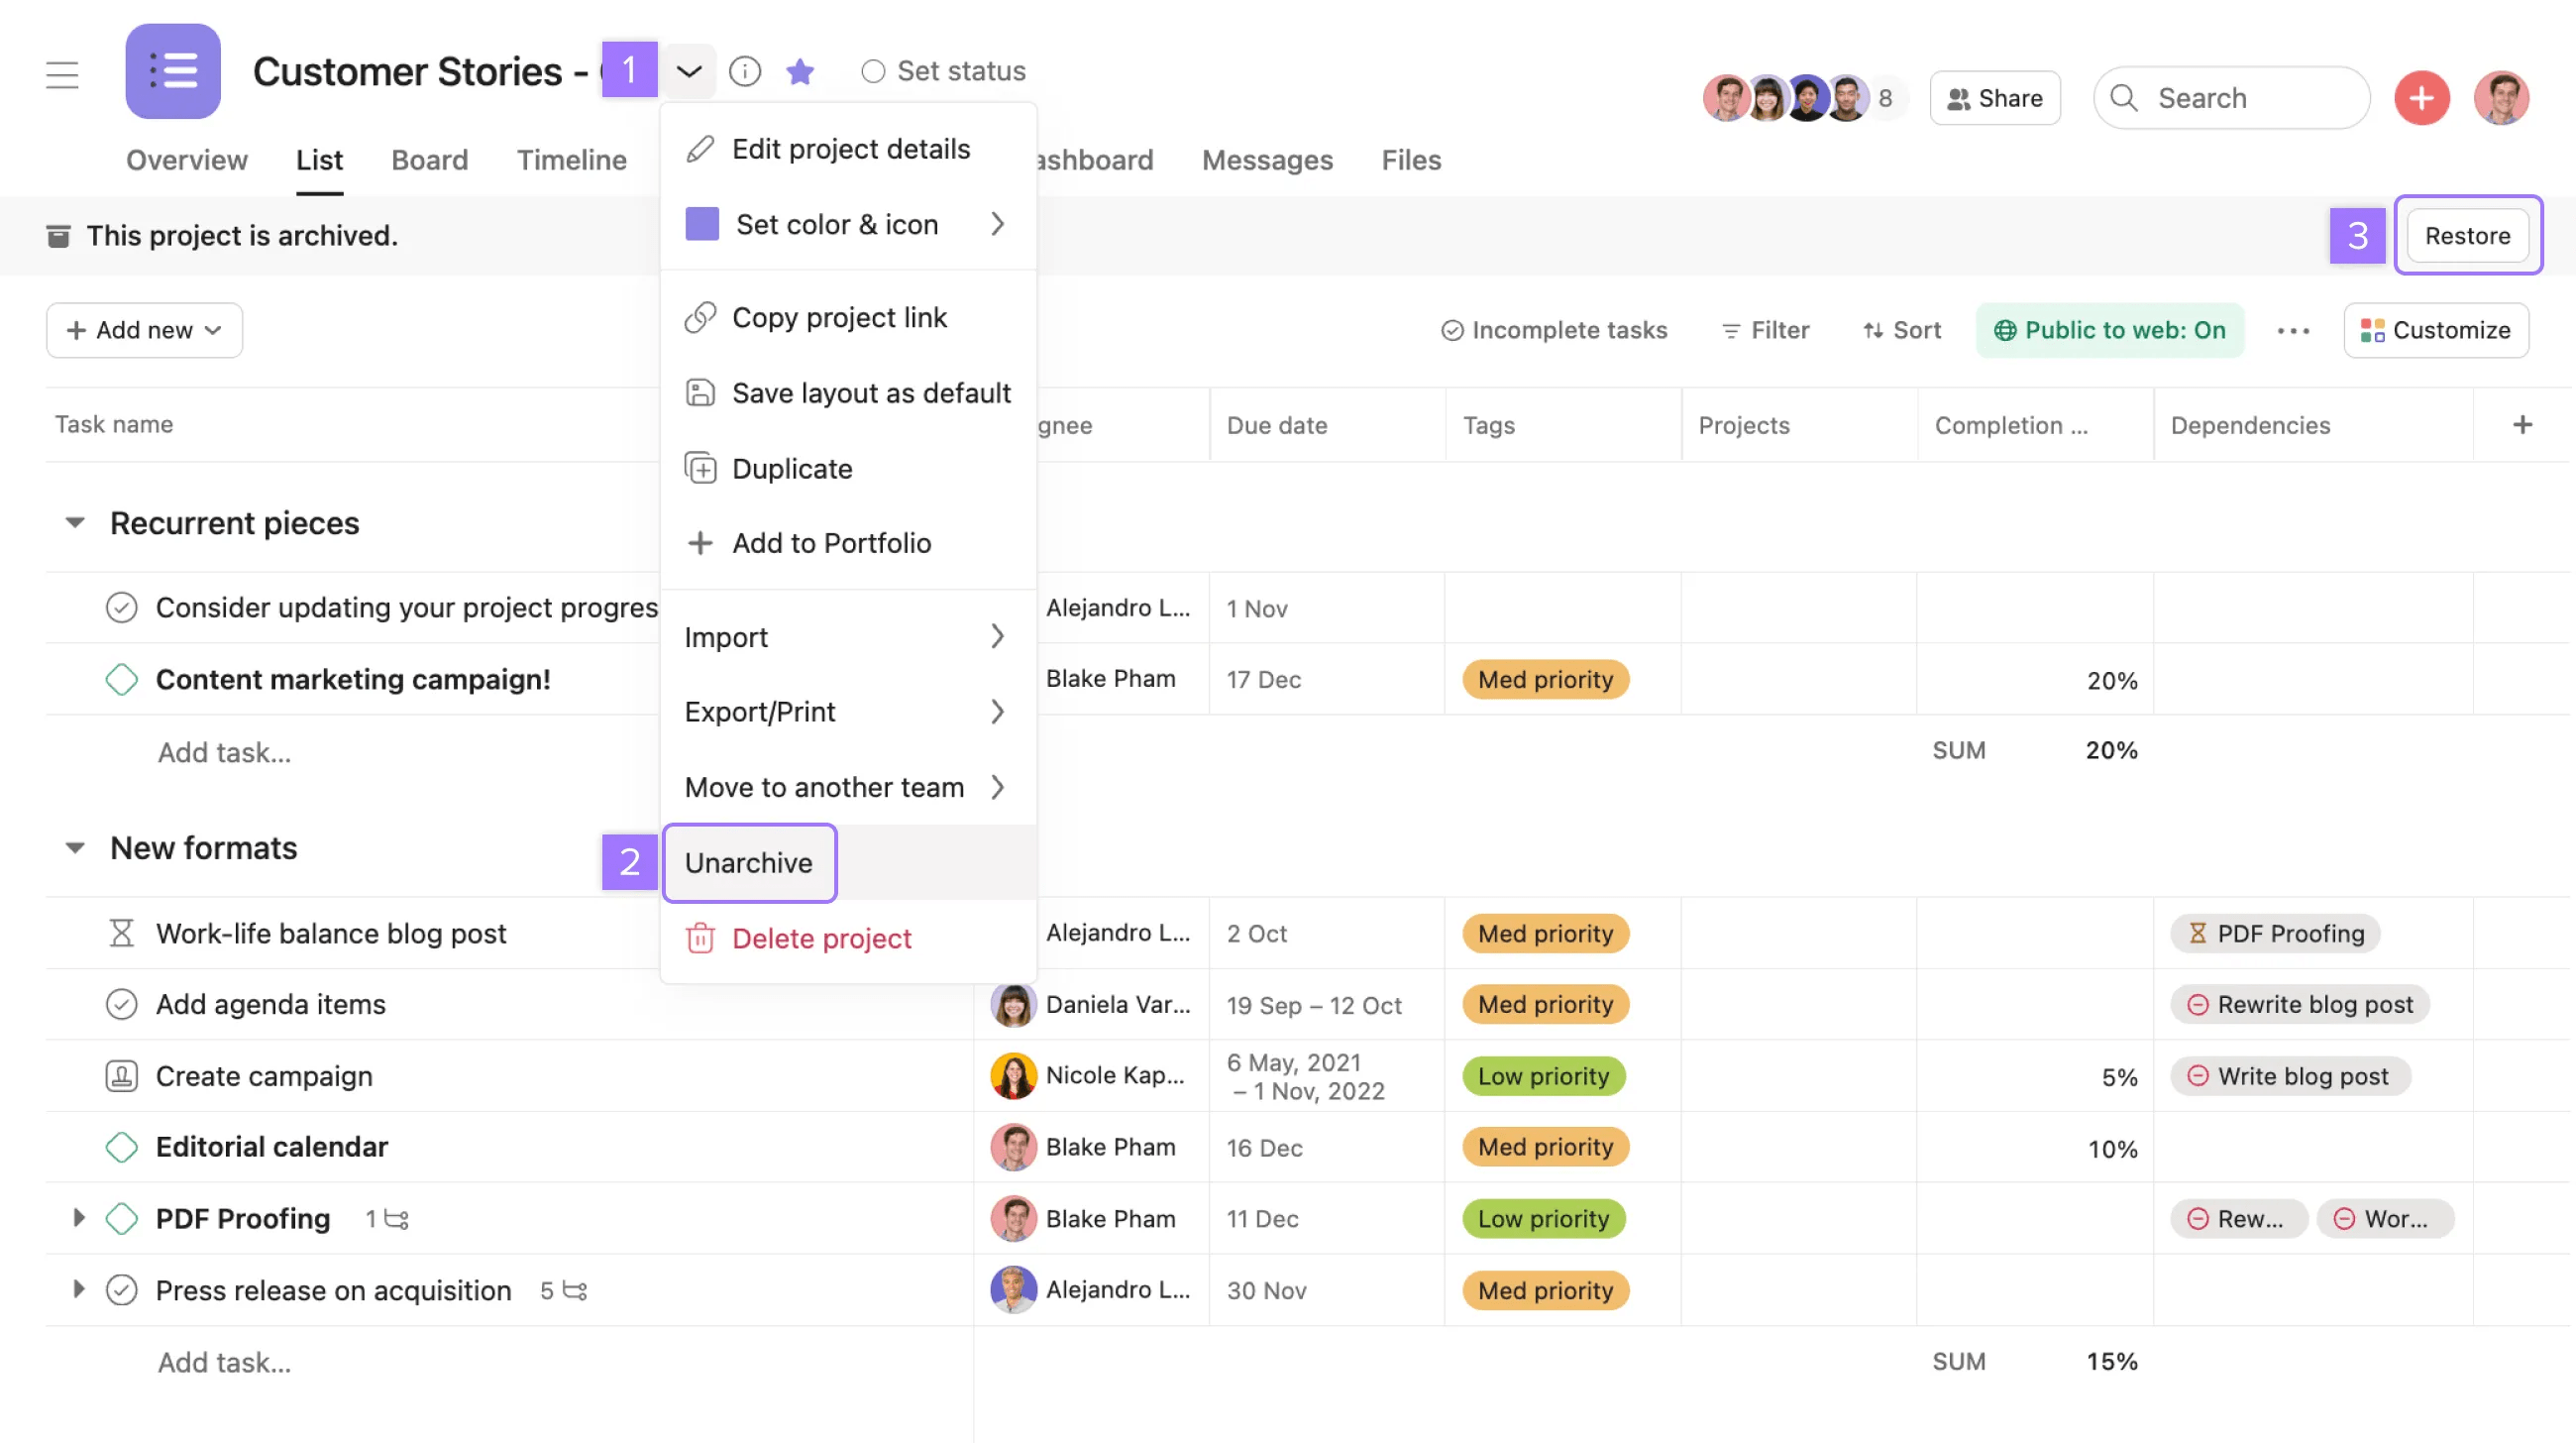
Archived projects will never expire and do not get deleted.
Deleting a project deletes it for everyone. Only delete projects that you are sure no one wants to keep. Only project admins can delete projects.
Assigned tasks and tasks that are associated with other projects will not get deleted.
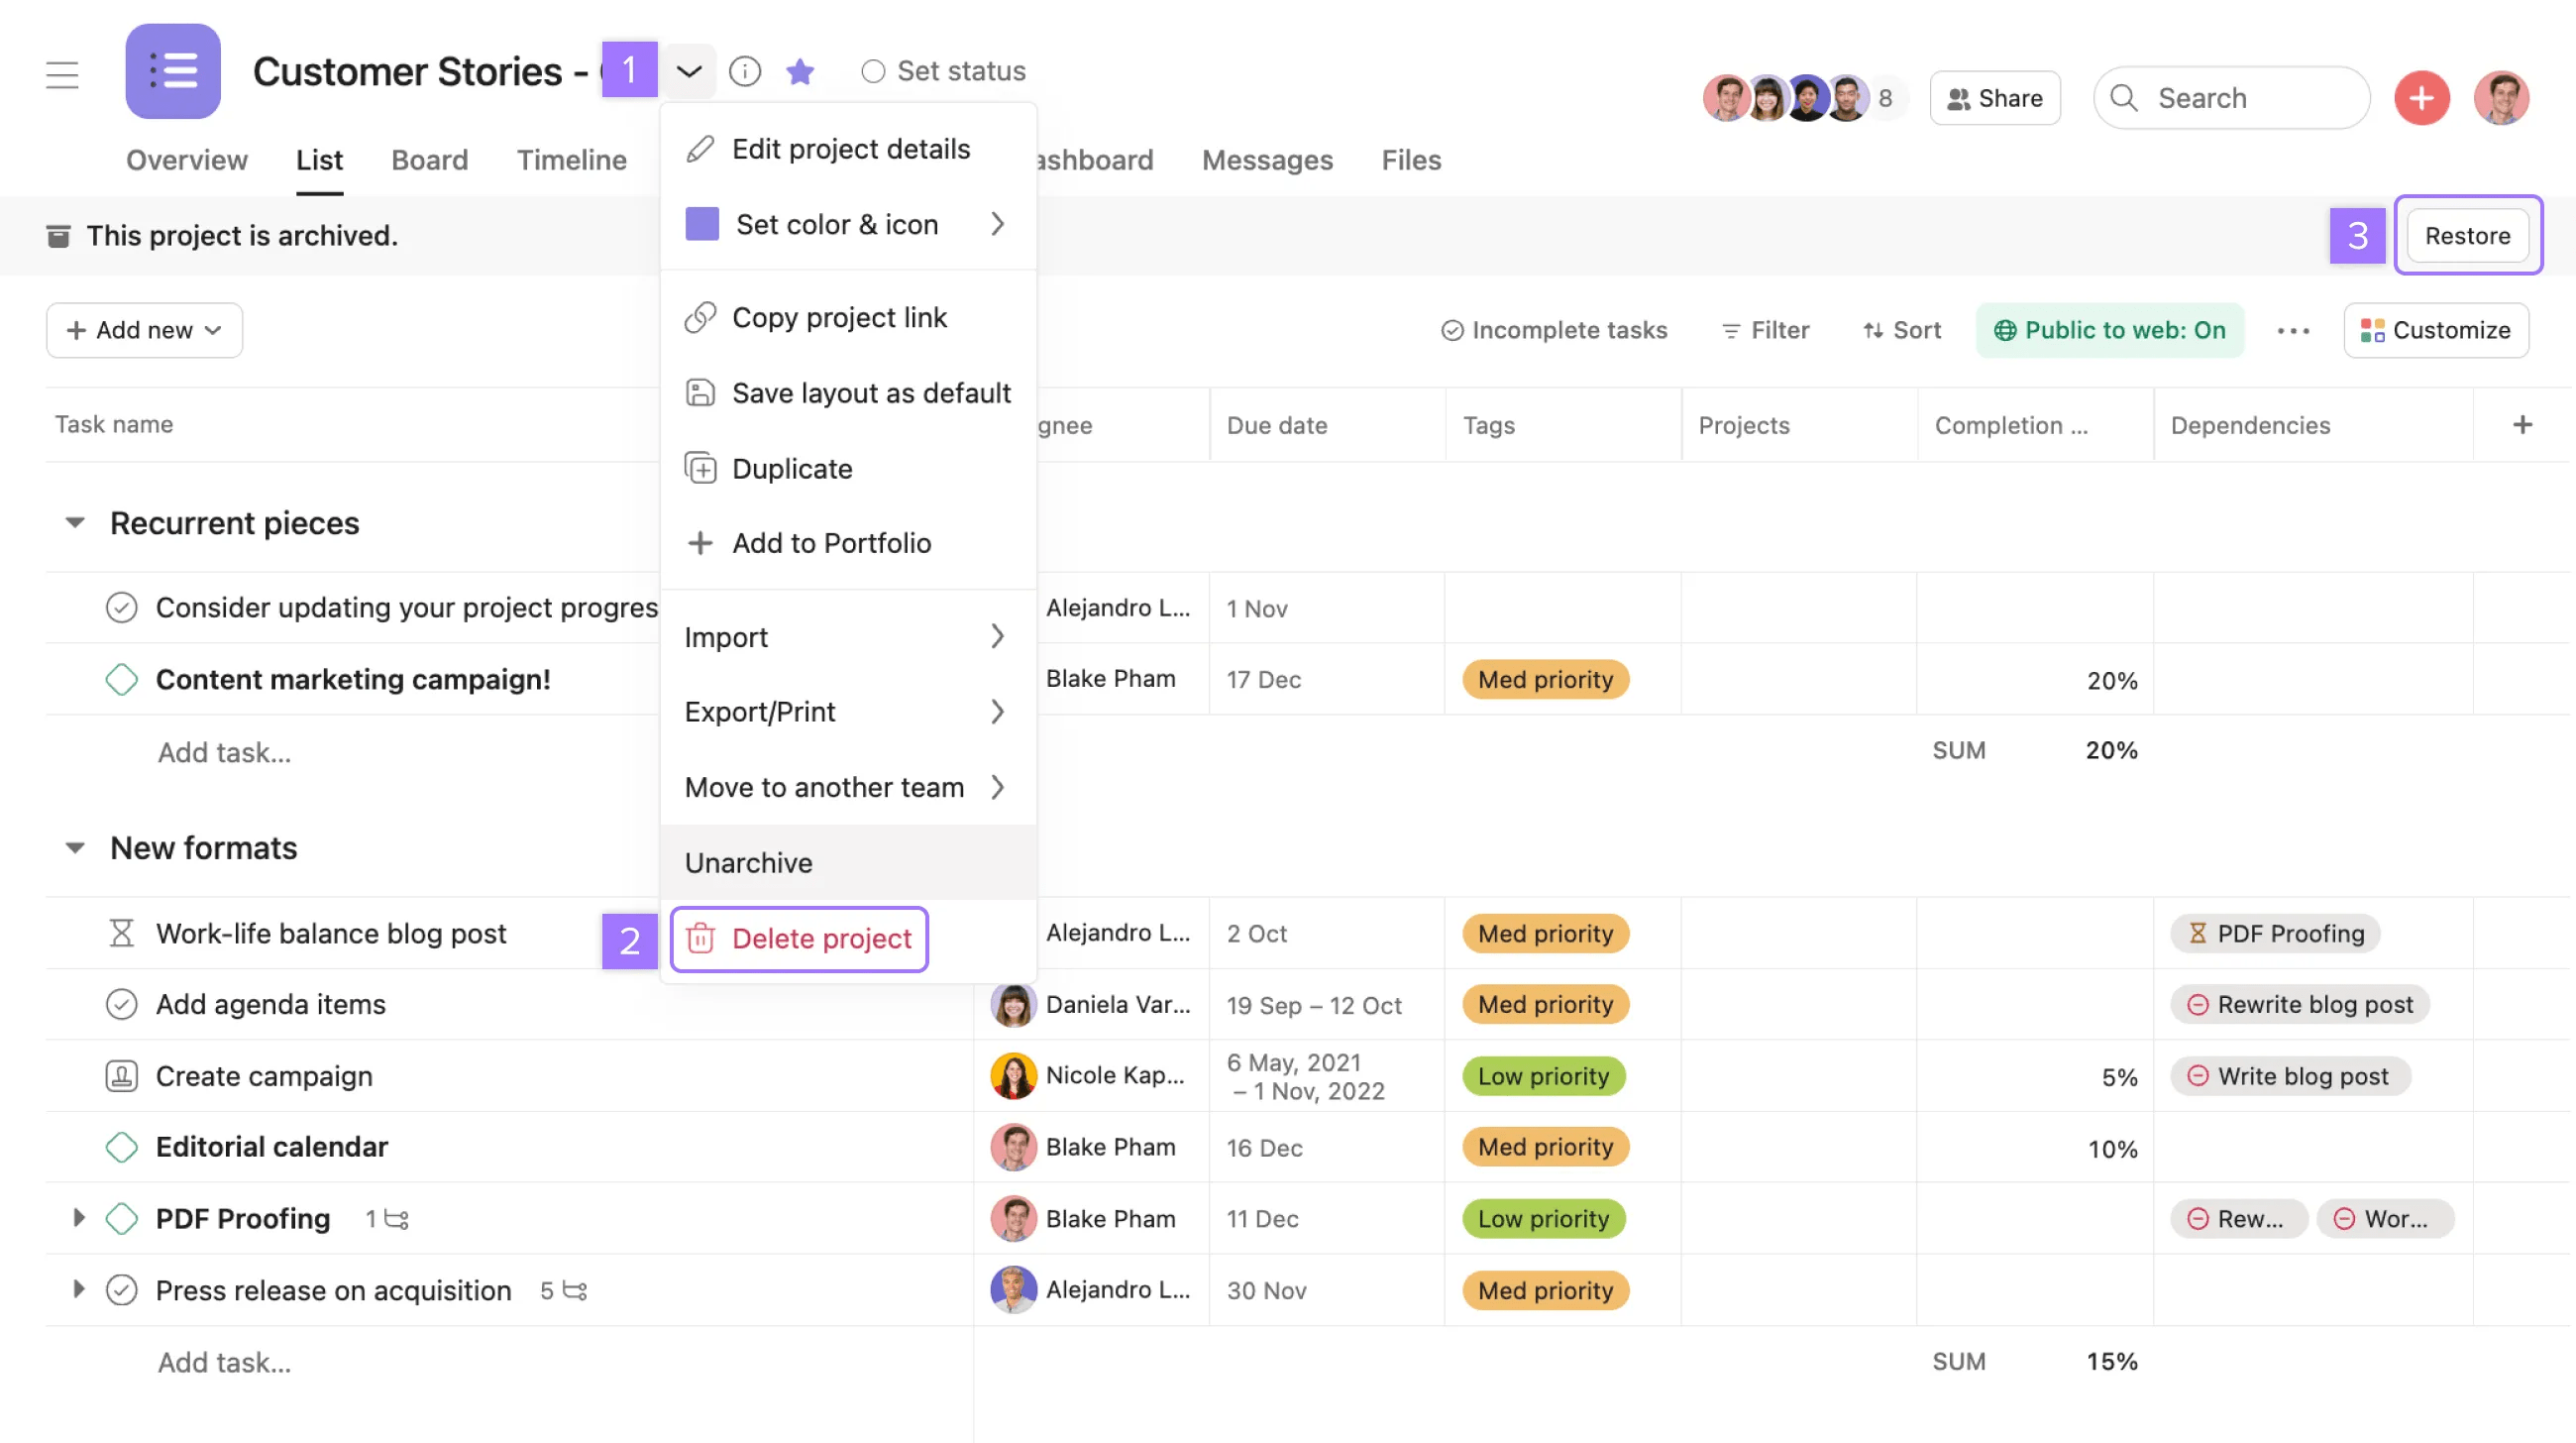
All project members will receive an email notification of the deletion and the person who deleted it will receive a recovery link. This link will expire after 30 days. Project deletion emails won't be sent if the project is less than one day old and has zero tasks in it.
You can only move a project to teams that you're a member of.
Workspaces and organizations have hard barriers. To move a project to another space, you'll need to create a new project in your chosen workspace or organization and manually copy and paste task lists from the existing project to this new project.
Third-party tools like this one may help you transfer or copy an Asana project to a different workspace. Asana isn't liable or responsible for third-party tools.
Copy the project URL to easily share with team members.
Discover project setup tips from the forum.
Want to learn more? Check out all the features of Asana Projects. Asana also offers free trials. Start yours today. Try for free