Products
AI Platform
Asana Foundations
Company Type
Visit our pricing page for more information.
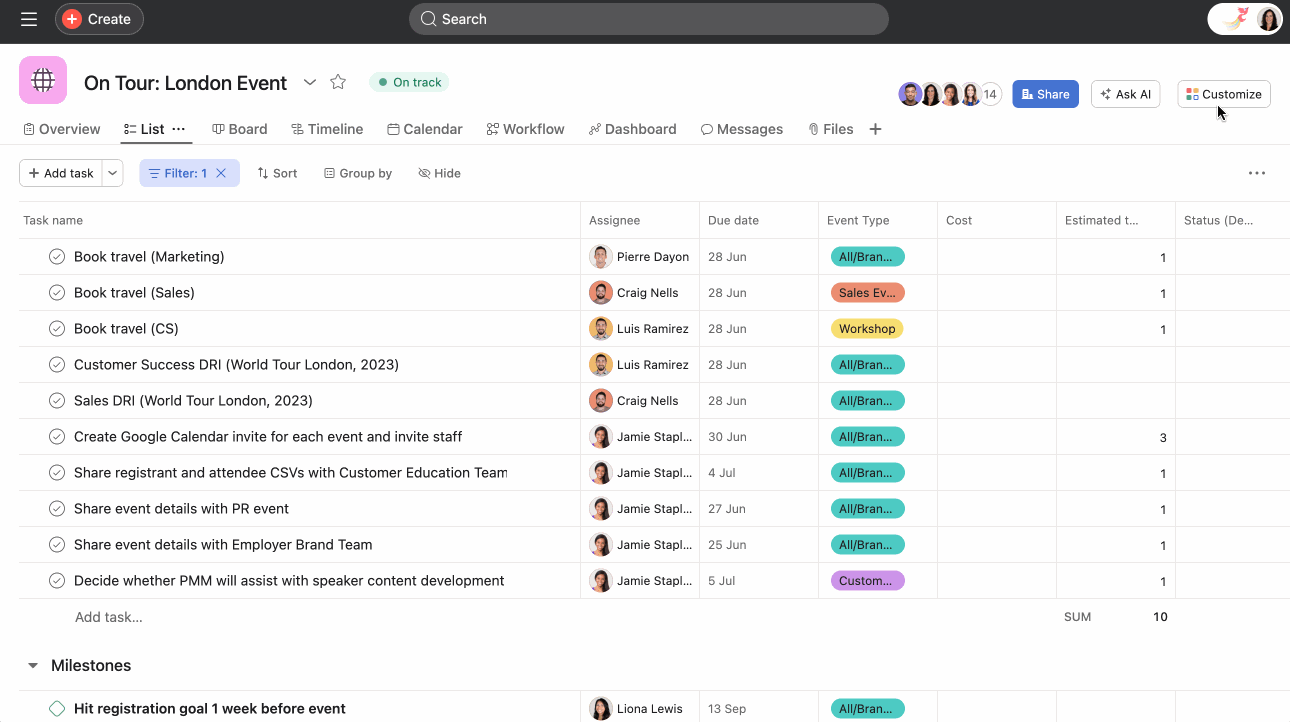
Custom fields let you add additional data to tasks in your Asana projects. You can create a field for stage, priority, cost, or anything else that’s important to your workflow, team, and company. This allows individuals to have clarity on work happening across their organization. You can view the custom fields as columns in a project or within the task itself.
Explore custom fields for free. Get started with a free Asana trial today.
There are two types of custom fields you can create in Asana:
Join our Getting started with Asana virtual training and learn how to track, categorize, and filter work using custom fields. Register now.
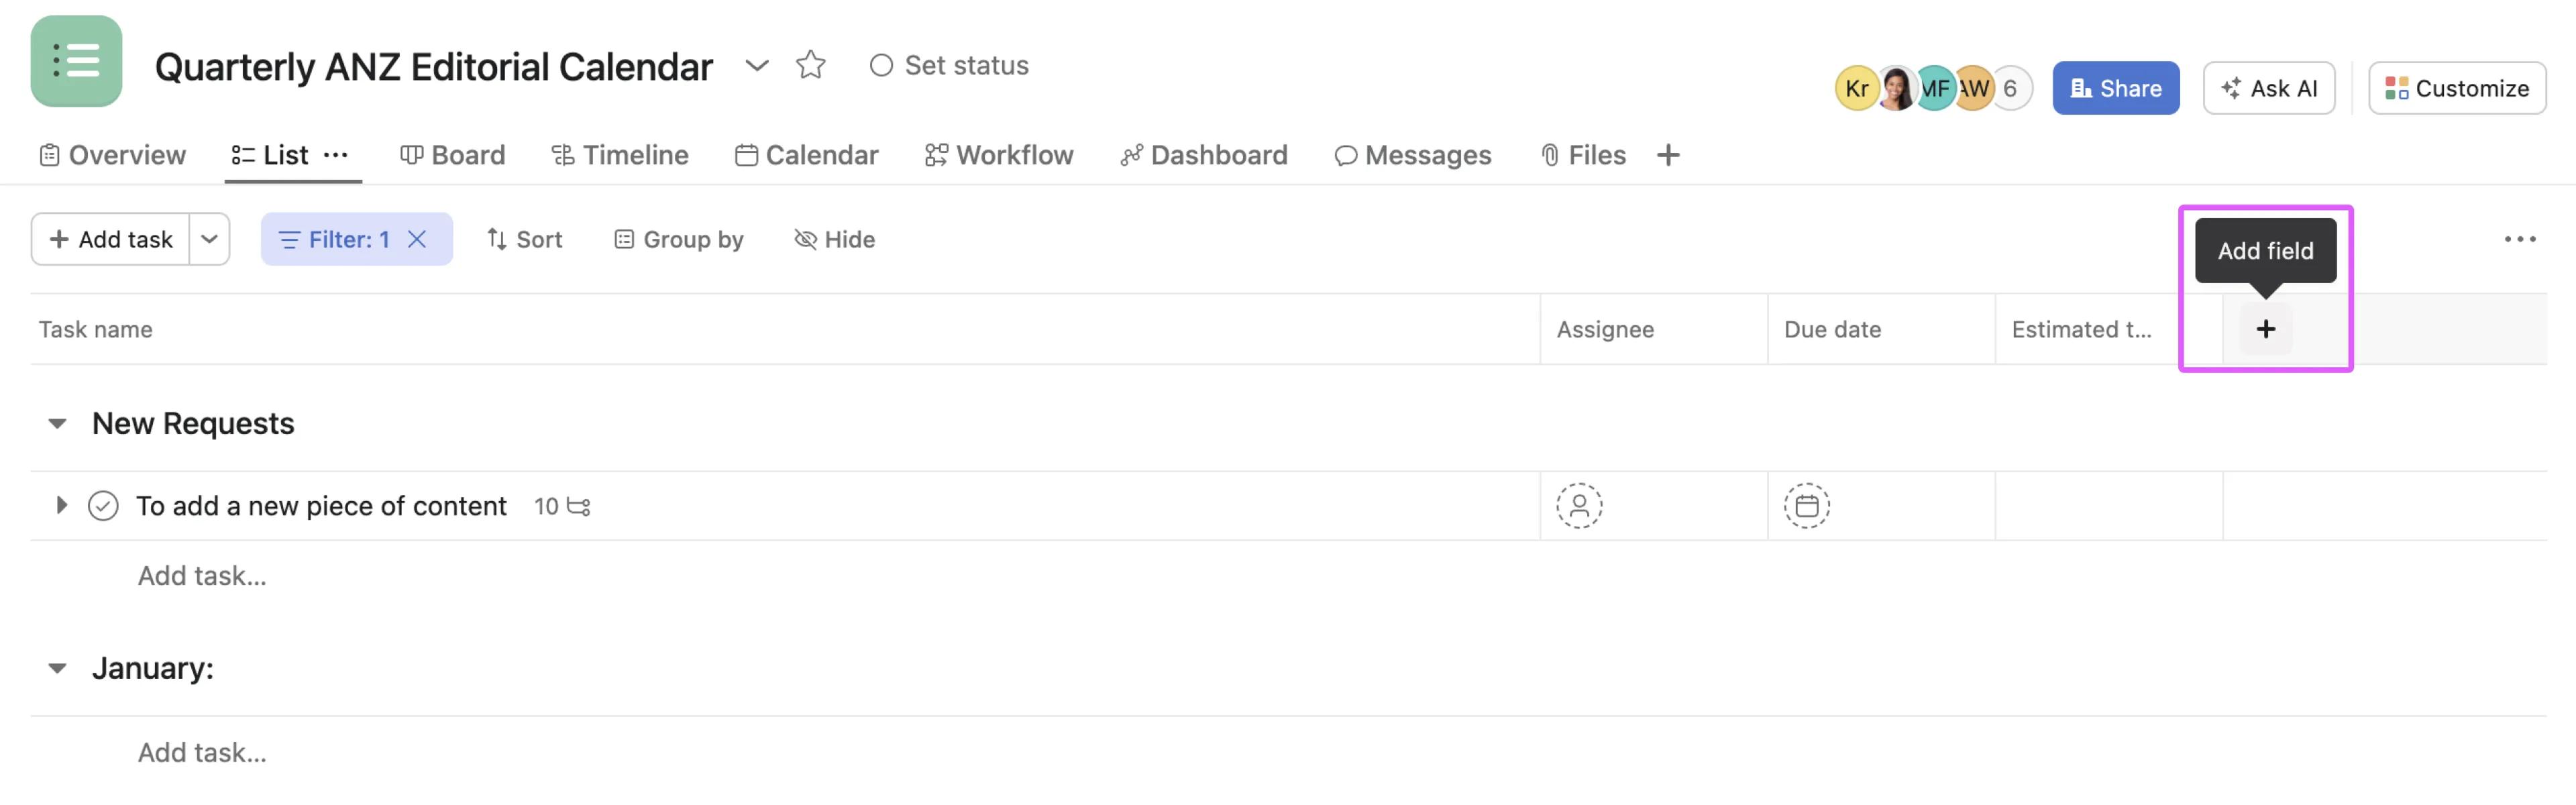
There are a couple of ways to add a custom field to your project.
The first is to click the + button beside the row of fields in list view.
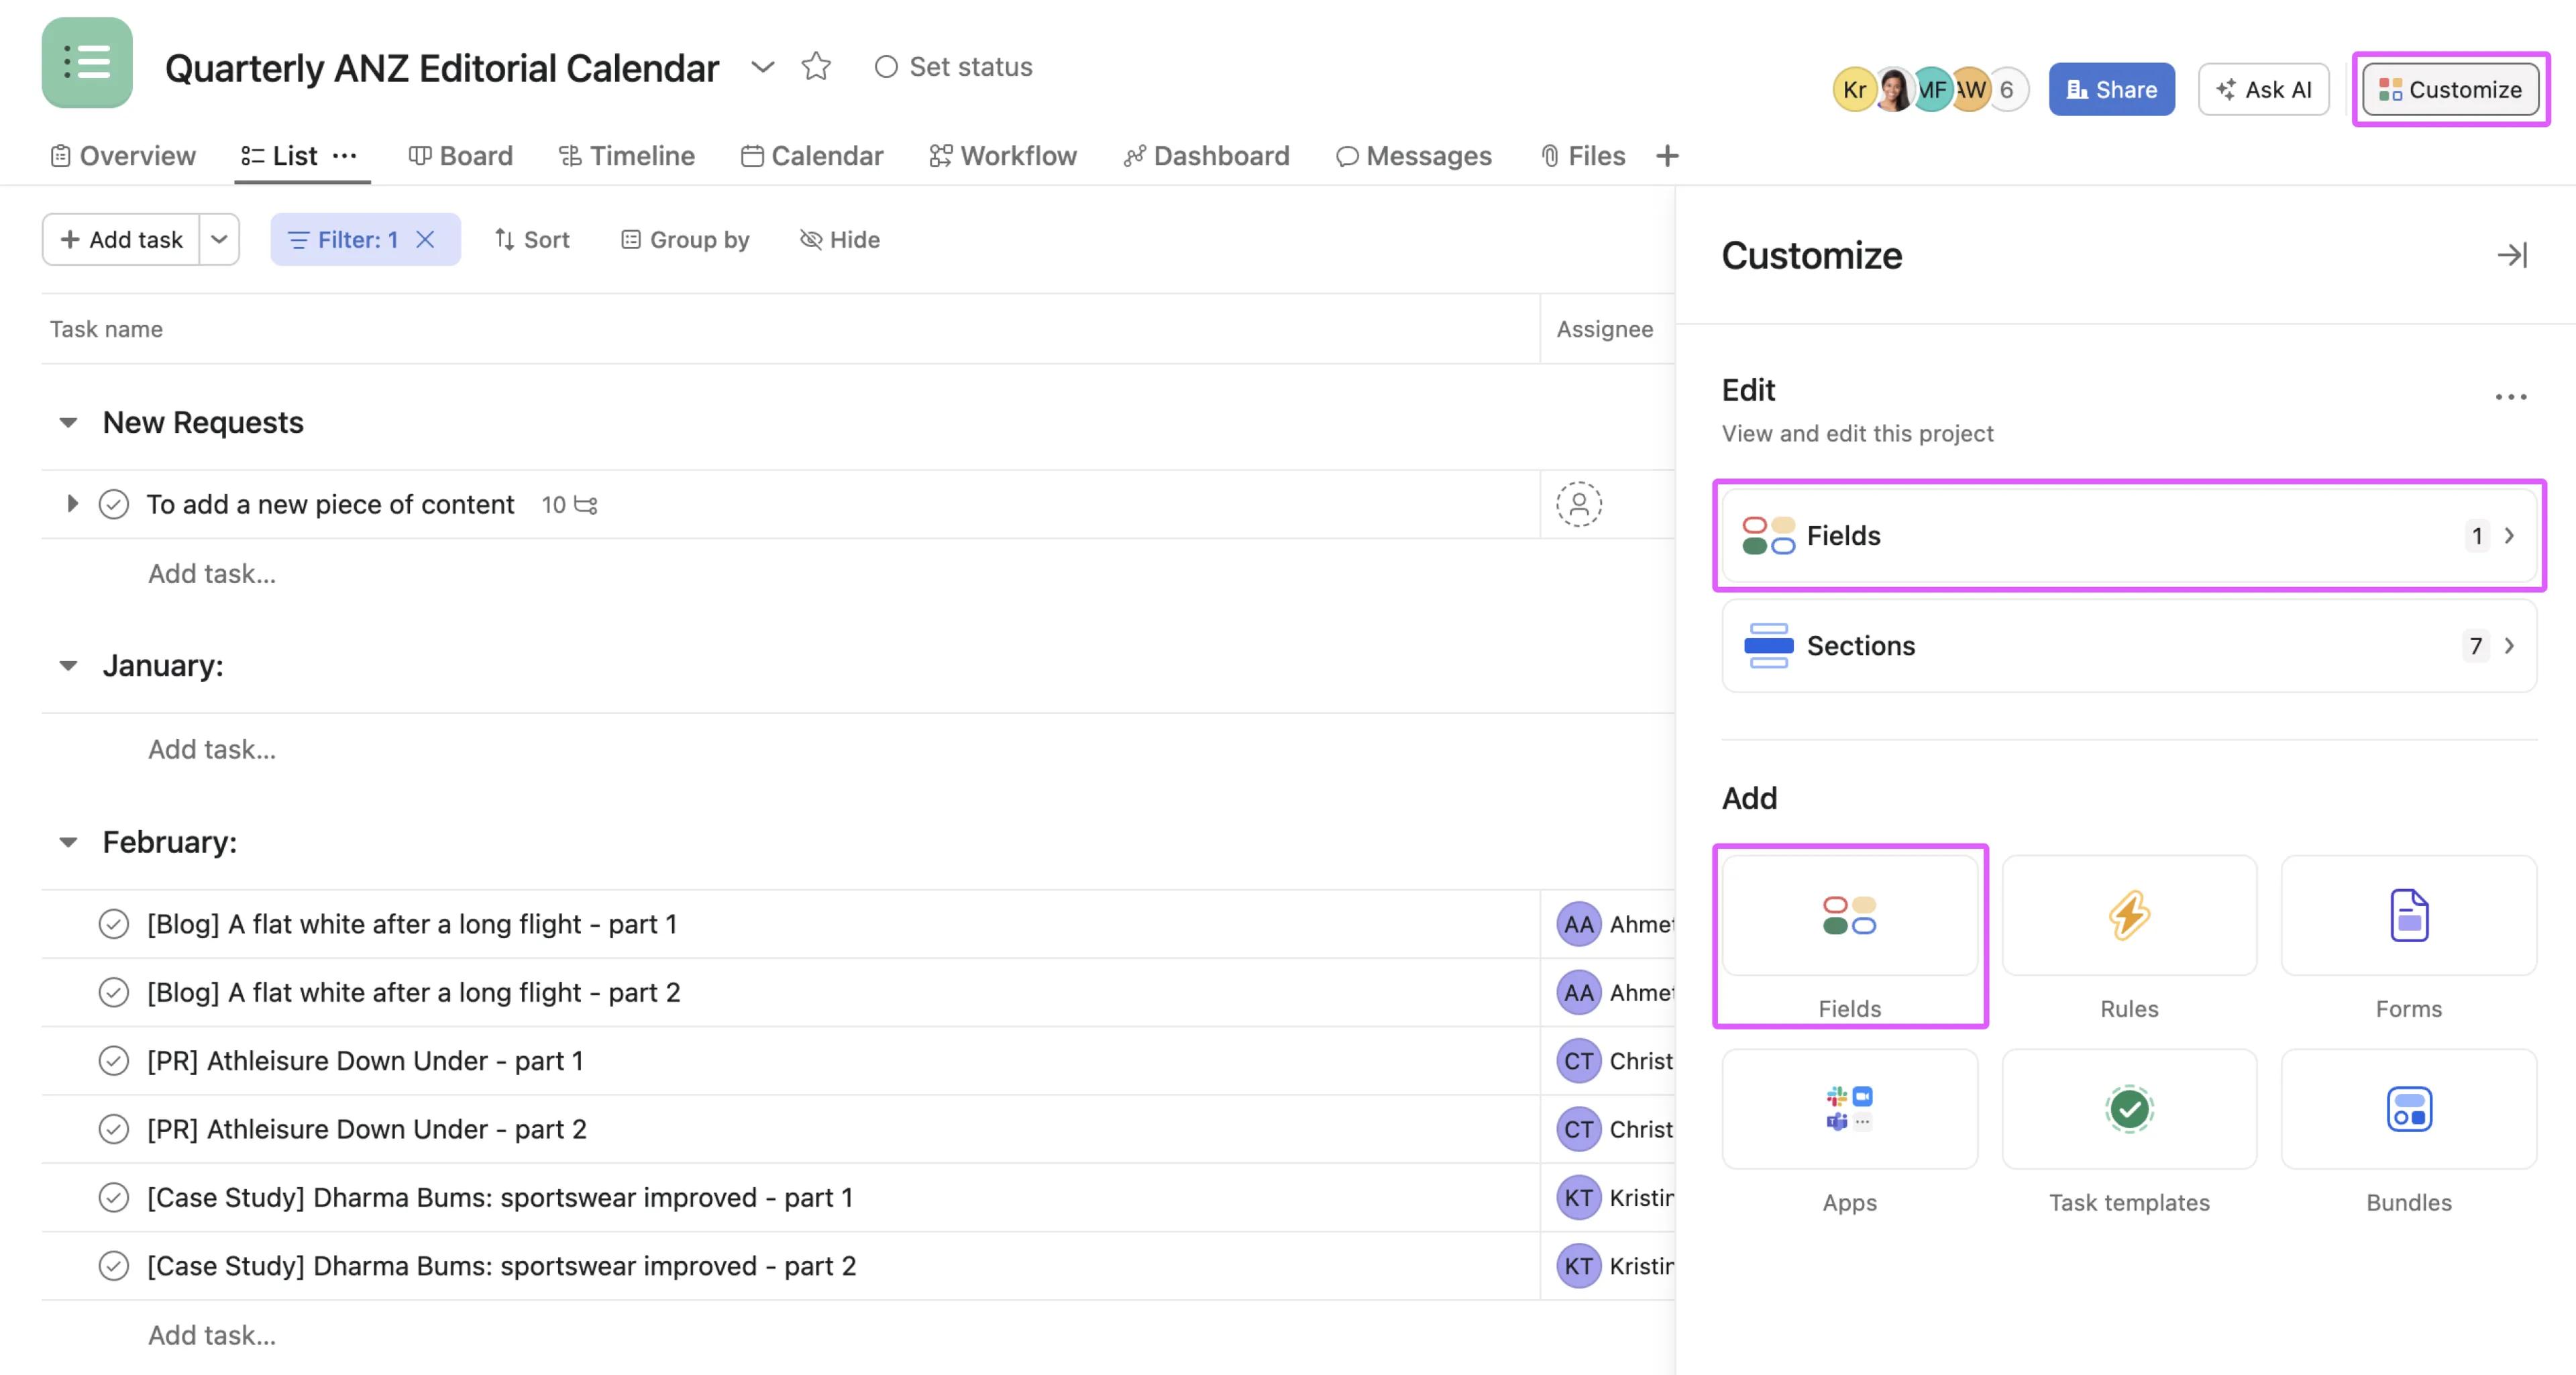
Otherwise, you can add custom fields to your project via the Customize menu.
Click the Customize button in the top right, and choose Fields, either under the Edit options, or the Add options.
Global custom fields are fields that are reusable across your organization. Local custom fields are private to the project or portfolio.
To create a global custom field, add a field to your project as shown above.
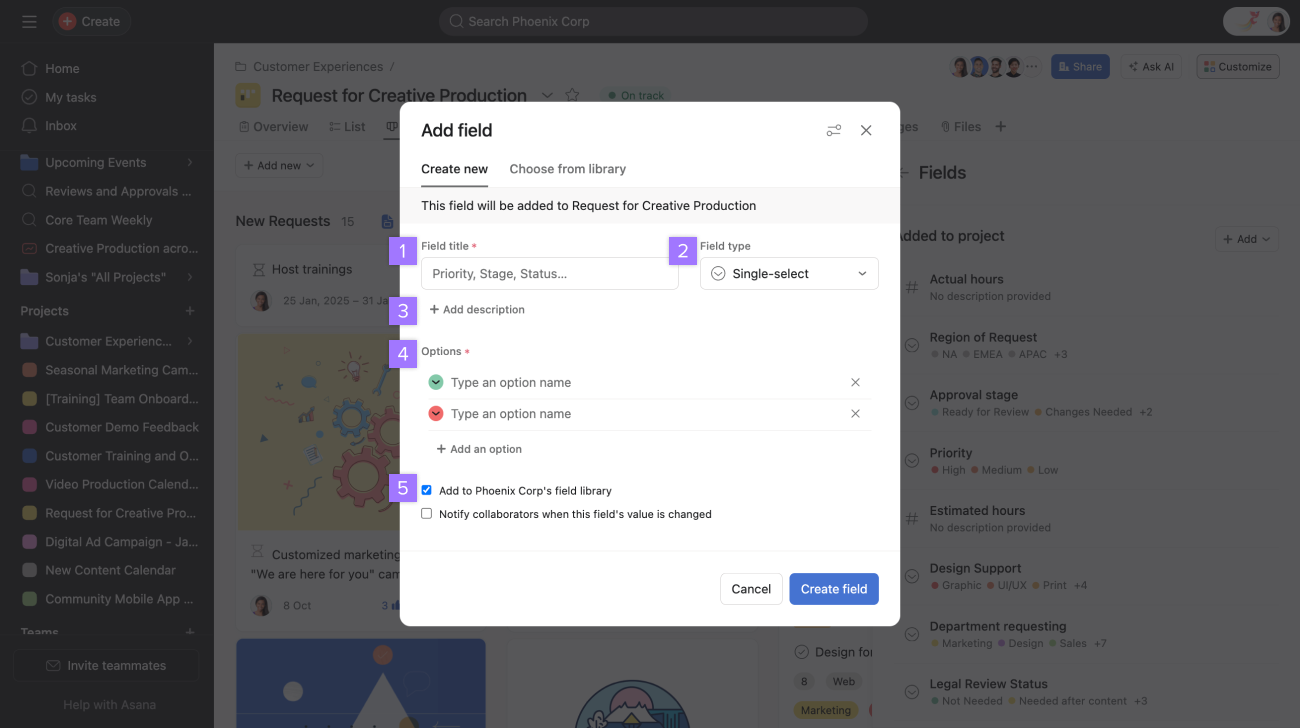
To create a local custom field, add a field to your project as shown above, but do not add the field to your organization's field library, to make it specific to your project. This keeps it a local custom field.
Note
Only the first level of subtasks will inherit the custom fields of the parent task automatically.
You can leverage Asana AI to suggest fields you might like to add to your project.
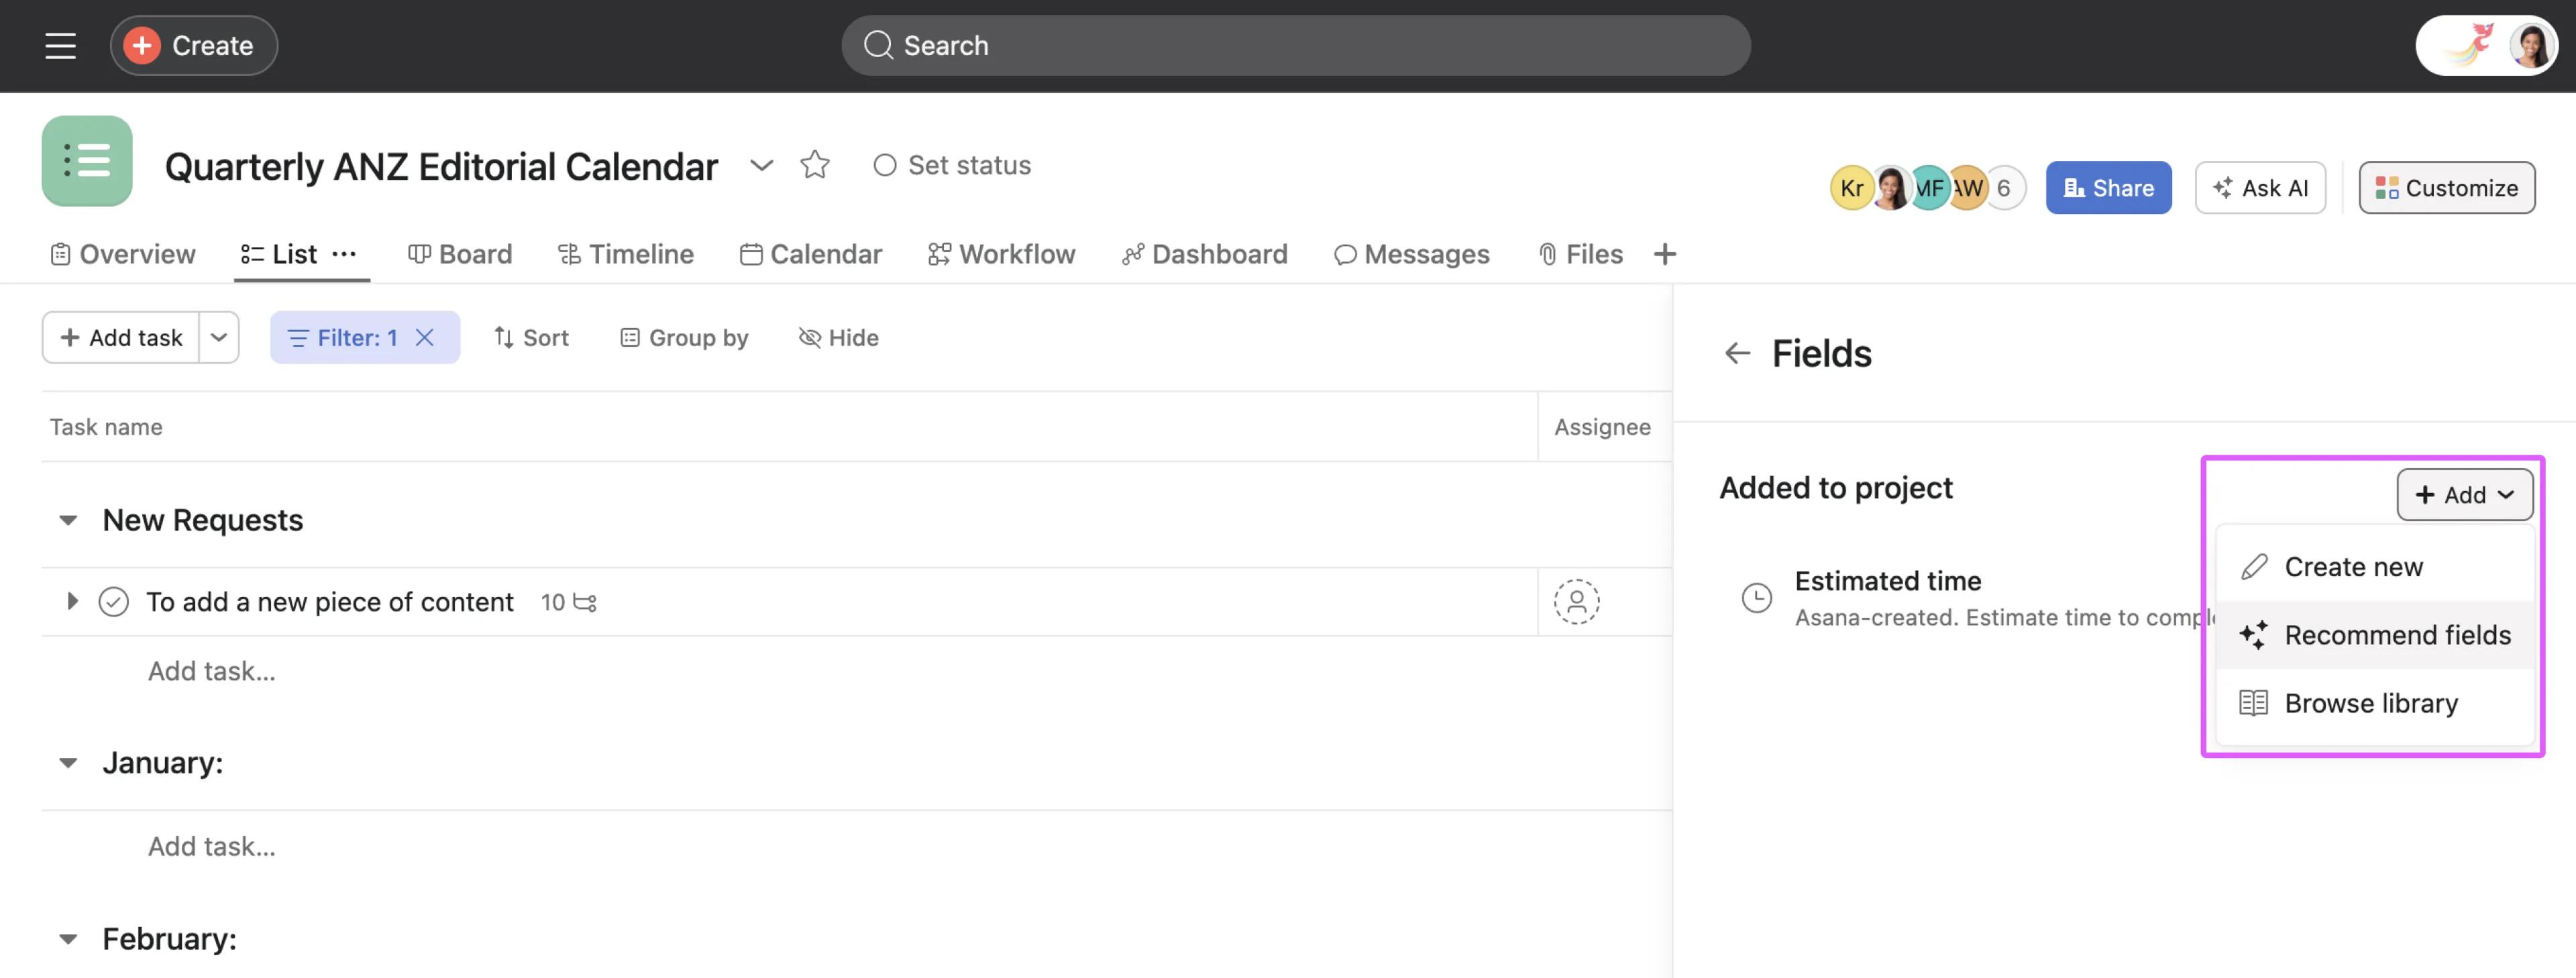
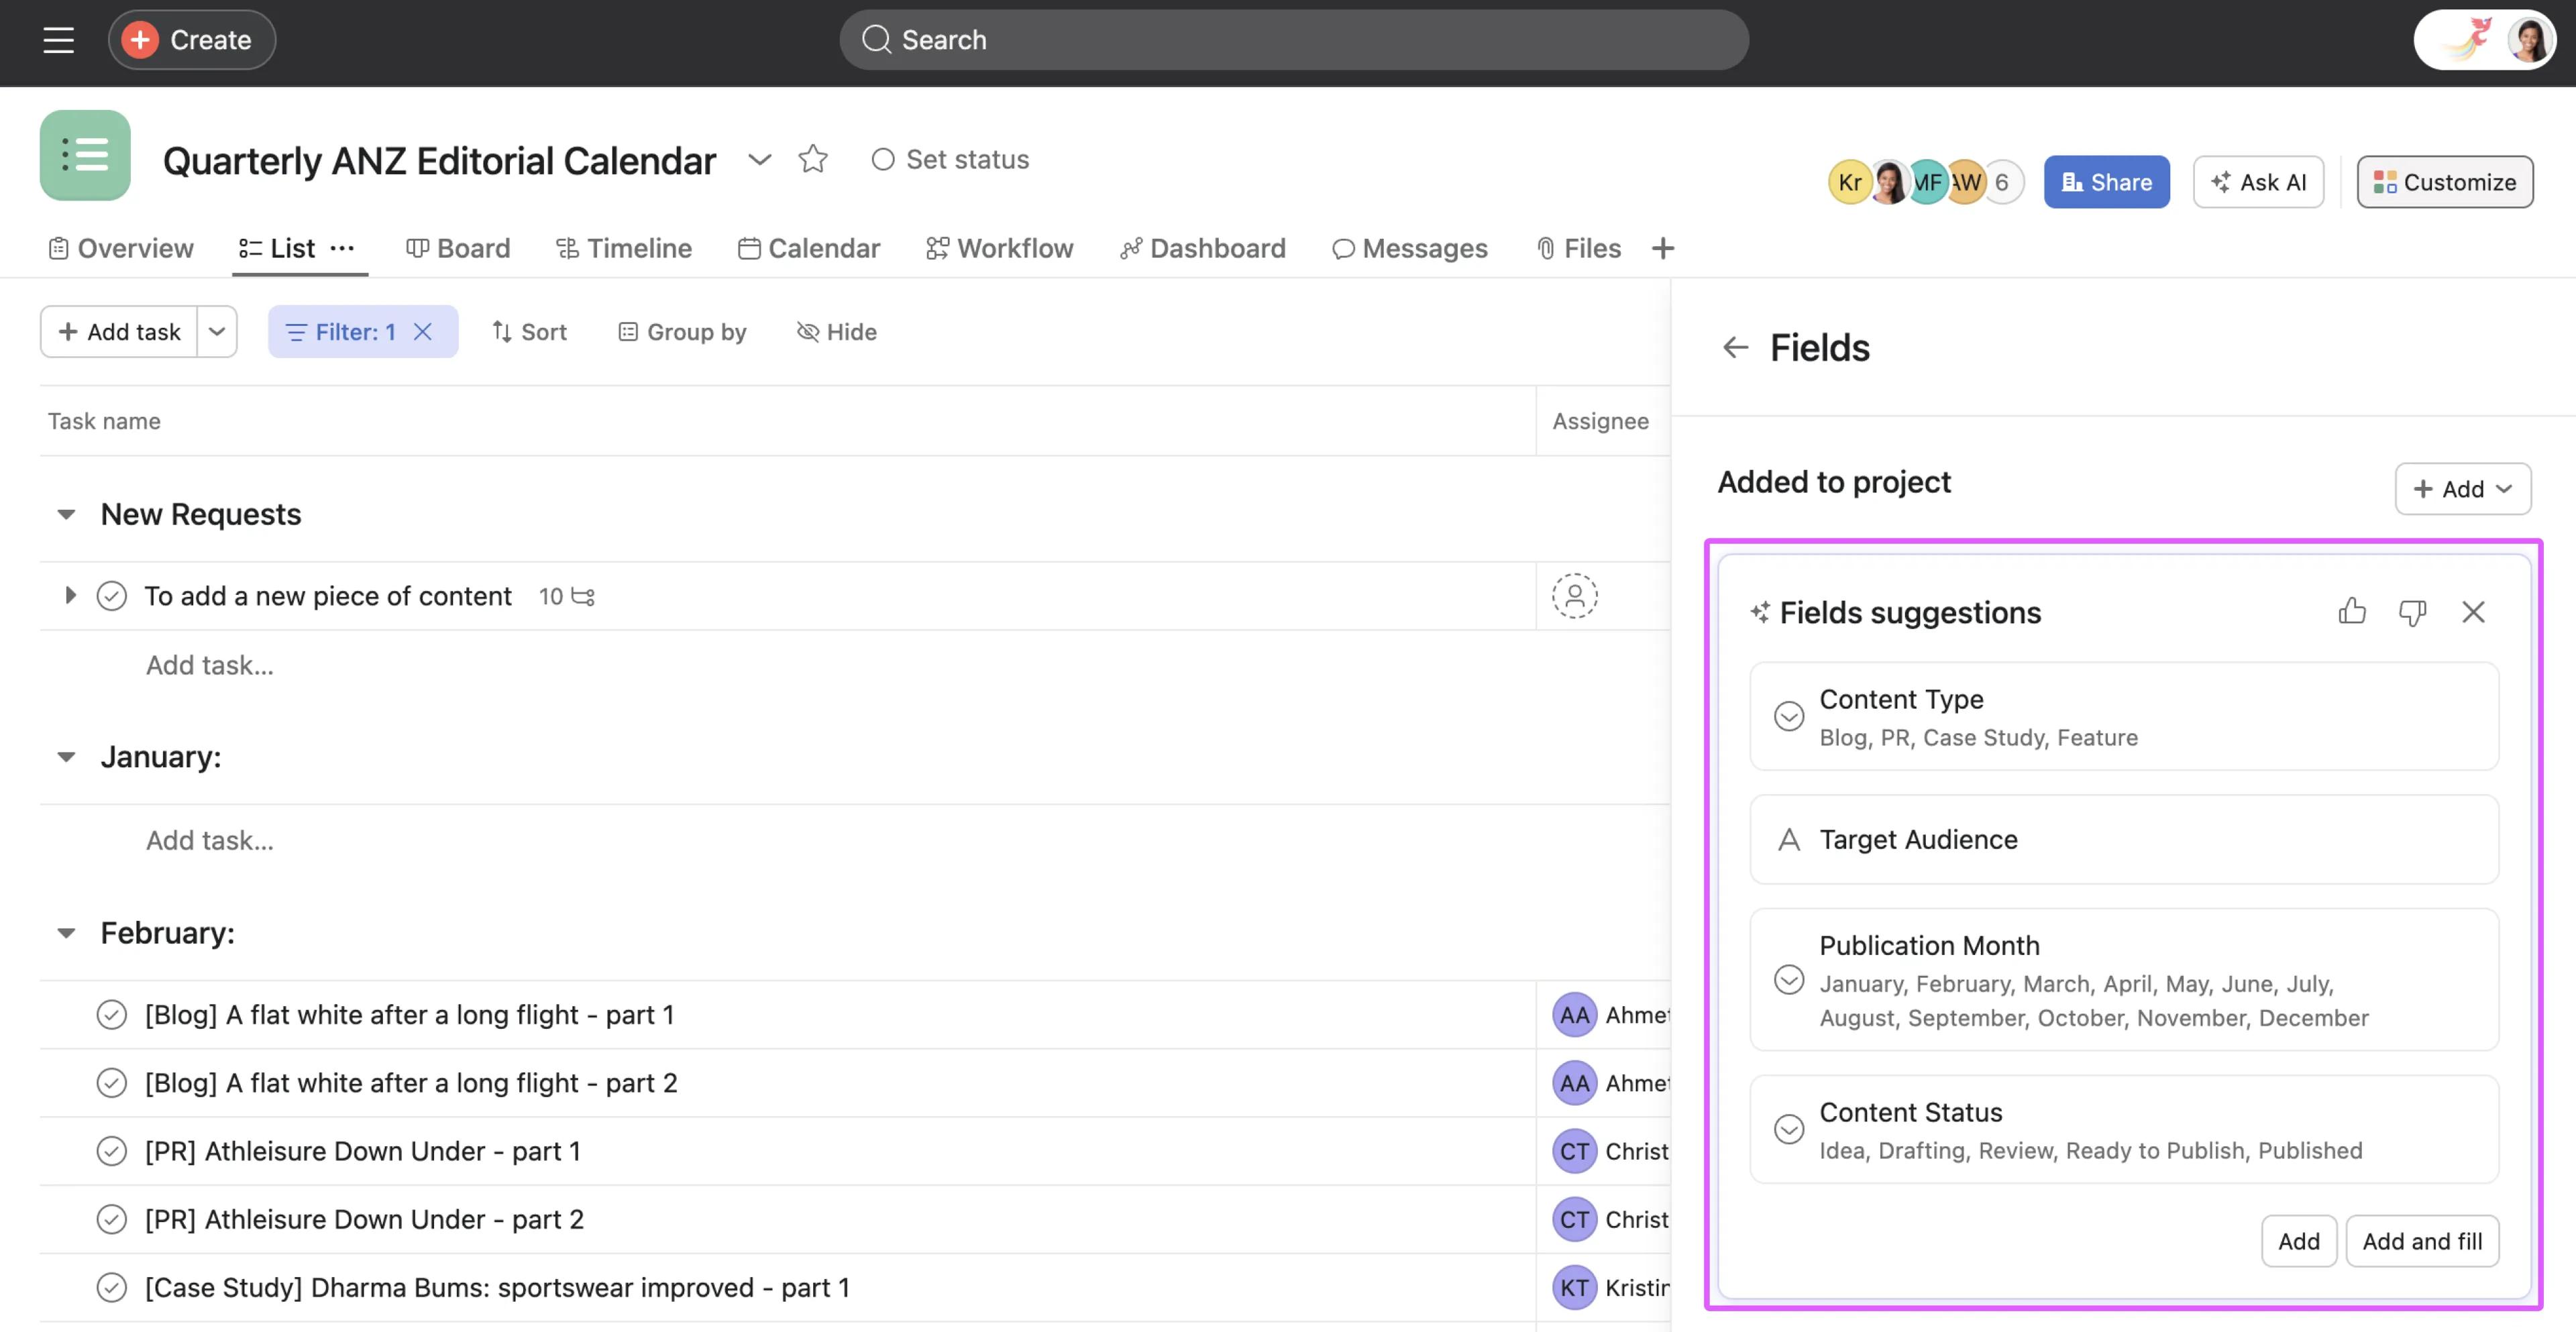
Asana AI will suggest some fields based on the context of the project and tasks.
You can edit a custom field using your toolbar or column header.
For global custom fields in your organization, edits made to them will apply globally to all the projects you use the field in.
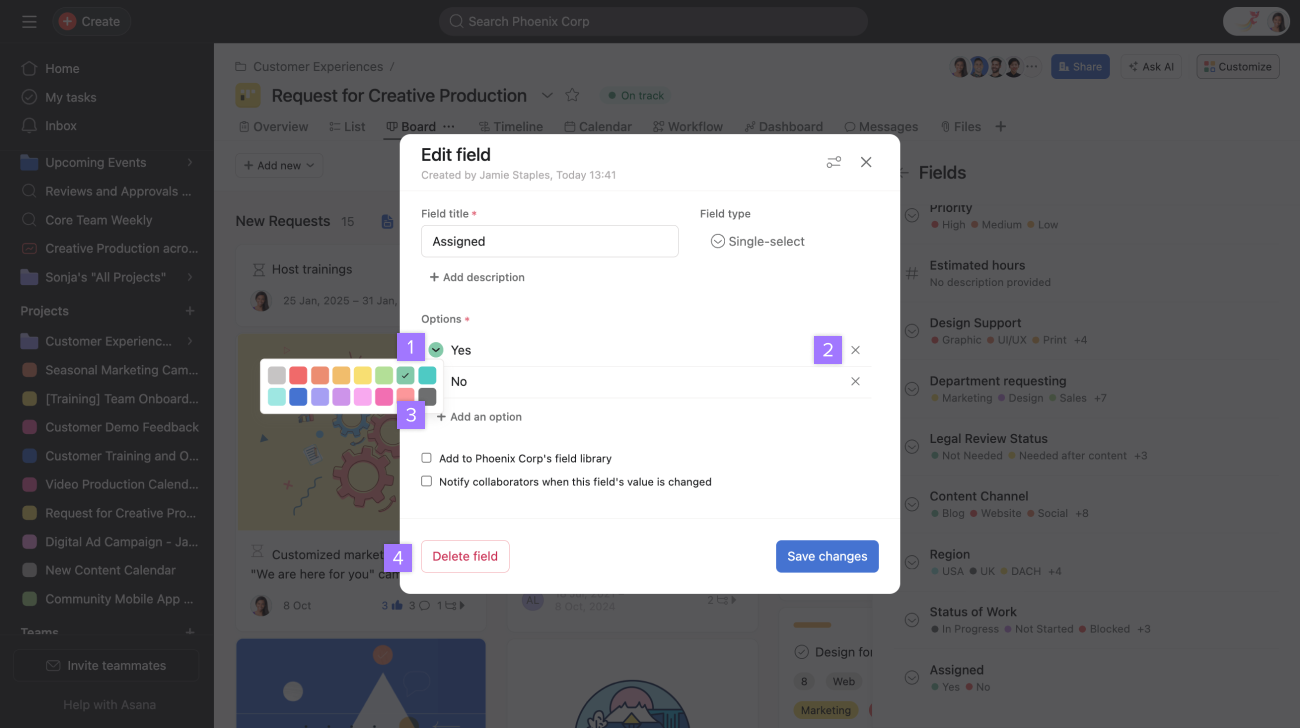
Drag and drop the custom field values to rearrange them.
If you remove a custom field value from your field's value options, tasks that use that value will retain the deleted value. The field can then be changed to another value, but you are not able to change a field back to a deleted item.
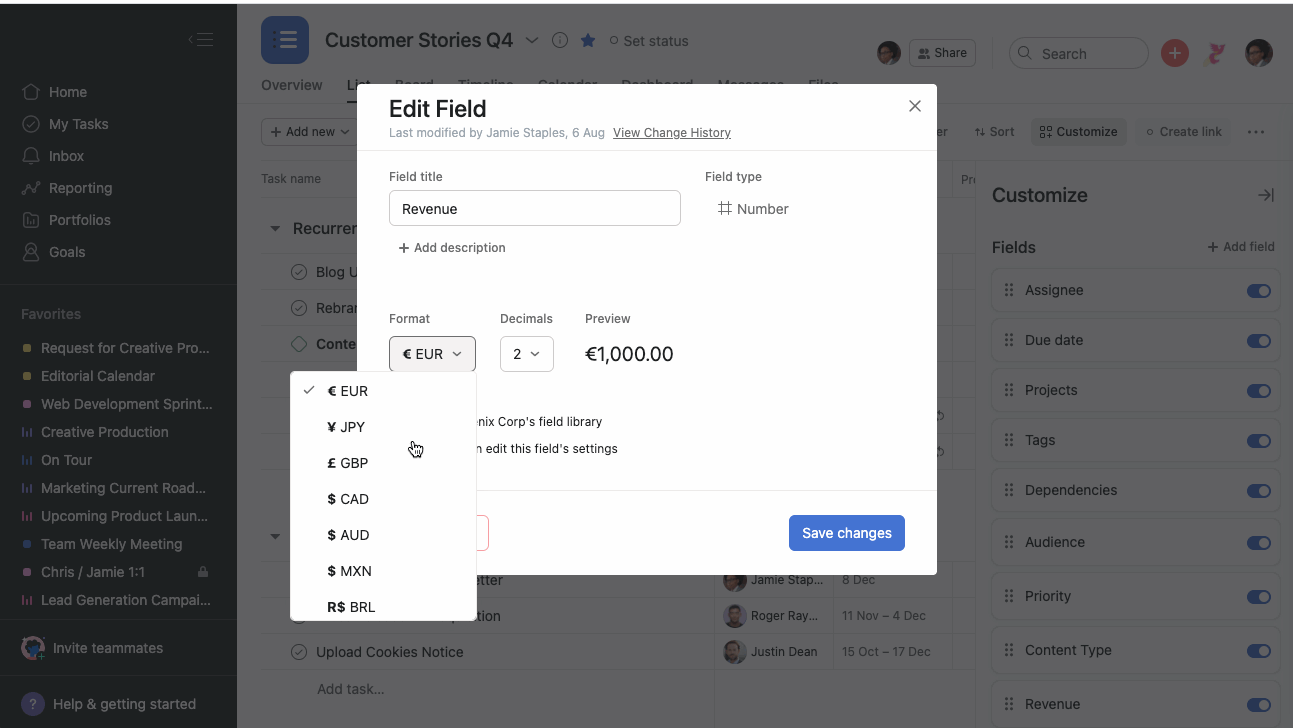
Reducing your field's decimal places will retain all current values, but they will be rounded up/down. Increase your field's decimal places and the original value will appear again.
Remove your field from a project if it is no longer needed or applicable.
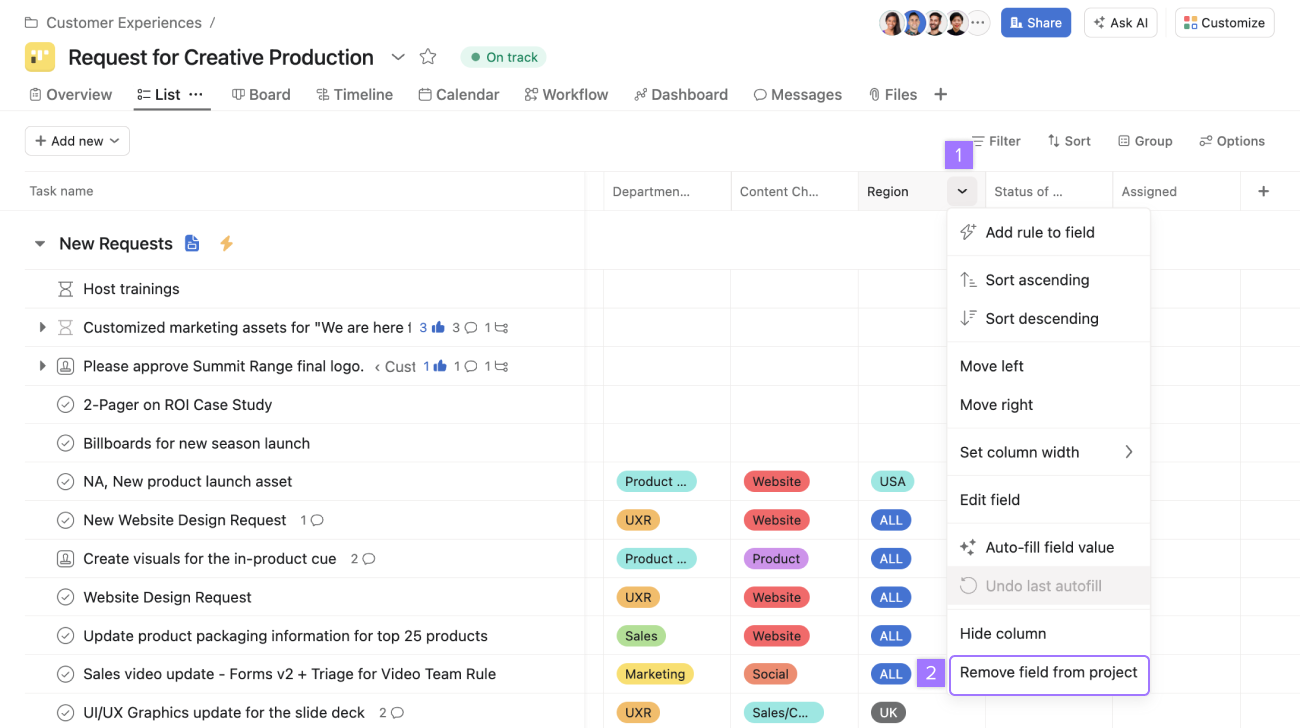
Select the Remove field from project option by clicking on the drop-down arrow next to the custom field name in the column header. You can also remove a field from your project through the Edit field window. When editing a field you will see the Remove from project button at the bottom of the Edit field window.
Removing a global custom field only removes it from the current project, it does not delete the field entirely. Other projects in your organization with the same field will retain it and the field could still be added to other projects in your organization.
Removing a field from your project does not delete your field's values from your project's tasks.
If your field is populated, the custom field and its value will still appear in the right pane of your task's details.
If your field is empty, the custom field will also disappear from the right pane of your task's details.
You can turn on custom field notifications at any time for both new and existing drop-down fields.
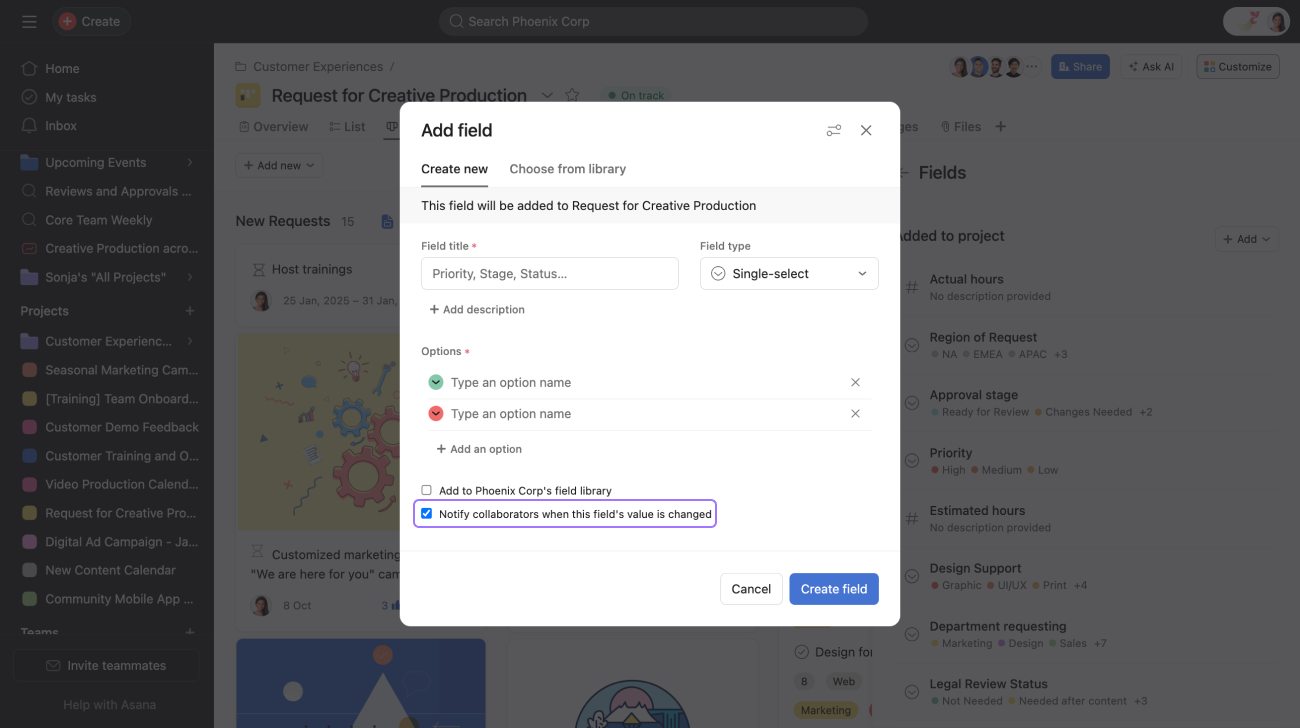
Check the Notifications box when creating a new drop-down field to notify task collaborators when this field's value has been changed.
Custom field notifications are only available for drop-down fields.
Once you are a task collaborator, you will receive an inbox notification every time a field value is changed.
If a custom field is public to your organization or team and someone checks the notifications box, anyone using that field at the time will receive notifications every time that field's value has been changed. If you want to be notified when a field's value has been changed for a specific task, you need to be a task collaborator.
Project members will only receive custom field notifications if they are following the task where the field value has been changed.
See how others use custom fields in the forum.
Want to learn more? Check out all the features of Asana Custom Fields.