Products
AI Platform
Asana Foundations
Company Type
In This Article
Visit our pricing page for more information.
Available on Asana Starter, Advanced, Enterprise, and Enterprise+ tiers, as well as legacy tiers Premium, Business, and Legacy Enterprise. Certain features within forms, such as branching, header customization, multiple forms per project, and confirmation message customization are only available to Advanced, Enterprise, and Enterprise+ tiers, as well as legacy tiers Business and Legacy Enterprise.
Visit our pricing page for more information.
Forms standardize the way work gets kicked off for your team, gather the necessary information you need, and ensure that no work falls through the cracks. You can use forms with internal and external teams, to collect and consolidate information, minimize any friction, back and forth, or misunderstanding for your team.
Explore everything Asana Forms have to offer. Start a free Asana Advanced trial today.
Forms are part of Asana projects. When someone fills out your form, the form submission will show up as a new task in the project the form lives in.
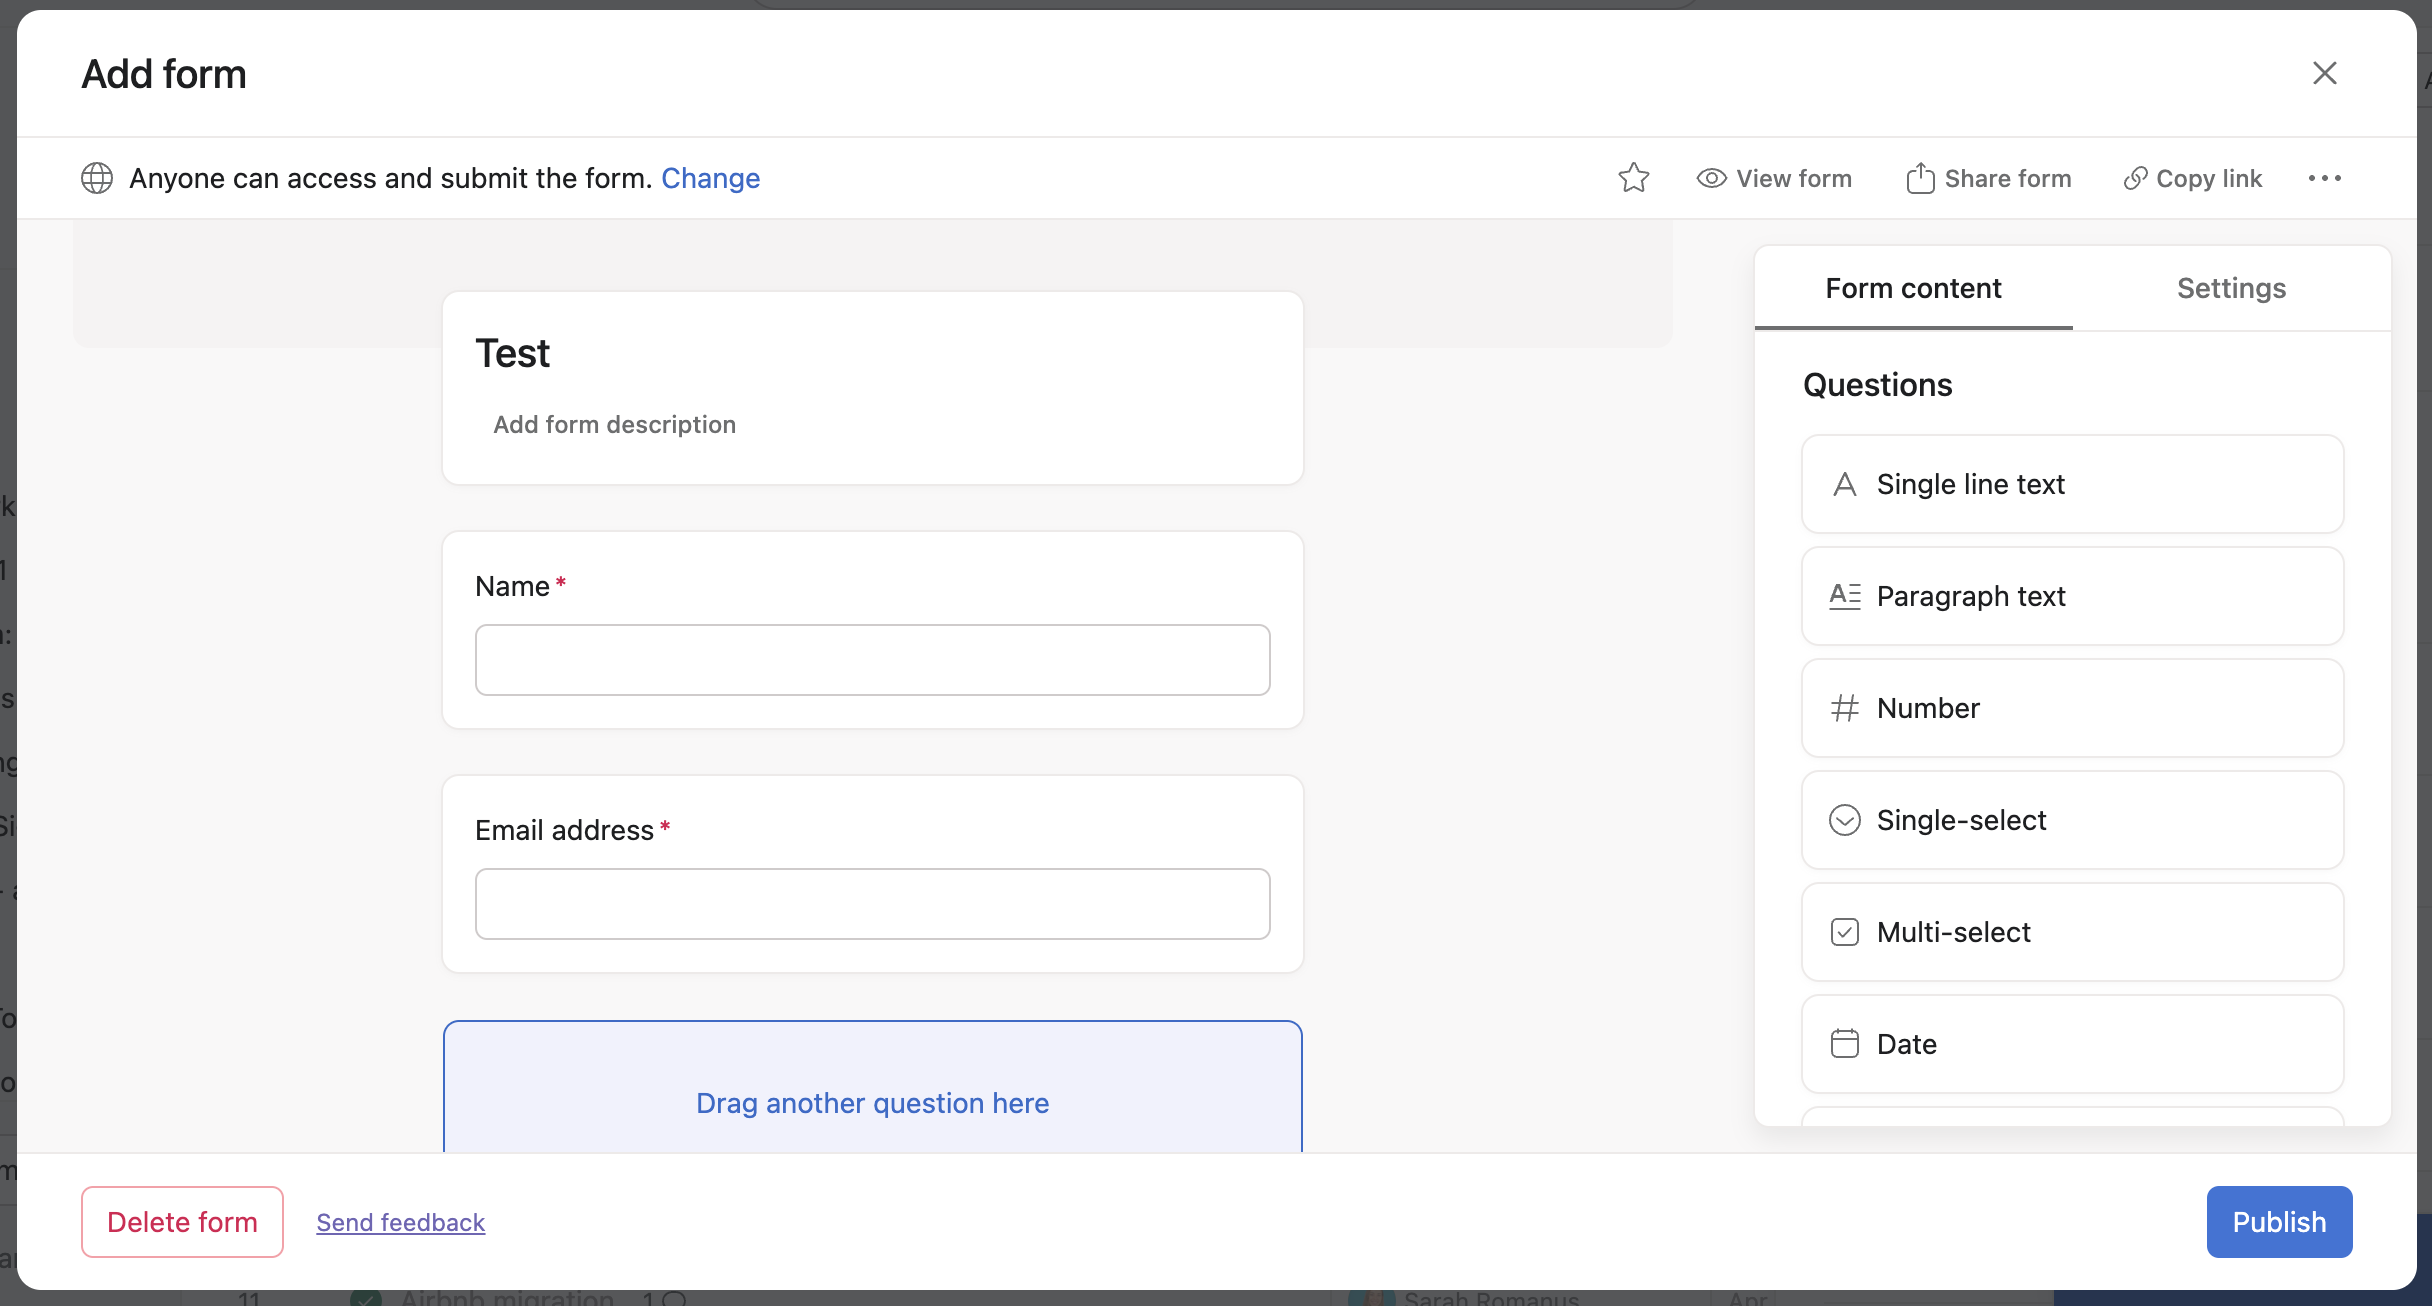
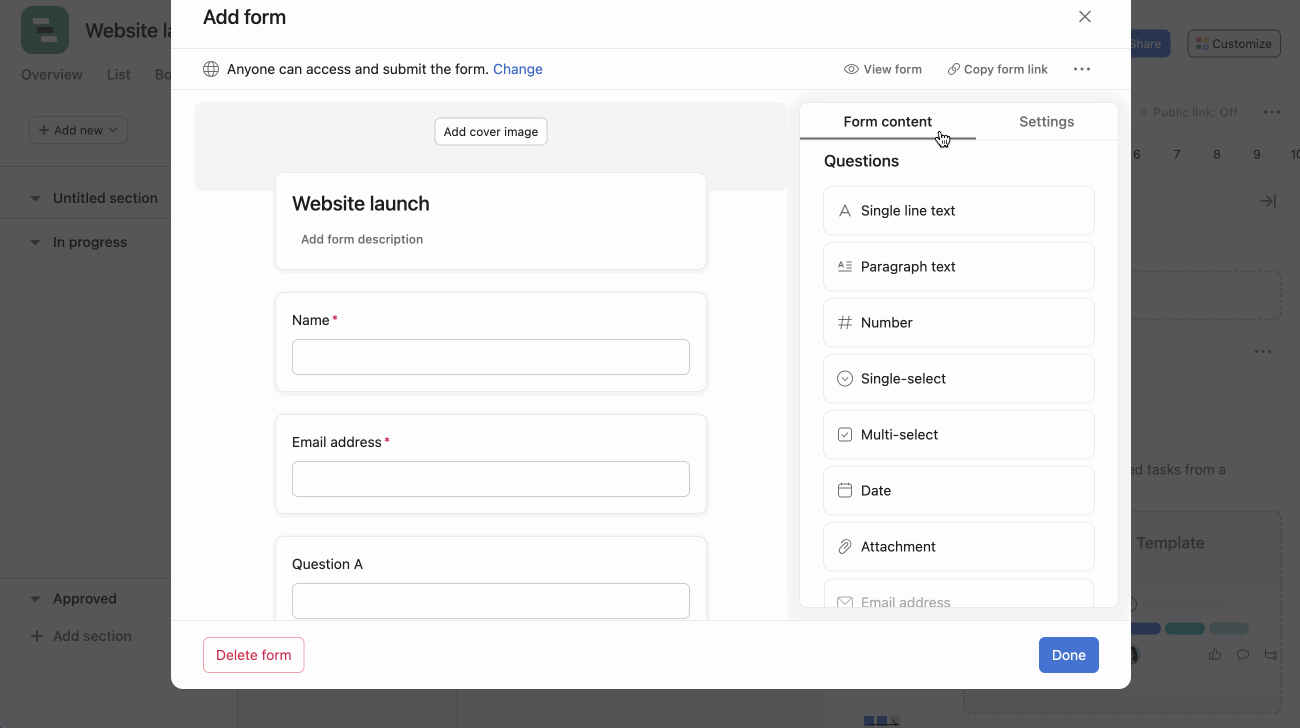
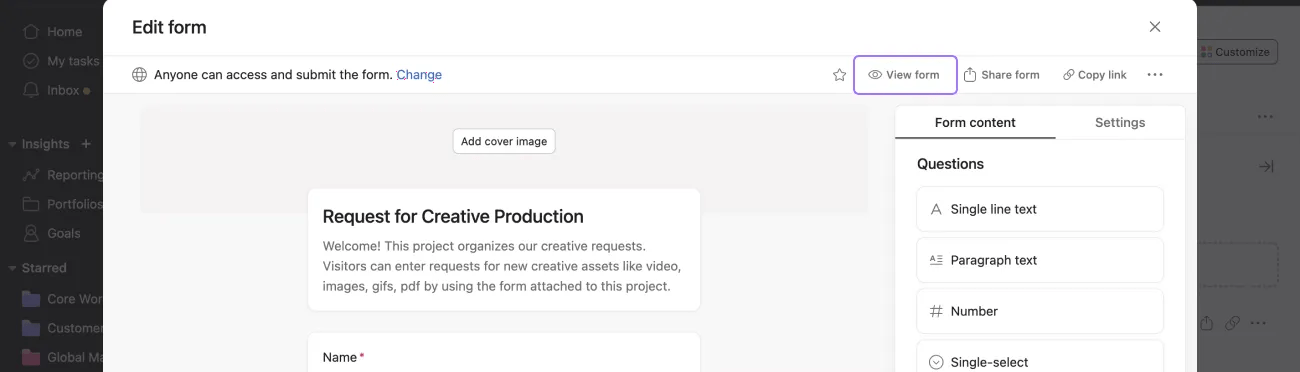
From the forms tab, you can create, edit and share forms. Your form will take on the same name as the project it's connected to, but you can change the name of your form and add a description to give directions or information to form submitters.
Forms also come with two default questions, name and email, to ensure you get the contact information of the requesters. You can choose to delete these questions when creating your form.
Note
Deleting the email question means that submitters won’t receive the email confirmation associated with their submission.
Add headings to your forms to organize your questions into sections.
You can also hover over your form and click + Add a heading.
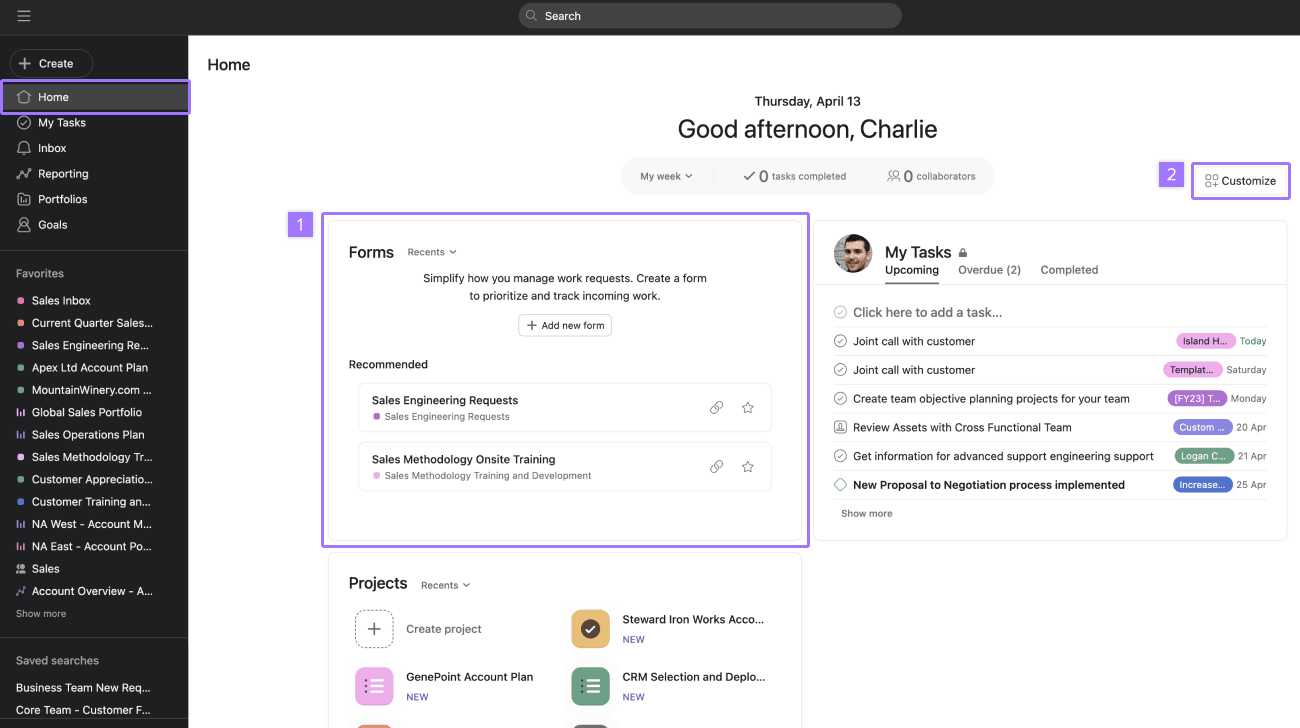
You can access forms directly from the Home page with the Forms widget.
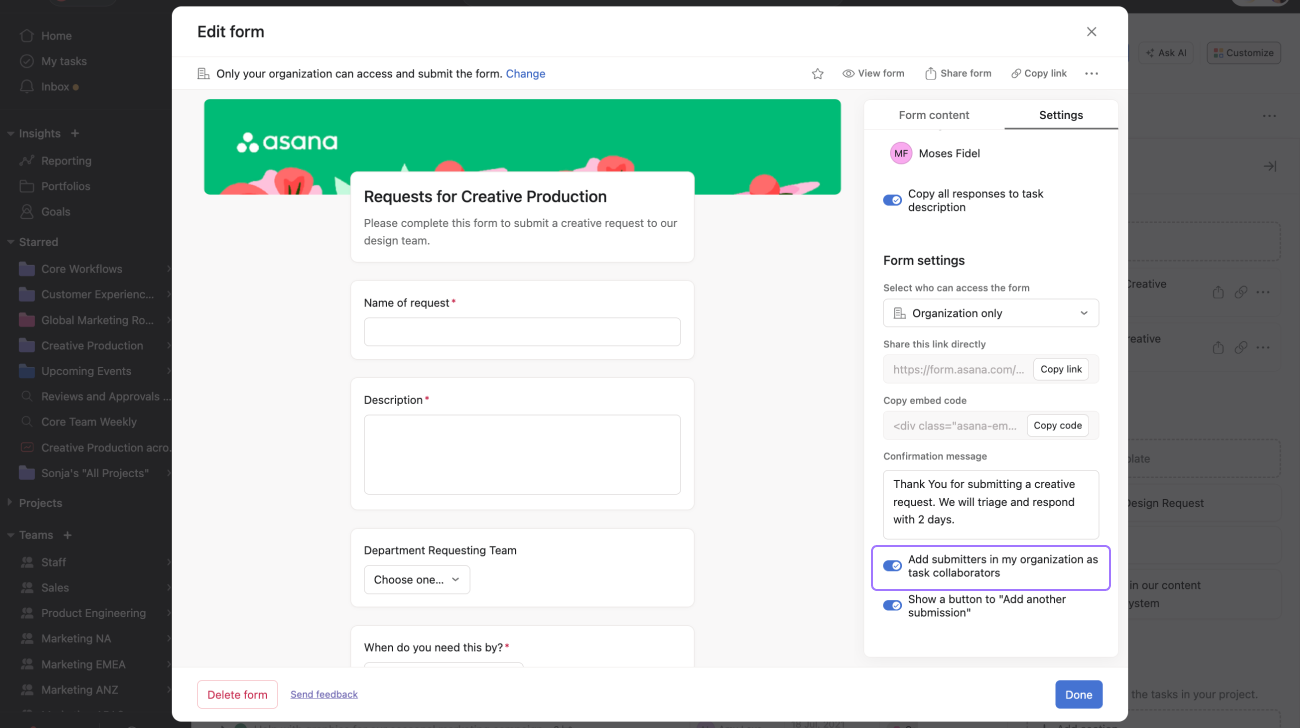
Keep a form submitter in your organization in the loop by automatically adding them as a collaborator on the task created by their form submission. Toggle the setting on or off from the settings tab.
Available on Asana Advanced, Enterprise, and Enterprise+ tiers, as well as legacy tiers Business and Legacy Enterprise.
Forms branching enables you to create follow-up questions associated with particular responses to single-select or multi-select questions.
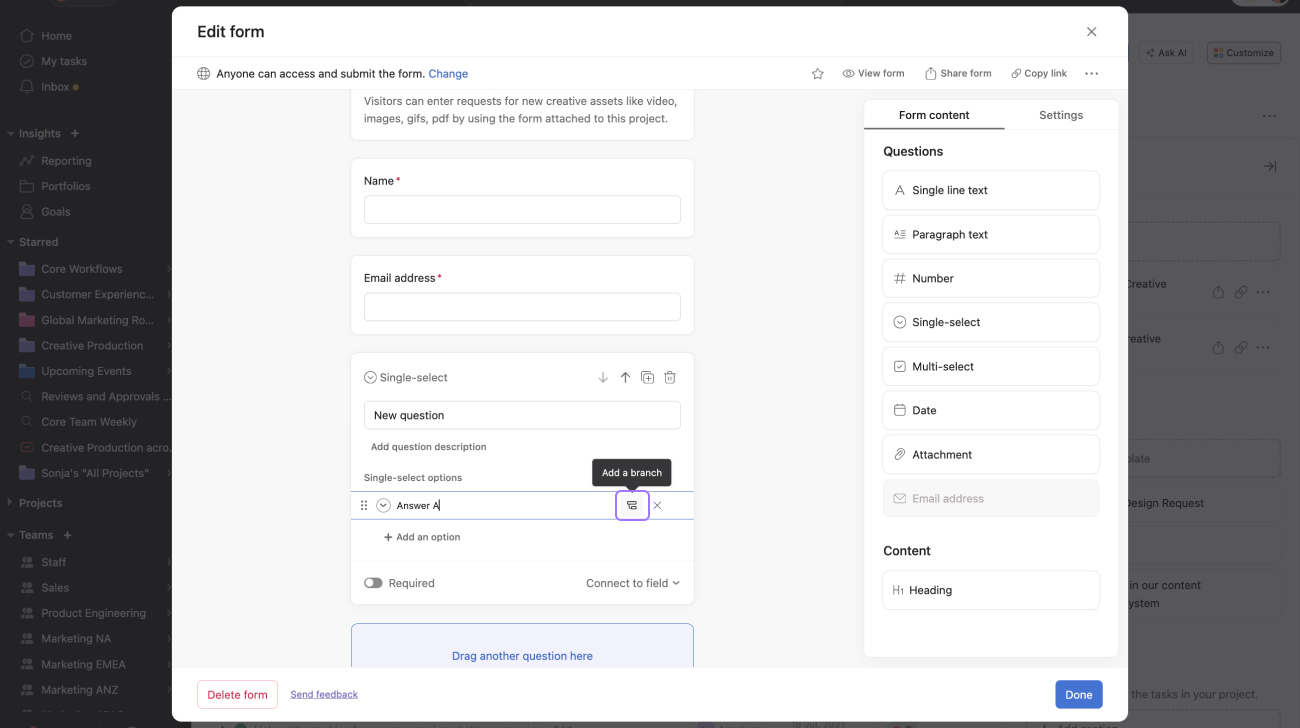
You can have up to five levels of branches within branches.
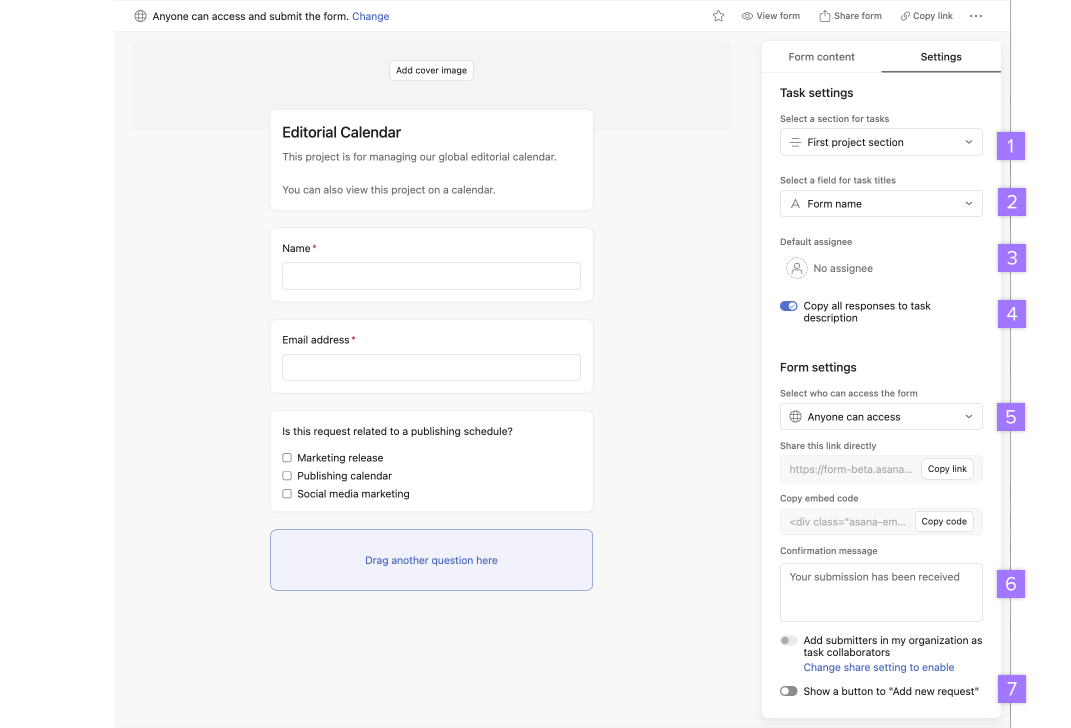
The ability to add a default assignee and a custom confirmation message is available on Asana Advanced, Enterprise, and Enterprise+ tiers, as well as legacy tiers Business and Legacy Enterprise.
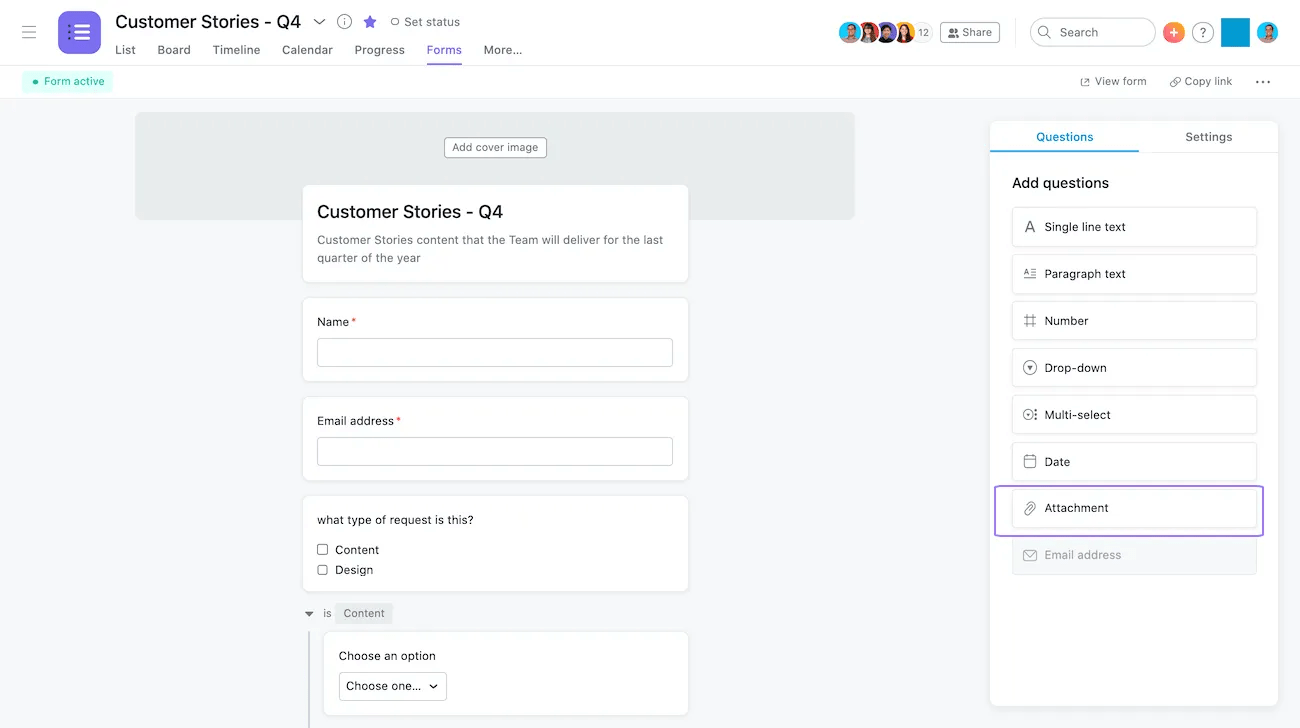
Add an attachment question to your form, so submitters can attach creative briefs, images, documents, PDFs and more. Any attachment added to a form will be attached to the task that is created in your project when a form is submitted.
To add an attachment, click on the Attachment icon under your questions list.

As you build your form, you can preview it at any time to see how it will appear to form submitters by clicking View form.
Asana-created project templates include forms.
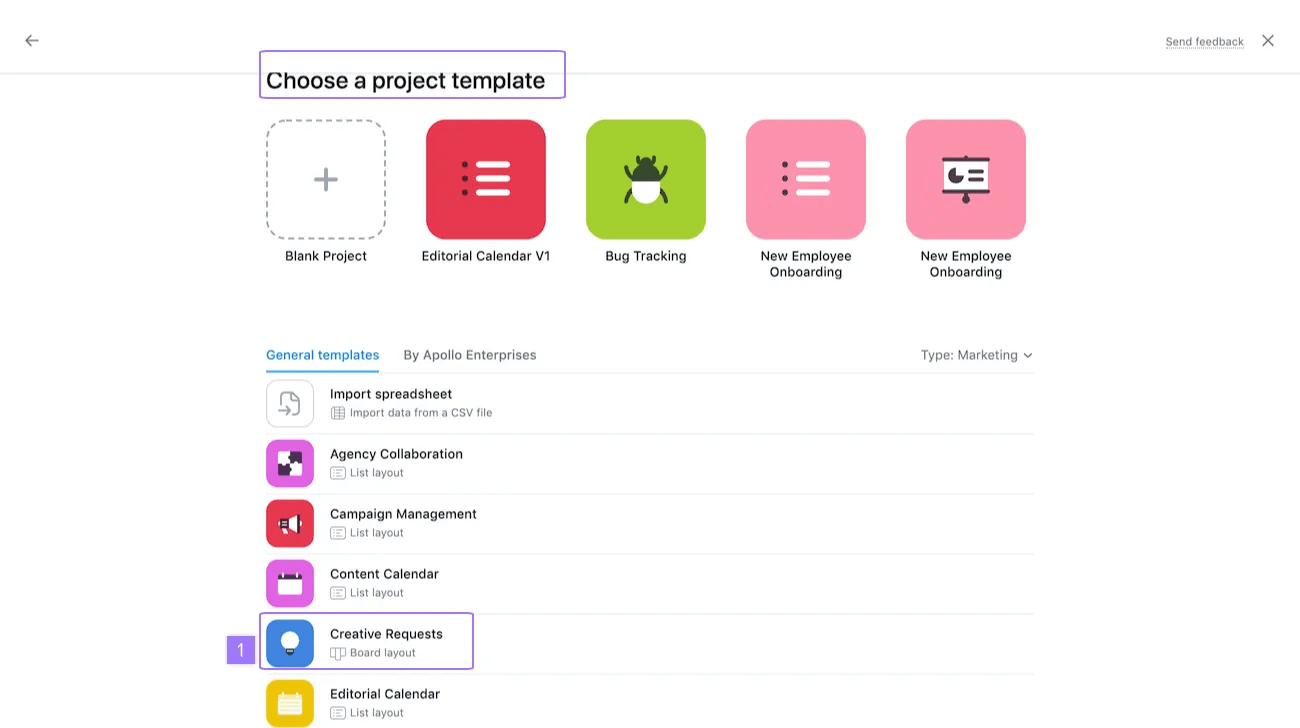
From project templates you will be redirected to a Creative Requests form which will capture all your team's creative requests and organize it for you.
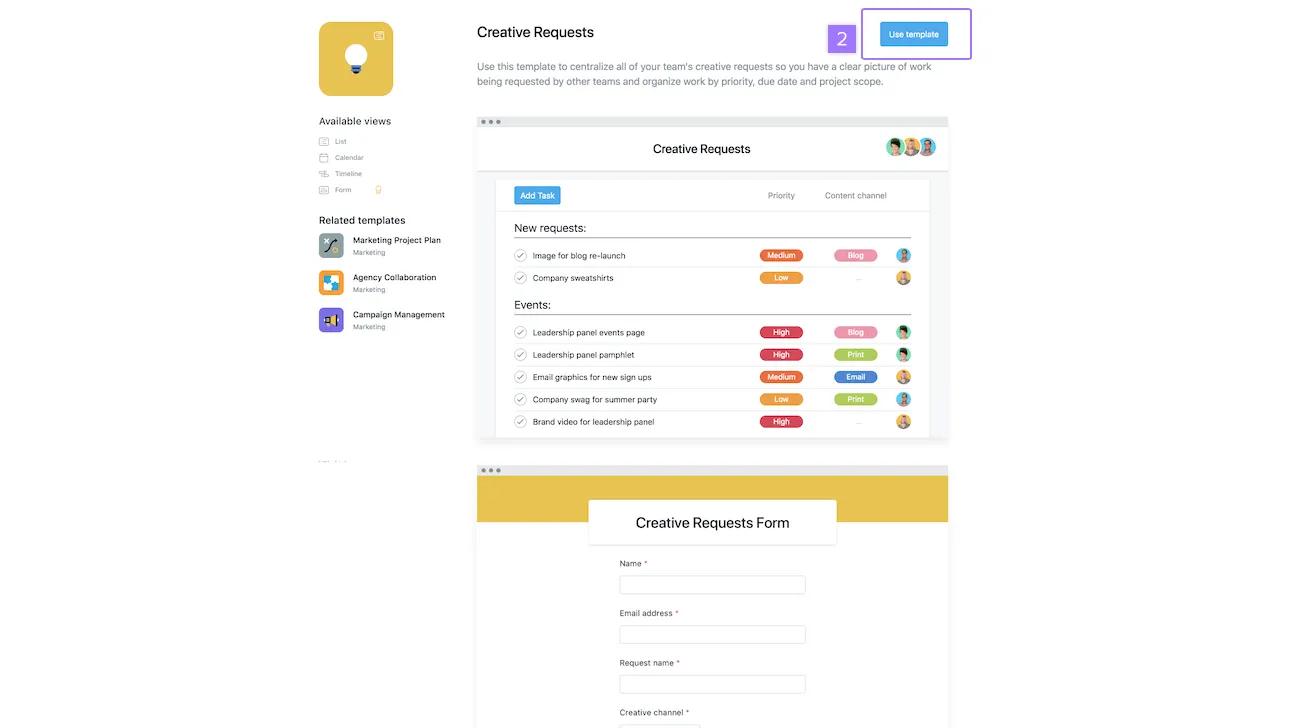
When you select Use Template, you can then rename the template and get started with your new project in form template.
You can specify the section in which the form will appear in the form setting for templates.
Explore community tips for building effective forms.
Forms can be easily managed and submitted through the project’s list view by using the form icon.
Finding the form icon: You can locate the form icon in the project list view, next to the project name or tasks. This icon allows you to access and manage forms directly from within the project.
Editing forms: Project editors and admins can click on the form icon to edit the form and its settings. This includes adding or changing form questions and mapping form submissions to specific sections.
Submitting forms: Project commenters and viewers can use the form icon to submit tasks via the form. They do not need edit access to use this feature.
When you create or edit a form, you can decide where the submitted tasks will land by mapping the form submissions to a specific section of your project.
Form section mapping vs. rules: If you have a rule in place that automatically moves form submissions to a specific section, this rule will not be overridden by the form mapping setting.
Default section behavior: If you do not explicitly map a form to a section, tasks submitted via the form will automatically go to the "first section in the project." In most cases, this is the default section, commonly seen in board or gantt views.
Removing the default section: If you want to remove the default section from your list view, simply map the form submissions to a specific section. Once mapped, the default section will disappear from the list view, helping keep your project organized.
If a user deletes the section the form is mapped to, the form will default back to the first section of the project
Available on Asana Advanced, Enterprise, and Enterprise+ tiers, as well as legacy tiers Business and Legacy Enterprise.
With every project having a different purpose and functionality, it’s so important to consolidate different types of input and information so that projects are used effectively. You can create multiple forms per project to support different types of work requests within any given project. Having the option to create multiple forms can help to streamline workflows and minimize the ‘work-about-work’ that can often add to the workload of the user.
Submit and manage work requests in one place. Get started with a free Asana Advanced trial. Try for free
Duplicating forms can help you save time when iterating your intake process.

To duplicate a form, click the three dot icon in the upper right corner and select Duplicate form.
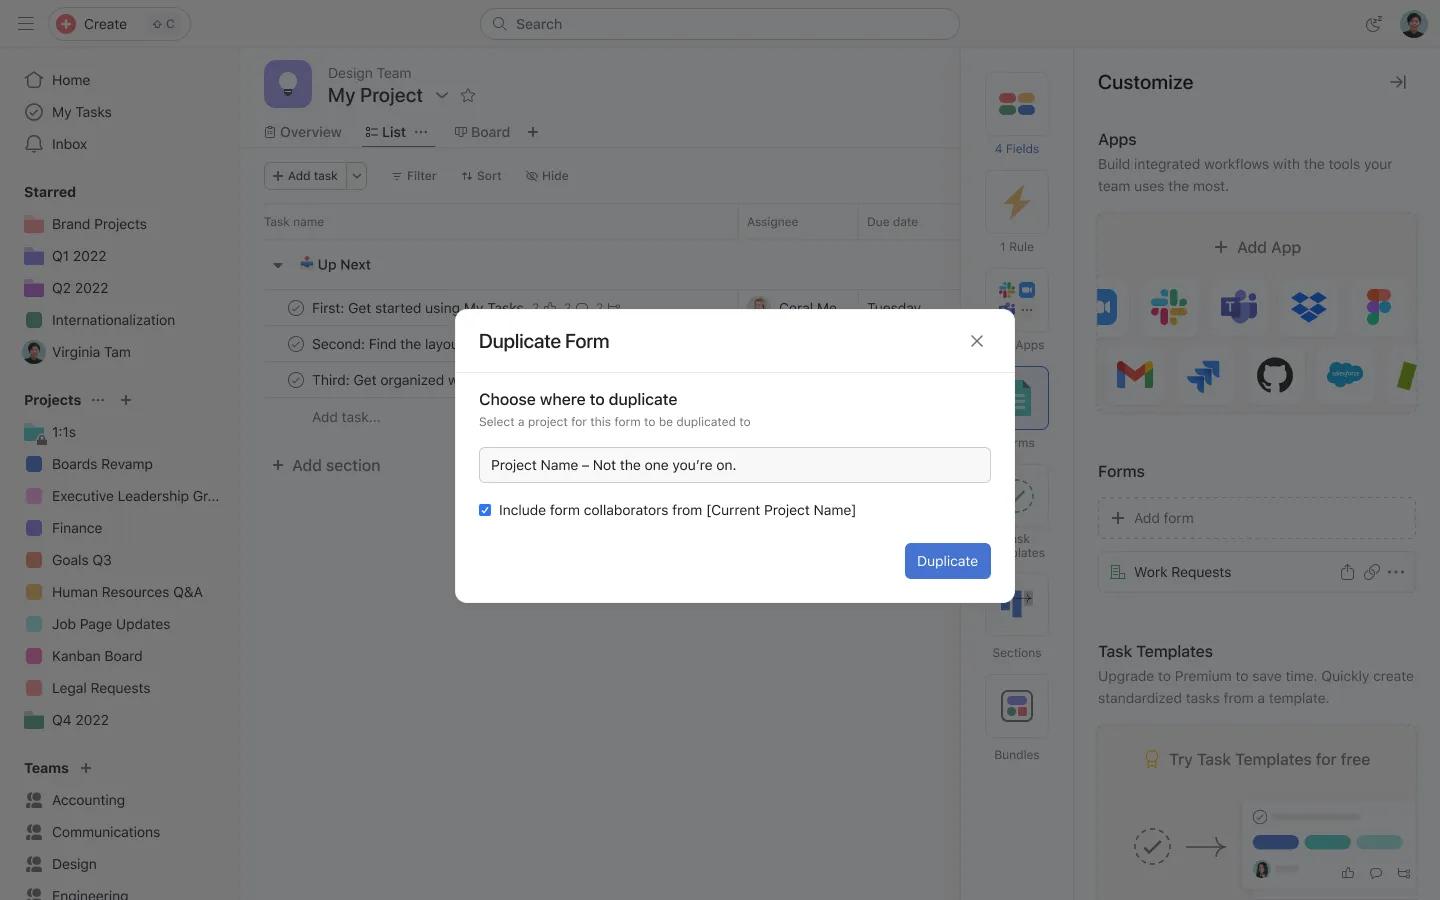
From here, you can select a project for this form to be duplicated to and click Duplicate.
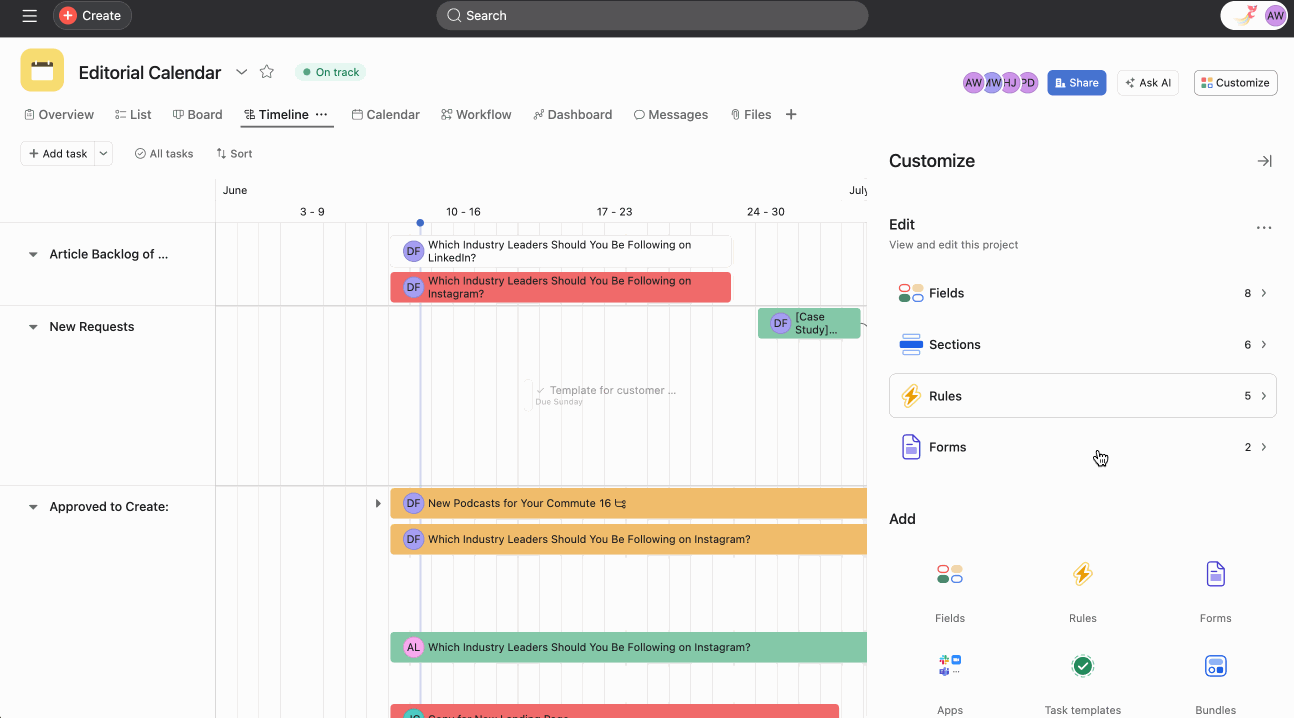
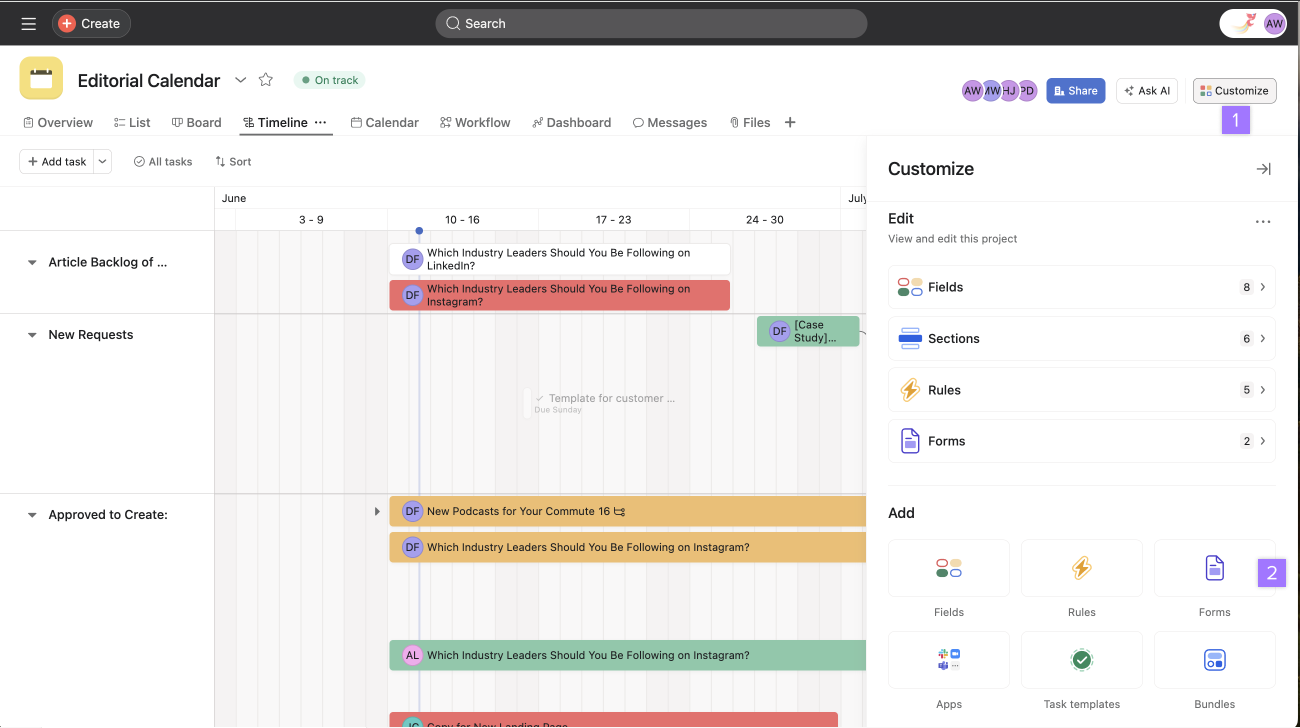
From the Customize menu, you can view all of your forms.
You can have a maximum of 20 forms in a project.
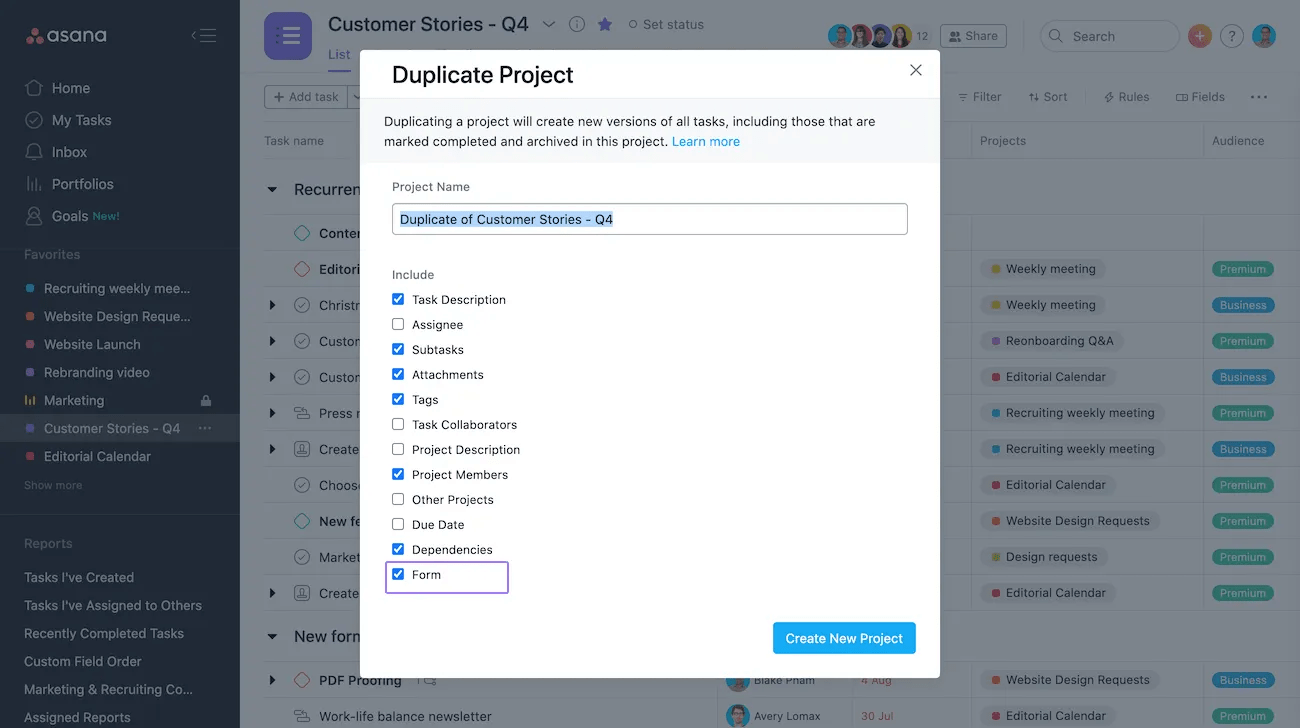
When duplicating a project, you also have the option to duplicate your form. Just select the Form check box when duplicating the desired project.
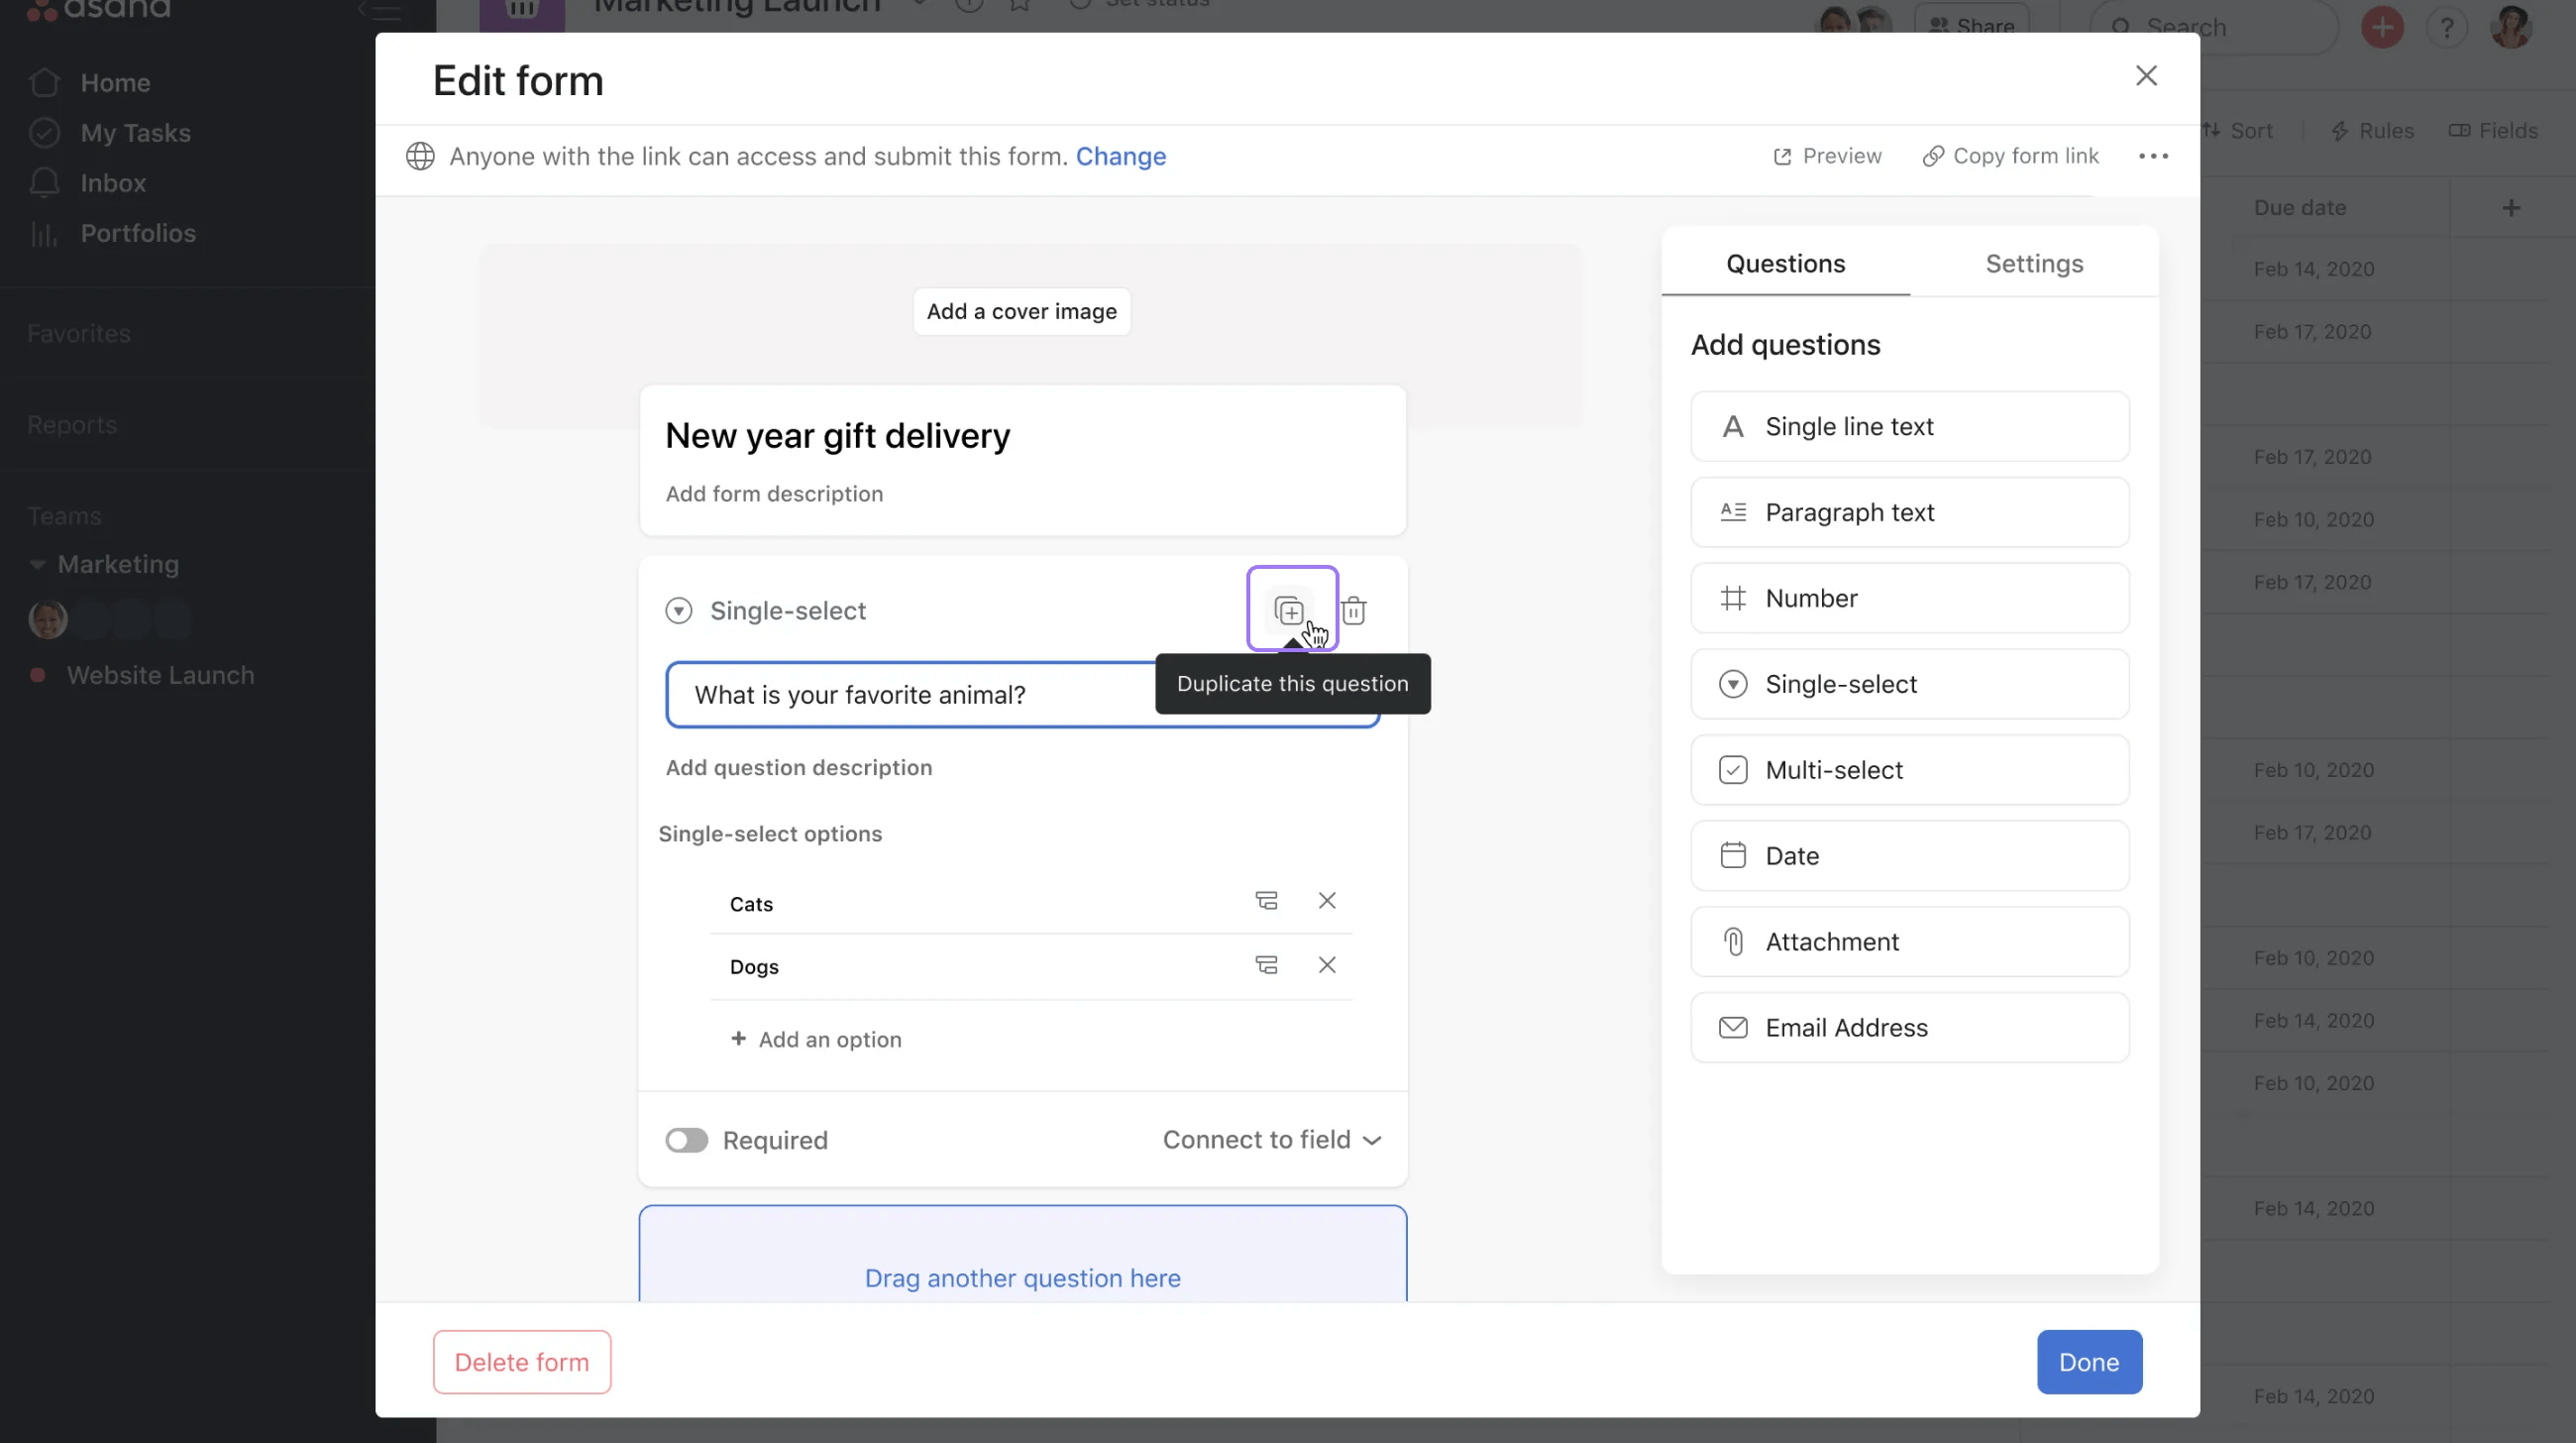
To duplicate a question, click on the + icon. You can then edit the duplicate question and its branches.
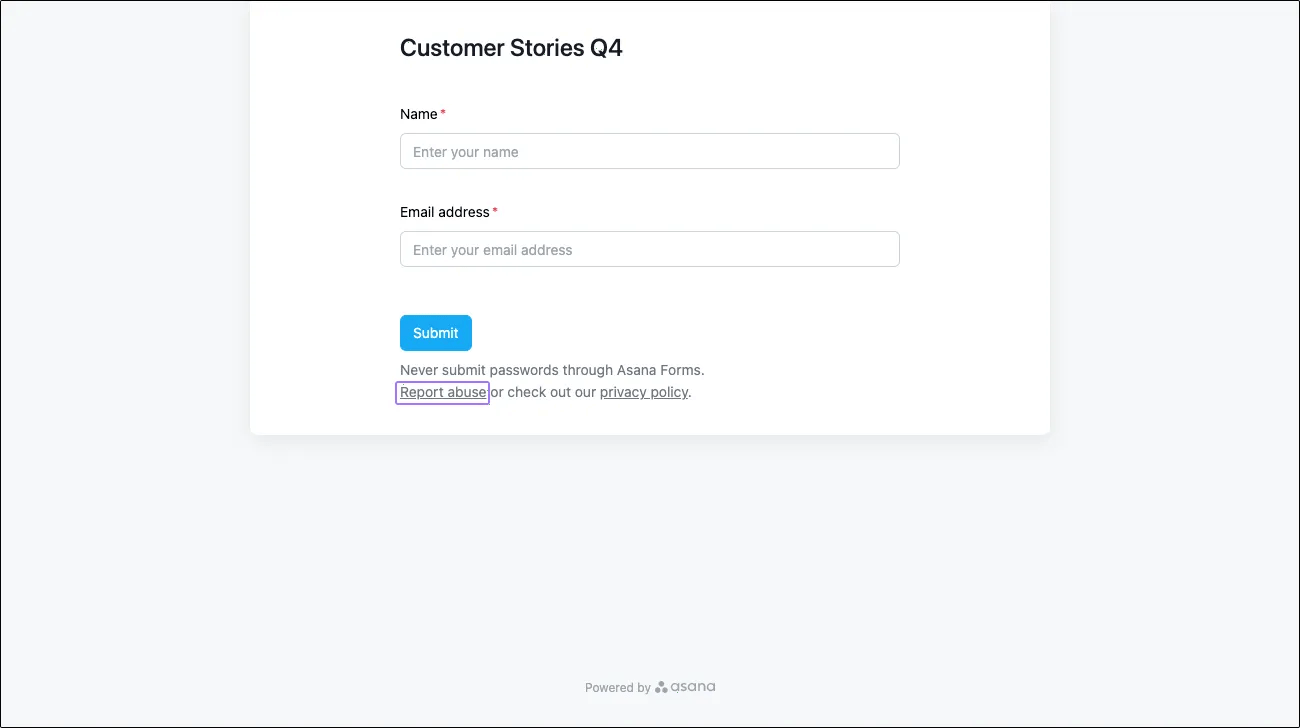
To report abuse in a form, click on Report abuse. Asana's security team will be notified to review and act on the incident in question.
Form-based communication, otherwise known as request tracking, enables non-Asana users to respond to form submissions via email without needing an Asana license. Visit our dedicated article to learn more about email communication with form submitters.
The form submission creates a new task in the project where the form lives, and the submitter receives a confirmation email with a record of their submission if they completed the email question.