Note
Note
Any attribute data synced to Asana via SCIM is available to all downstream Asana features, including AI features like Asana Intelligence (Dash). If you do not want a specific attribute surfaced in these features, remove or unmap it from your SCIM configuration in your identity provider, such as Okta or Microsoft Entra ID, before it syncs to Asana.
With SCIM functionality, super admins can quickly and easily provision and deprovision users in Asana from their identity management provider. Your organization can also be used to configure with SCIM. SCIM provisioning allows super admins to:
- Create a new user
- Update a user's profile attributes (Okta and Microsoft Entra ID only)
- Import Asana users into their identity management provider
- Import Asana teams into their identity management provider (Okta only)
- Create teams in Asana from their identity management provider (Okta and Microsoft Entra ID only)
- Deactivate a user
The following provisioning features are not supported by Asana:
- Reactivating users
- Deleting teams in Asana
Note
Like what you see? Get started with a free Asana trial today. Try for free
Set up provisioning
To use SCIM provisioning, you will need to connect your organization's Asana account with one of our supported identity providers. Setup will vary according to the identity provider you use. Asana supports SCIM provisioning via:
Okta
Features
Super admins can easily provision and deprovision users in Asana from Okta. The integration between Asana and Okta relies on an industry-standard protocol called SCIM that allows super admins to:
- Create users: Okta users assigned to the Asana application in Okta are automatically added as members to your organization in Asana.
- Update user’s profile attributes: Attributes such as userName, title and department for a user’s profile can be synced from the user’s Okta profile to Asana.
- Import users: Users created in Asana can be imported in Okta either matched against existing Okta users or created as new Okta users.
- Import groups: Teams created in Asana can be imported as groups in Okta. Take into account Okta doesn't allow you to manage memberships of these imported groups.
- Push groups: Groups and their members in Okta can be pushed to Asana (as Asana teams and team members).
- Link groups: Existing teams in Asana can be linked to groups in Okta after importing the teams from Asana.
- Deactivate users: Users can be deactivated in Asana if they are no longer assigned to the app in Okta.
The following provisioning features are not supported at the moment:
- Reactivating users
- Deleting teams in Asana
Note
Importing users or groups with emojis in their names to Okta will cause failure, as Okta only supports characters encoded with 3 bytes or fewer.
Requirements
Please ensure that you meet the following requirements before turning on SCIM for your organization.
- You’re a super admin for an organization in Asana that’s on the Enterprise, Enterprise+, or Legacy Enterprise tier. SCIM is available for organization-wide plans, but not for divisions.
- You have the correct Okta plan for provisioning users via SCIM. Please see Okta’s lifecycle management offerings for more information.
If you meet these requirements, use the following steps to enable SCIM for your organization.
Steps
Step 1: Add Asana’s Okta integration app to your Okta account
Login to Okta and add Asana’s Okta integration:
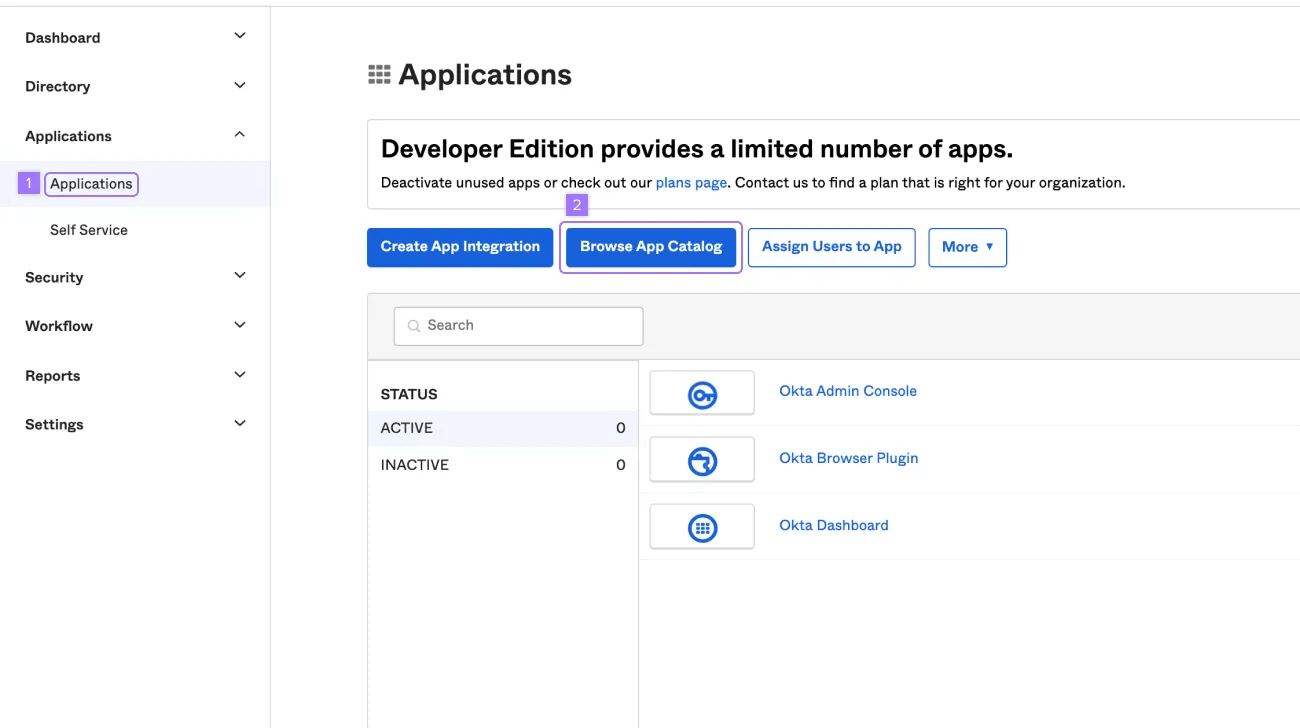
- Click Applications on the sidebar
- Click Browse App Catalog
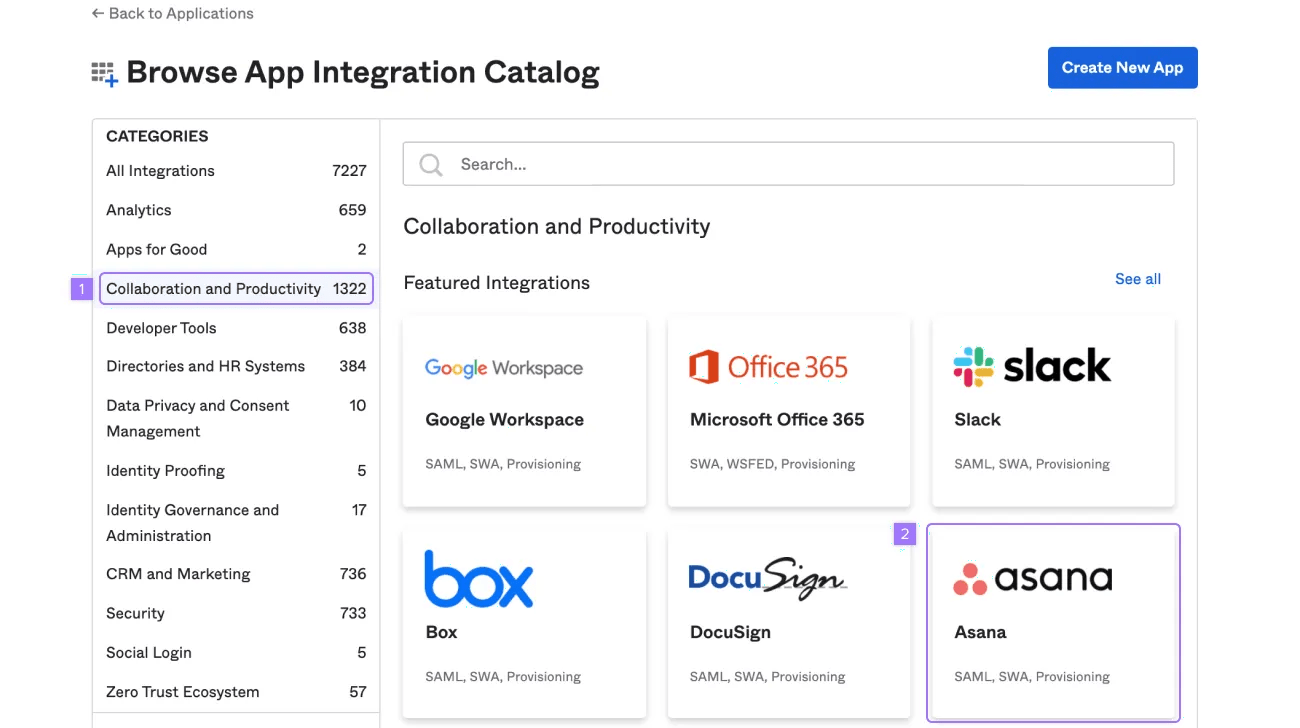
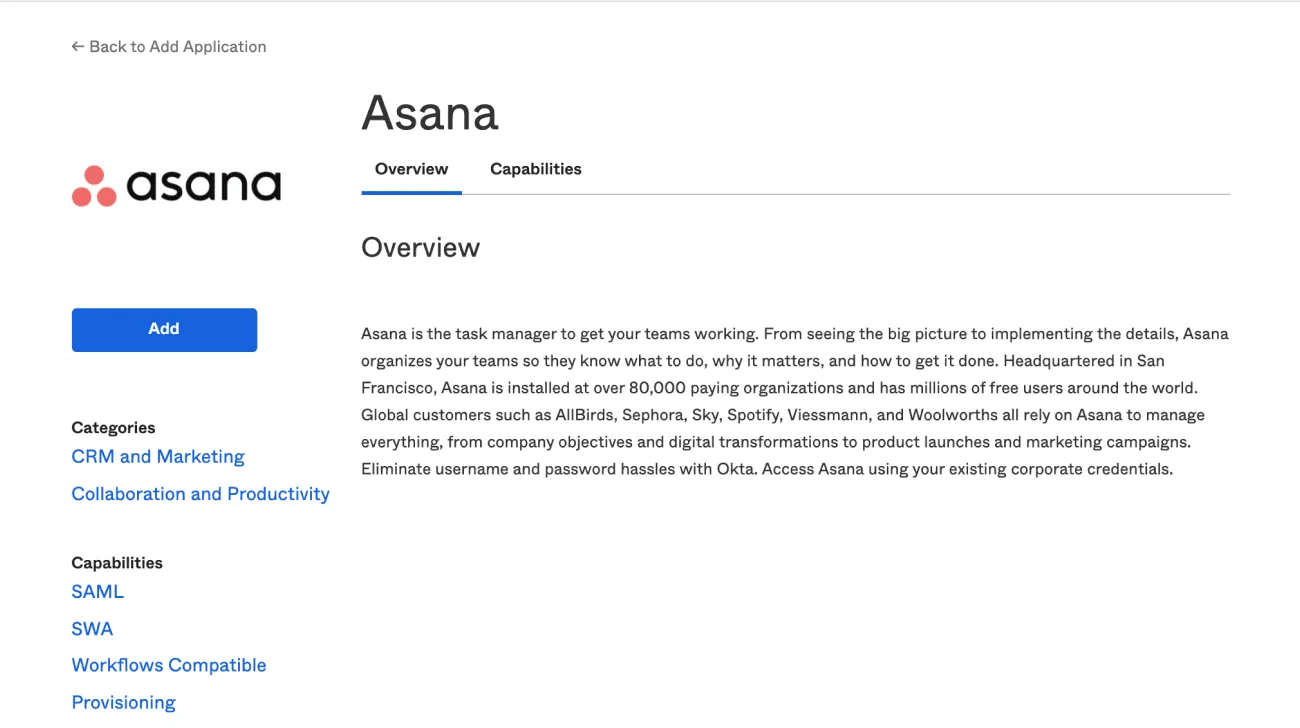
To add Asana:
- Click Collaboration and Productivity
- Click Asana
Step 2: Connect your organization’s Asana account to your Okta account
To use SCIM provisioning, you'll need to connect your organization’s Asana account with your Okta account.
Complete the following steps in Asana
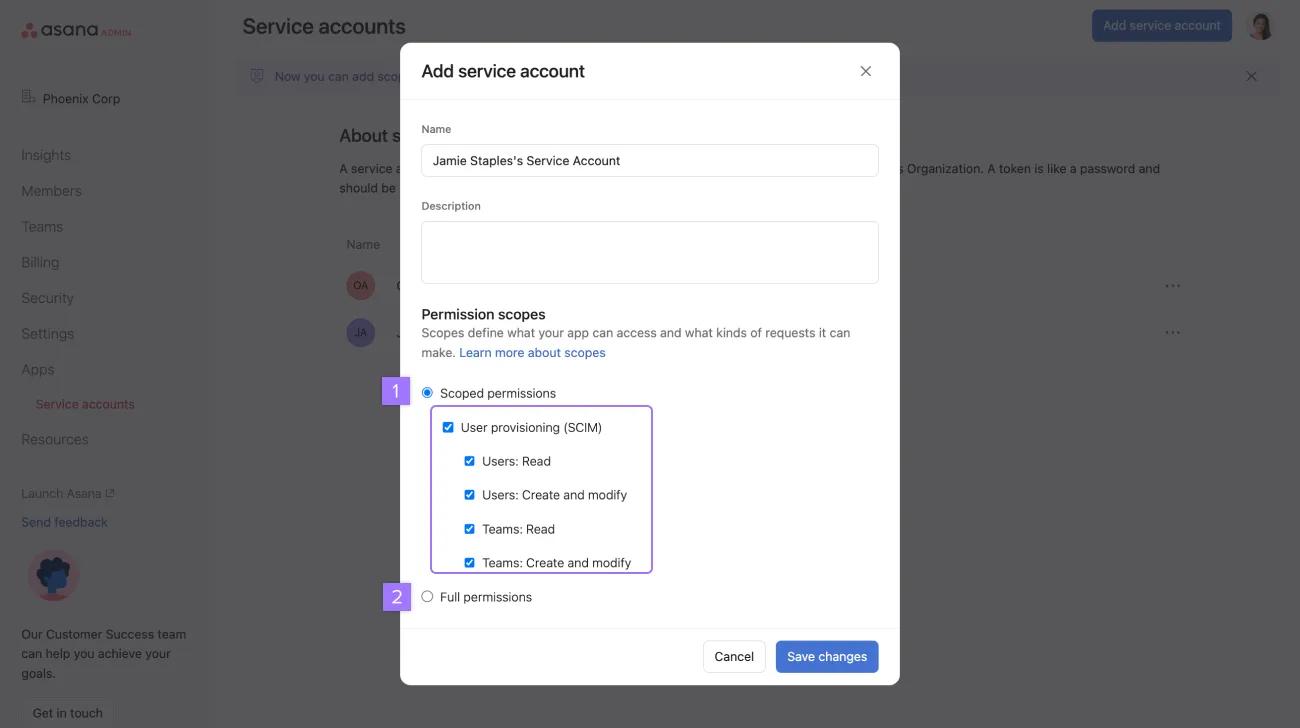
Login to a super admin account on Asana, and navigate to the admin console menu by clicking on your profile picture in the top right, and clicking Admin console. Navigate to the Apps tab and click Add service account.
From Permissions scopes, choose Scoped permissions, tick the User provisioning (SCIM) box and ensure all permissions below are checked. Scoped permissions only provide the API token access to user provisioning (SCIM). By limiting access you’re reducing security risks associated with the API token’s usage.
Note
If you don’t want Okta to push groups to Asana teams, rename teams, or modify teams, then uncheck the team-related permissions.
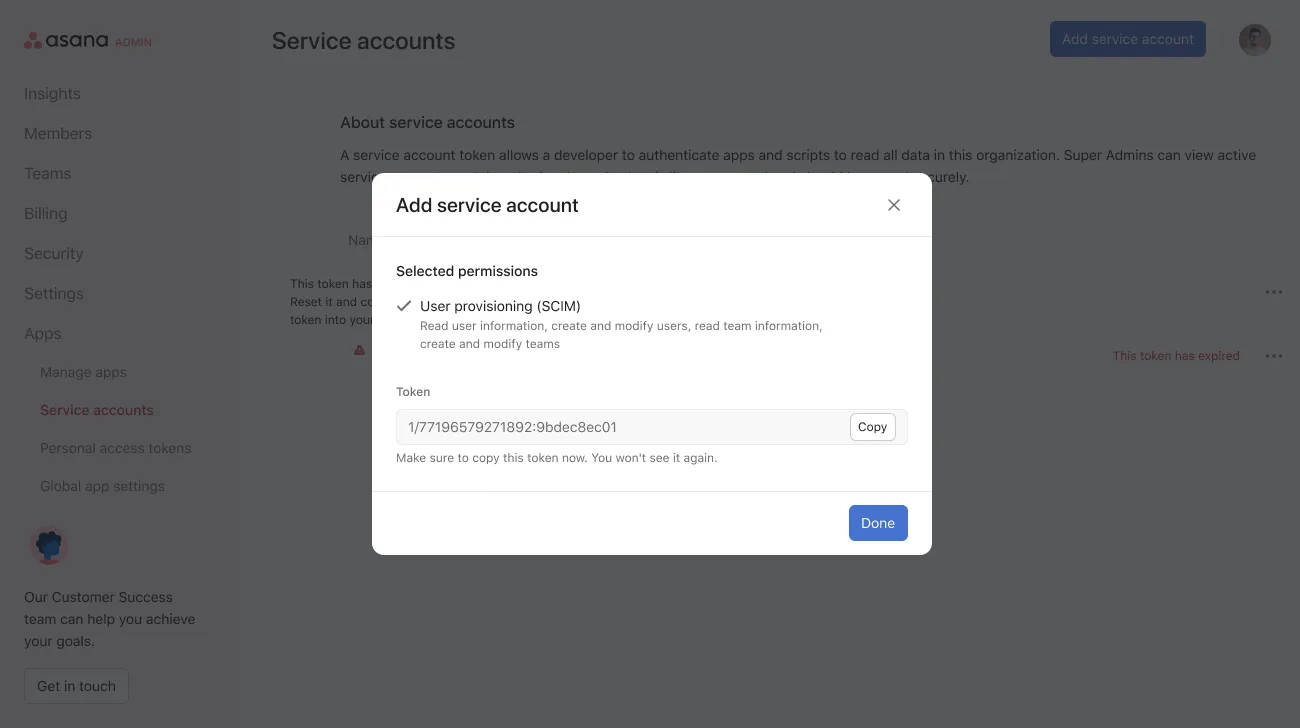
Adding a service account will generate an API token, that you can use in the Provisioning tab in the Asana app within Okta.
Complete the following steps in Okta
Login to your Okta admin portal and under the Applications tab, navigate to the Asana application.
To connect Asana to your Okta account:
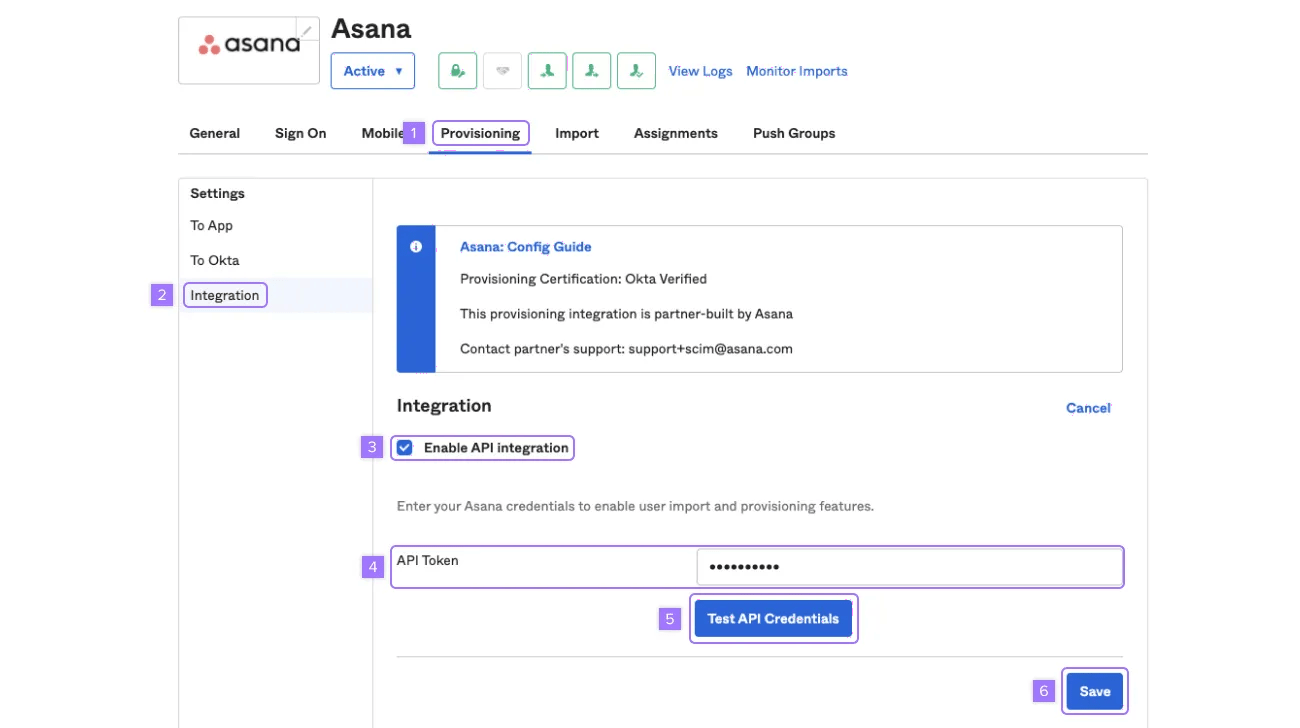
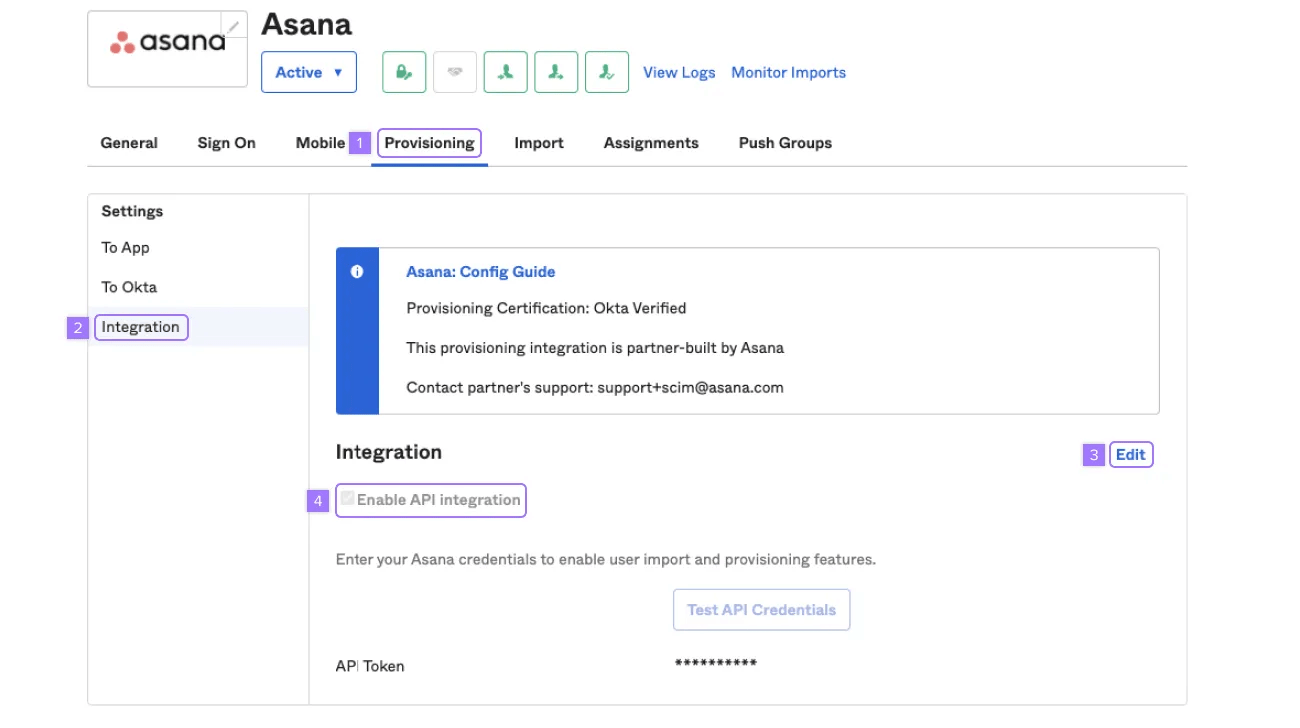
- Click on Provisioning
- Under the Settings sidebar click on Integration and click on Configure API Integration
- Check the Enable API integration box
- In the API Token field, enter the token you received in your service accounts tab in Asana.
- Click on Test API Credentials to verify the token is set up correctly
- Click Save to save your configuration in Okta
Step 3: Set up provisioning options for Asana in your Okta account
In Okta
Under the applications tab, navigate to the Asana app and click on Provisioning.
To set up provisioning options:
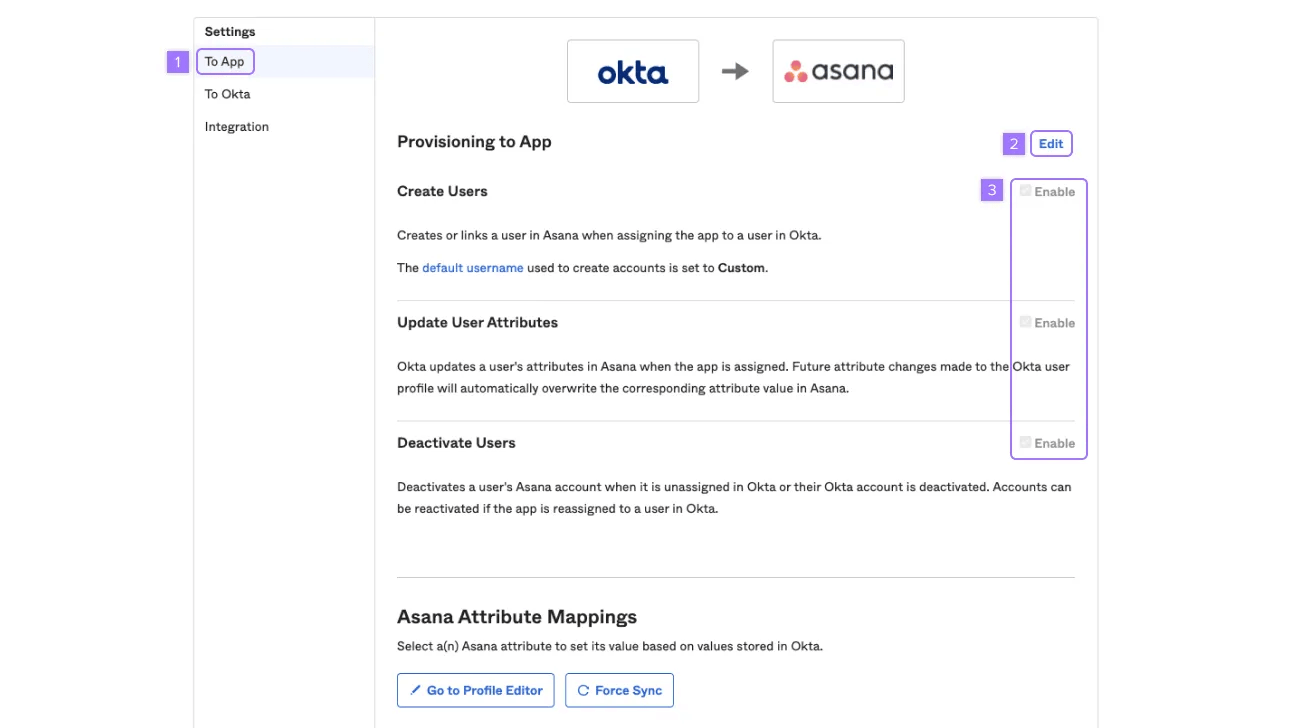
- Under the Settings sidebar click on To App
- Click on Edit at the top right
- Enable user provisioning options for the Asana app and click Save to apply integration settings
Note
We recommend you enable Create Users, Update User Attributes, and Deactivate Users.
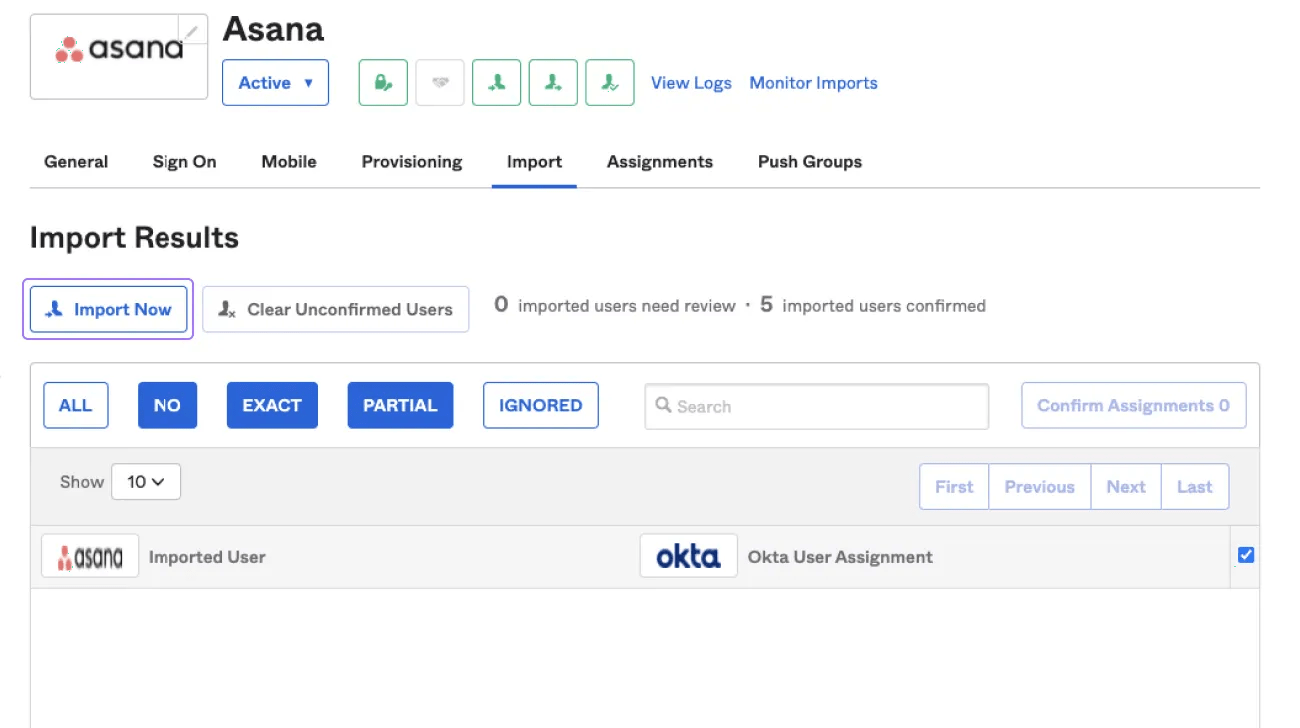
Use the
Import tab to reconcile the users detected in Asana with the users you have in your Okta domain. Import any Asana users that you’d like to create or assign Okta accounts for.
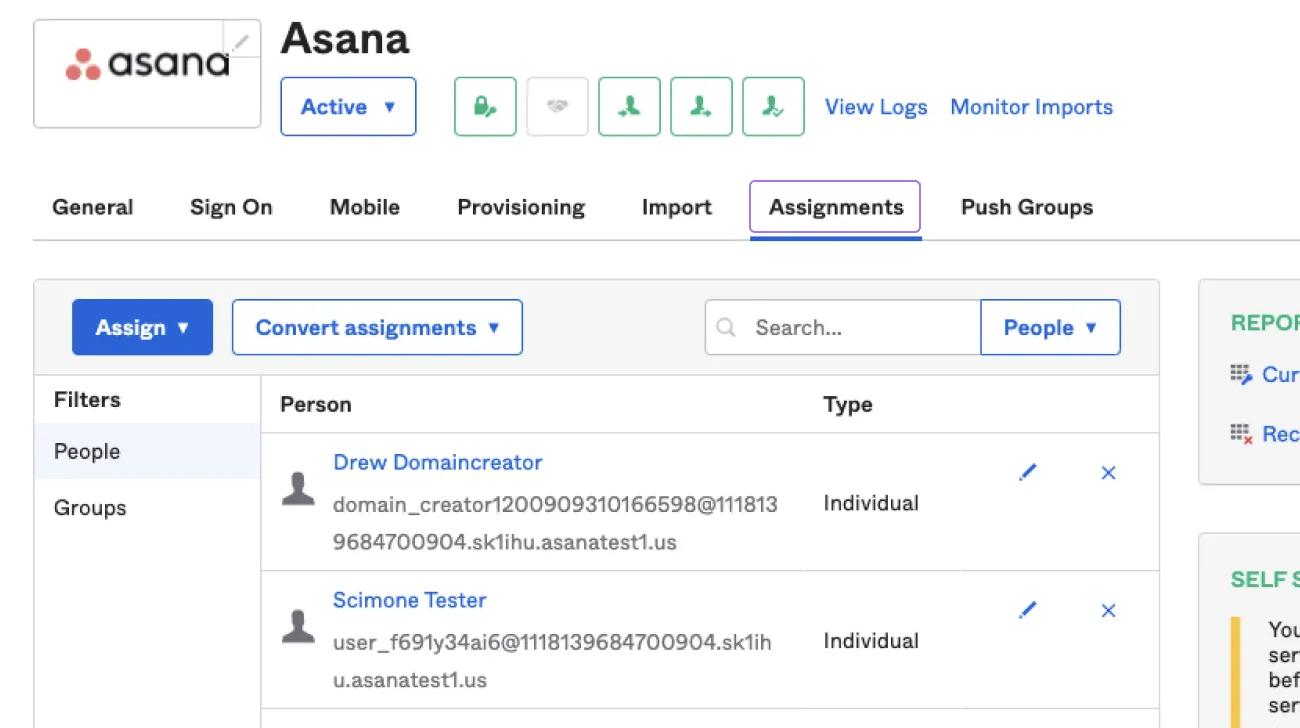
Administer the users assigned to Asana as you would with SAML using the
Assignments tab. Users will now be automatically kept in sync with the Asana members list.
Step 4: Map provisioned users into teams in Asana
To map Okta groups to Asana teams, you can decide to push new groups into Asana or link groups in Okta to existing teams in Asana. If you’re linking groups, please ensure that the teams you’d like to map them to are already set up inside Asana. Find out more about how to create a team in Asana.
In the Okta admin portal:
- Go to the Asana app and click on Refresh App Groups in the Push Groups tab to update any imports or changes that occurred in Asana. This ensures that all groups from the target app are represented in Okta.
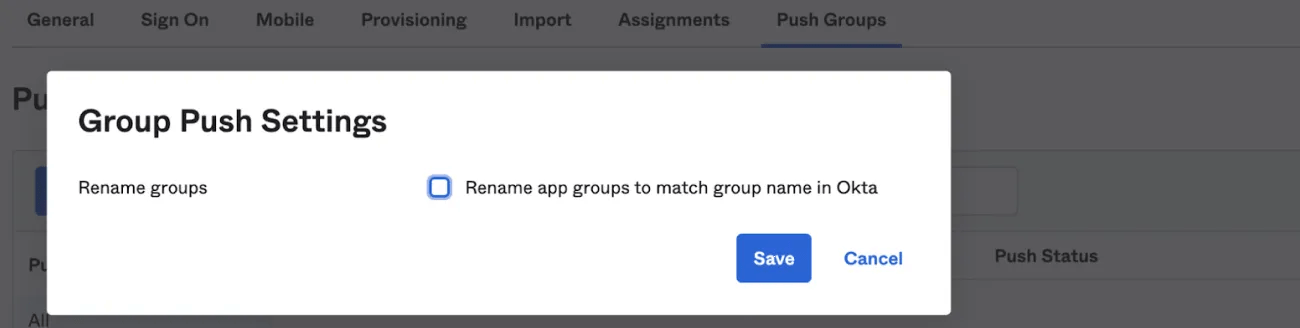
- Click the Action button (Group Push Settings) if you want the ability to rename a group in Asana when linking. We recommend not renaming the app group to avoid any unintended changes to team names in Asana.
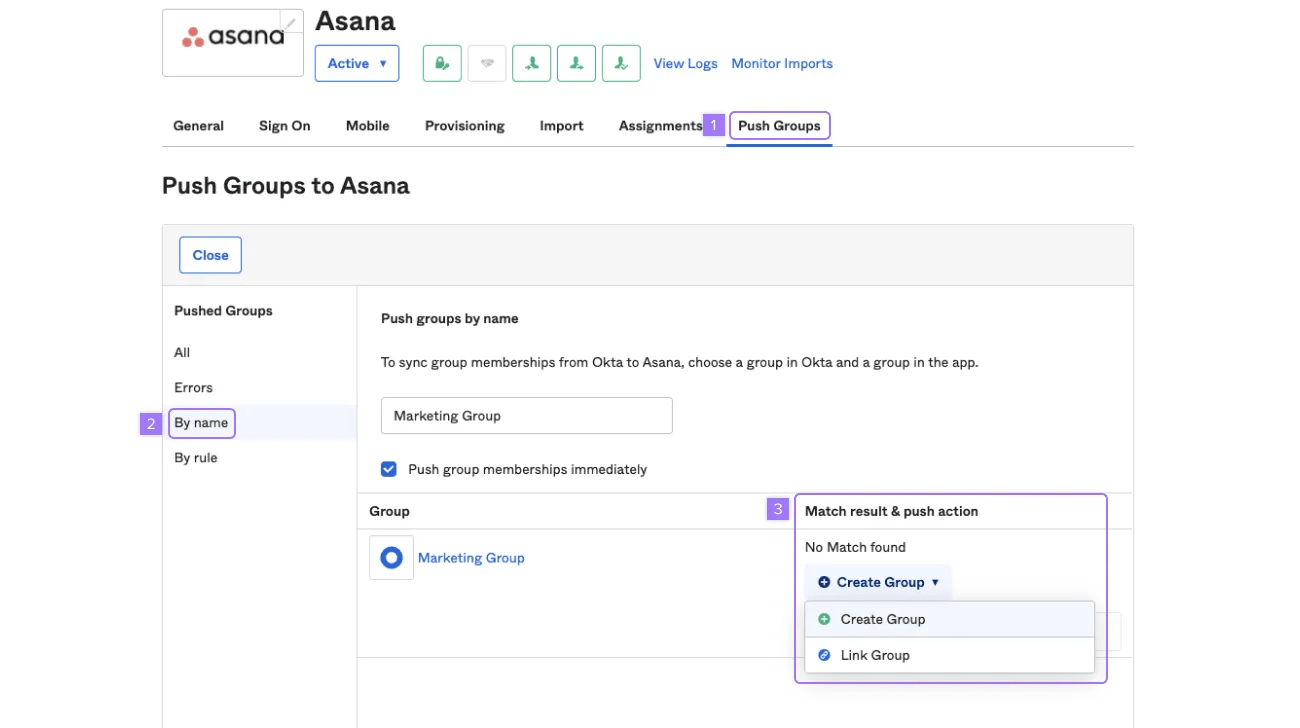
- Click on Push Groups
- Select By name and use a keyword to find the group in Okta
- When the group appears in the table, click the Match results and push action drop-down menu. Choose Link Group if you’re trying to map a group to an existing team. Otherwise, select Create group. Click Save to apply integration settings.
Note
Please note that deletion of teams in Asana from Okta isn’t supported by this integration. Please use the Teams tab in the admin console in Asana to manage and delete teams.
Step 5: Configure attribute mappings for Asana
To configure and map attributes to user profiles in Asana, please follow the following steps.
- Go to the Asana app and click on the Provisioning tab.
- Configure the right options under the Asana Attribute Mappings section.
- Select Create or Create and Update from the choices under the Apply on column.
Look at the list of supported attributes and types here.
Limit which attributes sync to Asana
If you want to stop syncing a specific attribute to Asana, remove or unmap that attribute in your identity provider. For example, in Okta, you can update the mapping under Provisioning and Attribute Mappings. Asana does not provide a separate control to exclude individual SCIM attributes on the Asana side.
Note
Removing an attribute mapping stops future syncs of that data. It does not delete data that has already synced to Asana.
Step 6: How to update your current Asana - Okta integration
If you’re currently using the Asana - Okta integration, please use the following steps to enable/access the latest updates.
- Click Provisioning
- Click Integration
- Click Edit
- Uncheck the Enable API integration and click Save
Then, click Edit again, check Enable API integration, enter the API token and click Save. Then, enable provisioning features. After this, you’ll see new attribute updates and integration capabilities reflected in the integration.
- When deprovisioning a user from Asana within Okta, the user will be deleted within Asana (same behavior as if the account were removed within the Asana UI). Please exercise caution when deactivating users.
- Assigning the Asana app to users in Okta will create that user profile within Asana, and trigger the same behavior as if they had been invited to Asana. It's important to note this when informing users that they have been assigned the Asana app.
- Changing the Okta username at the Asana application level (i.e. username override) will trigger a deactivate call on the previous username to be issued against Asana. If this previous username was associated with an active Asana account, it will be deleted. Please exercise caution when applying application level overrides.
- When creating or updating users, the users must have emails which match the domain of the organization in Asana (e.g. you can only provision users with an @asana.com email domain to the asana.com Asana organization). Organization guests will continue to be provisioned and deprovisioned, and managed within the admin console's Members tab only.
- A user’s formattedName must match givenName and familyName. When mismatch is found, formattedName takes precedence and could revert/override the givenName and familyName field value changes. So during attribute mapping or manual app user profile updates, please ensure that the formatted name’s value matches the string combination of givenName and familyName during profile push. For example:
- givenName = new firstname
- familyName = new lastname
- formattedName = new firstname new lastname
OneLogin
Learn how to configure SCIM provisioning using OneLogin here.
Note
To enable SCIM functionality with non-natively integrated IdPs please check the necessary accepted attributes here.
SCIM deprovisioning customization
The super admin of an organization can choose how a user’s tasks are handled after they have been deprovisioned via SCIM or the API.
When a user is deprovisioned from Asana, a Previously assigned tasks project containing all of the public tasks that were assigned to the user is created.
An organization-wide setting in the admin console allows you to choose a super admin to become the owner of this project. The project owner can reassign the tasks as they see fit.
To assign the project owner role to a super admin:
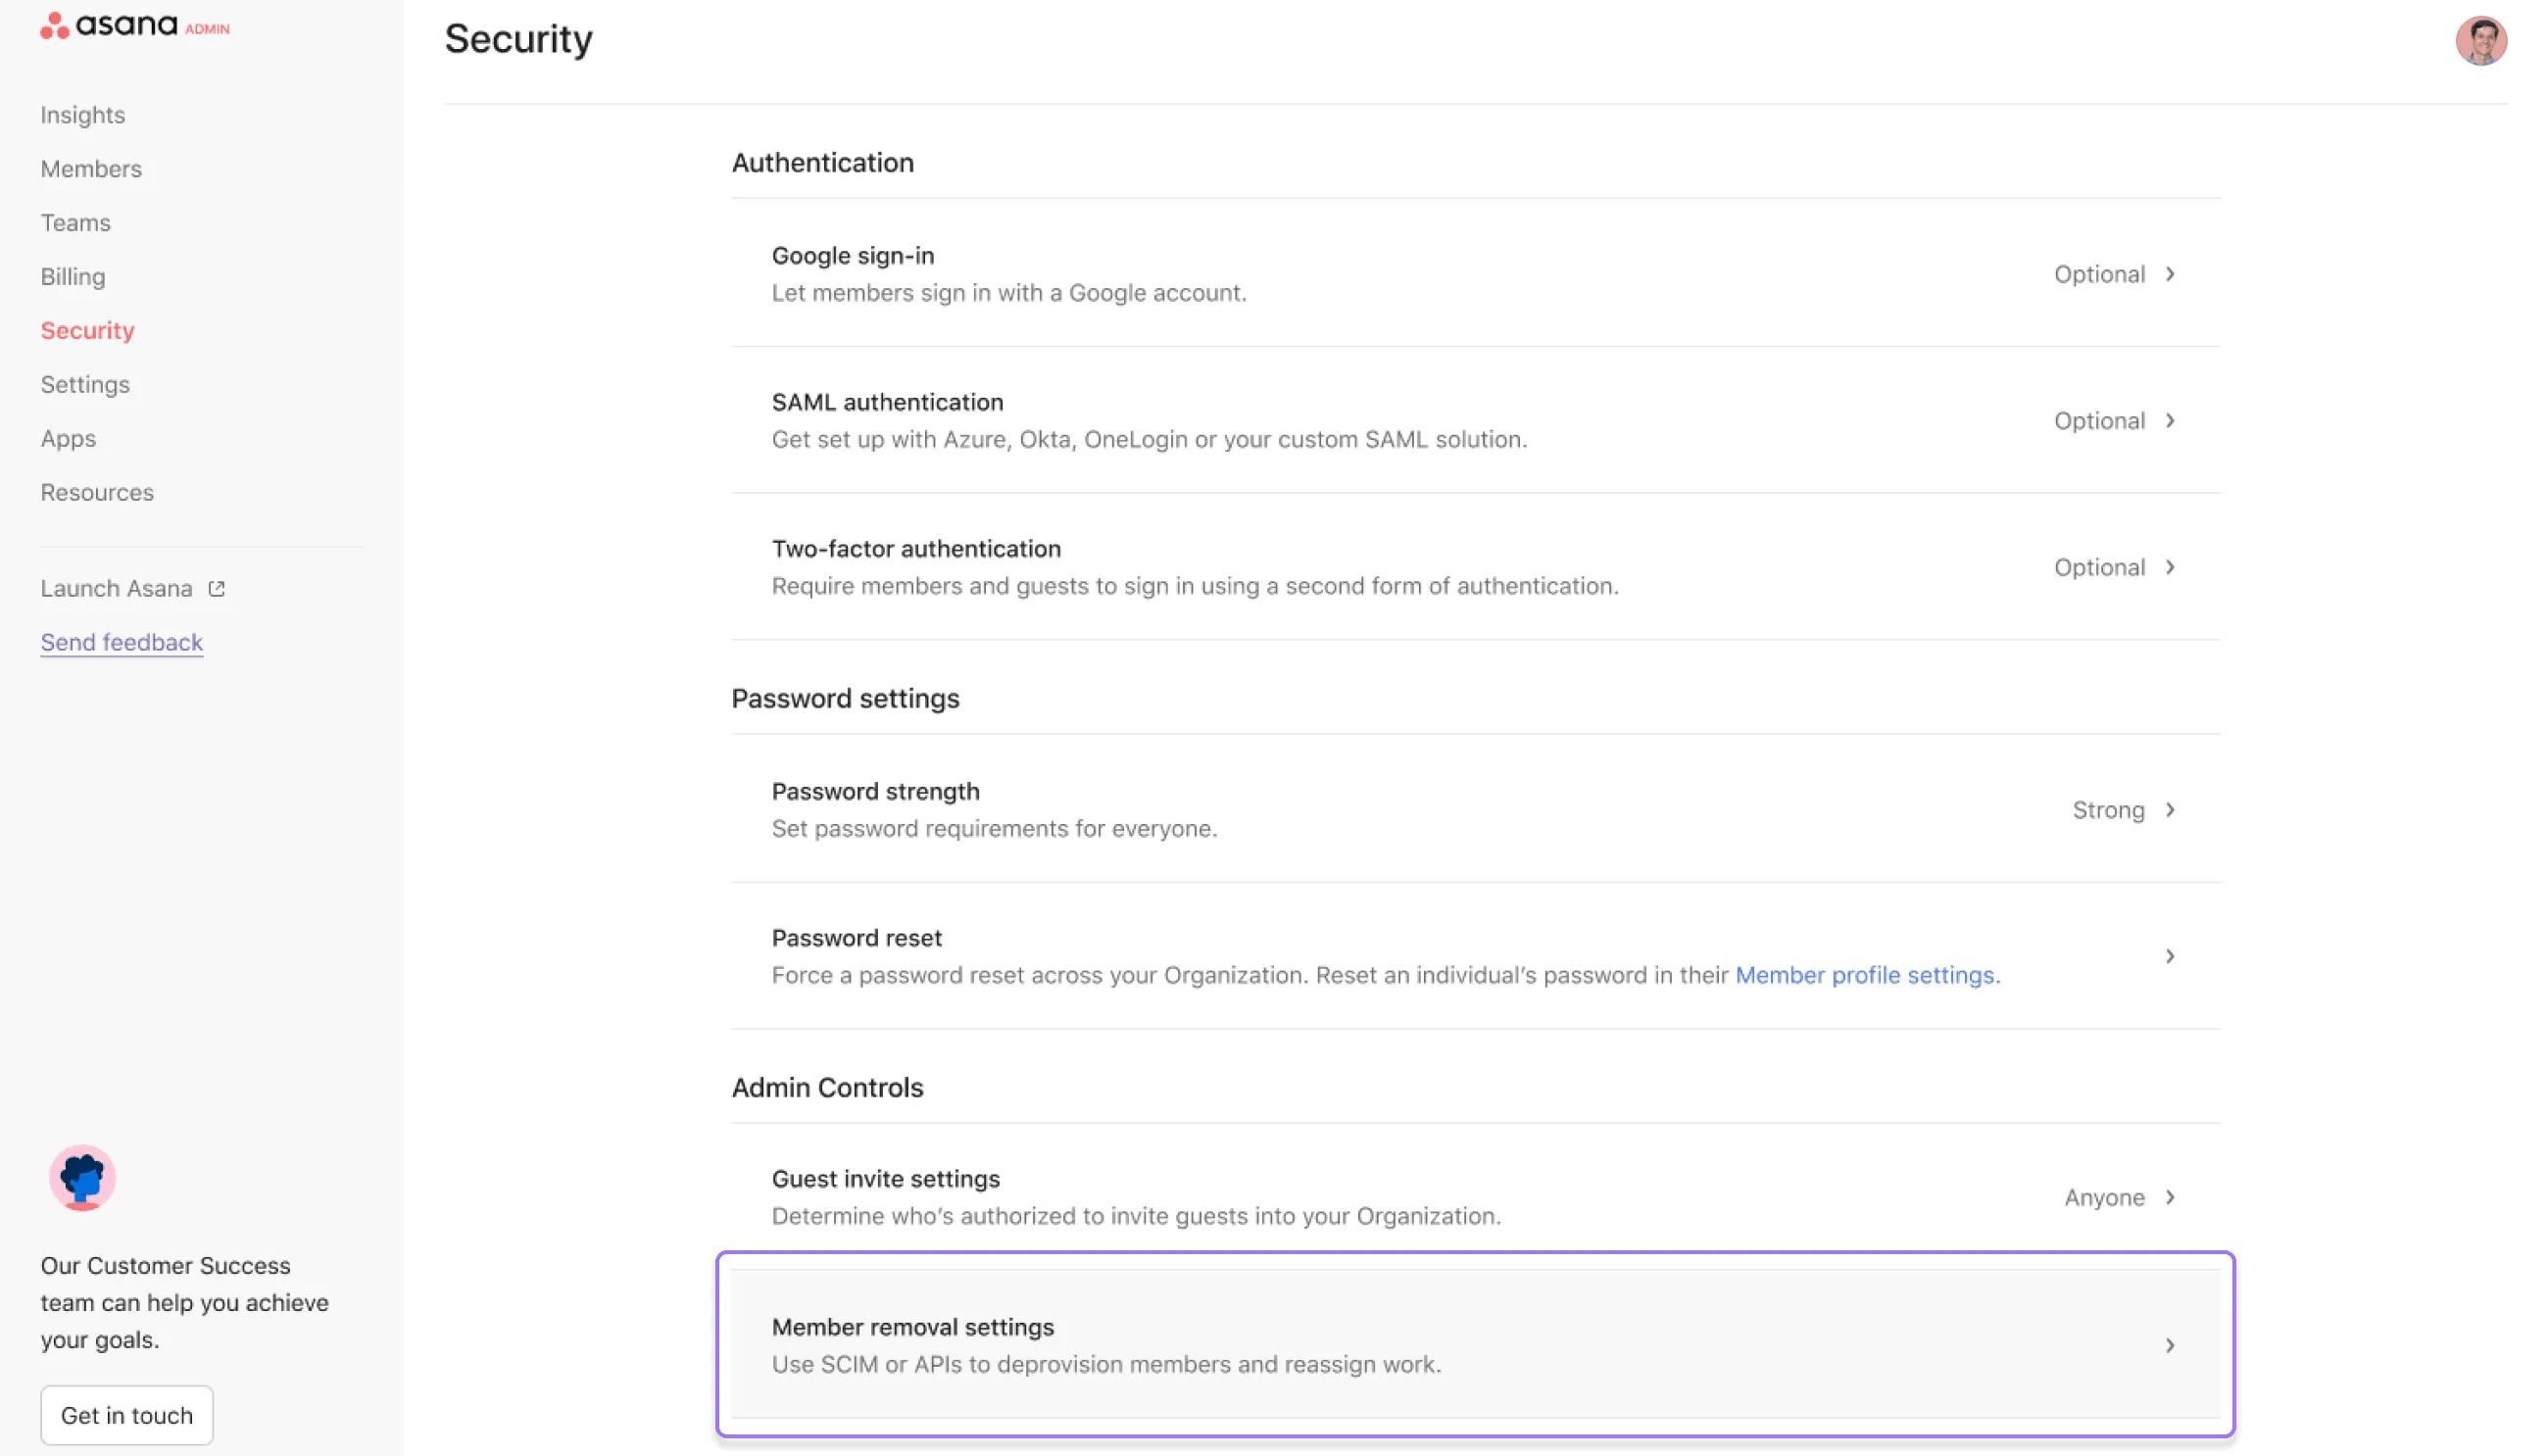
Navigate to
Member removal settings in the
Security tab of the
Admin Console.
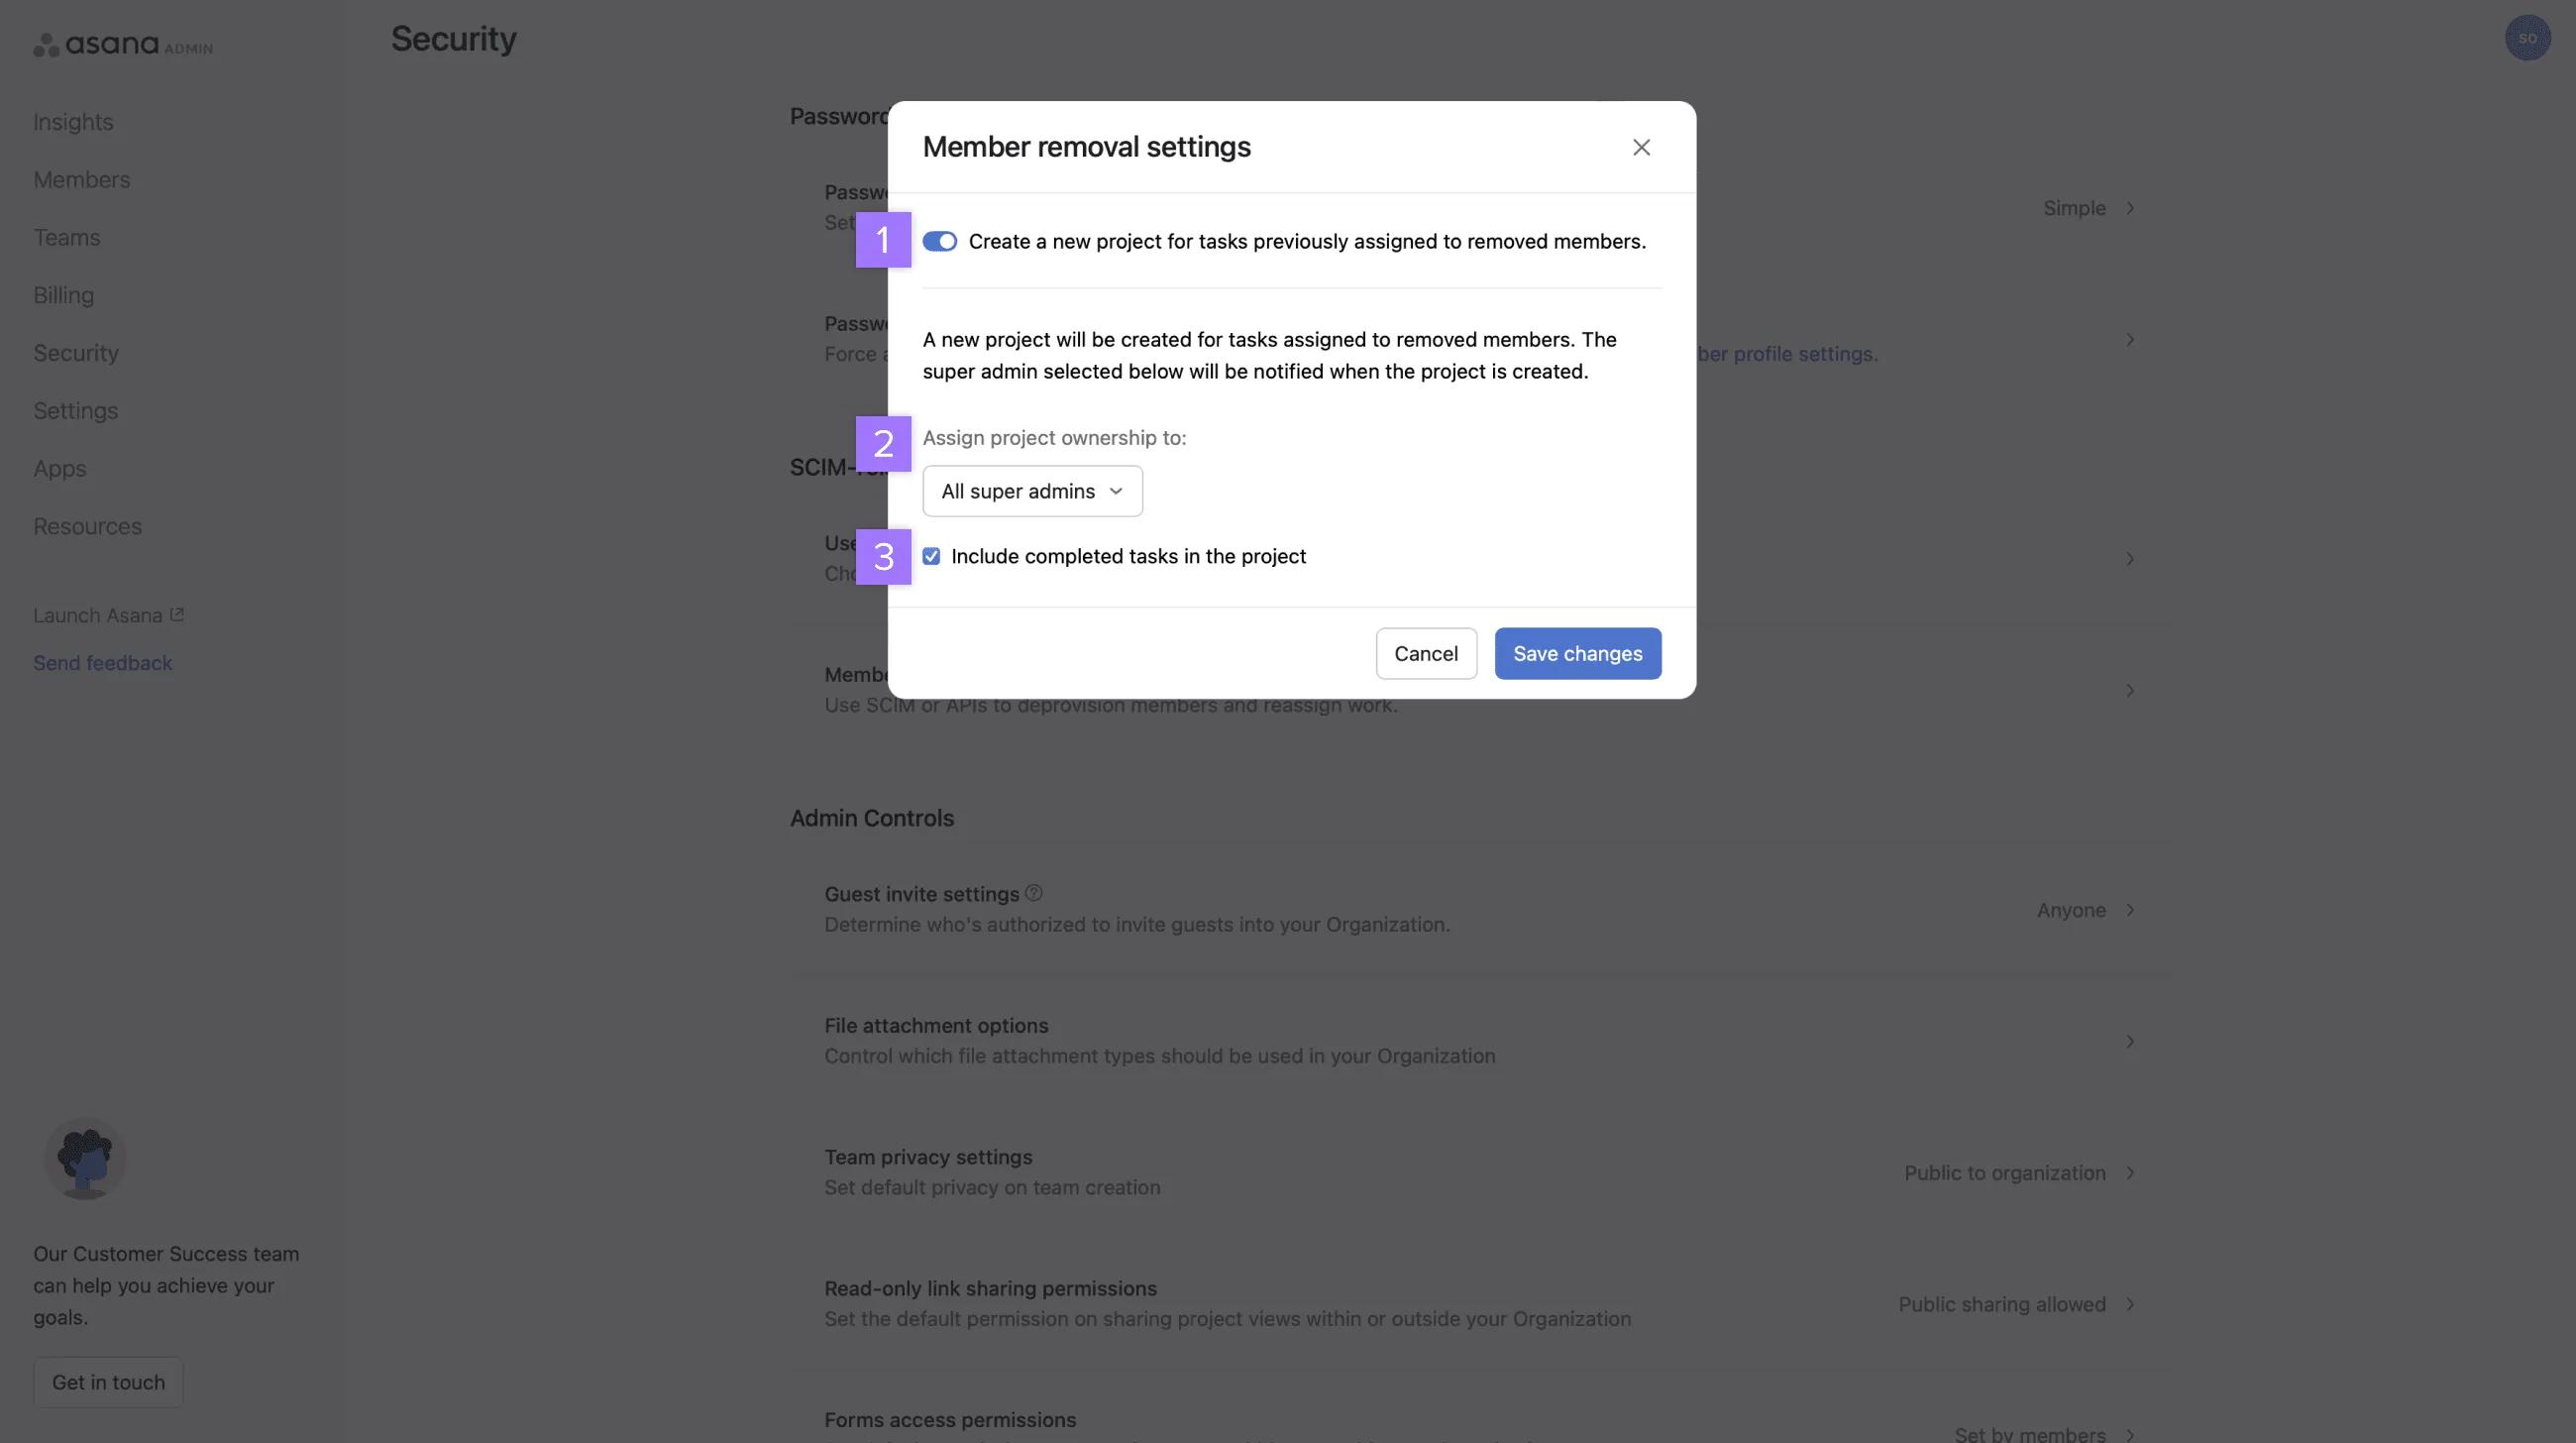
- Toggle on the option Create a new project for tasks previously assigned to removed members.
- Choose All super admins or a specific super admin from the drop-down menu.
- Check the box if you wish to include completed tasks in the project.
Note
These customization settings will only apply when the user is removed from the organization via SCIM or API with a Service Account token.
You will find more information on user deprovisioning in our FAQ article.