Splunk + Asana

Overview

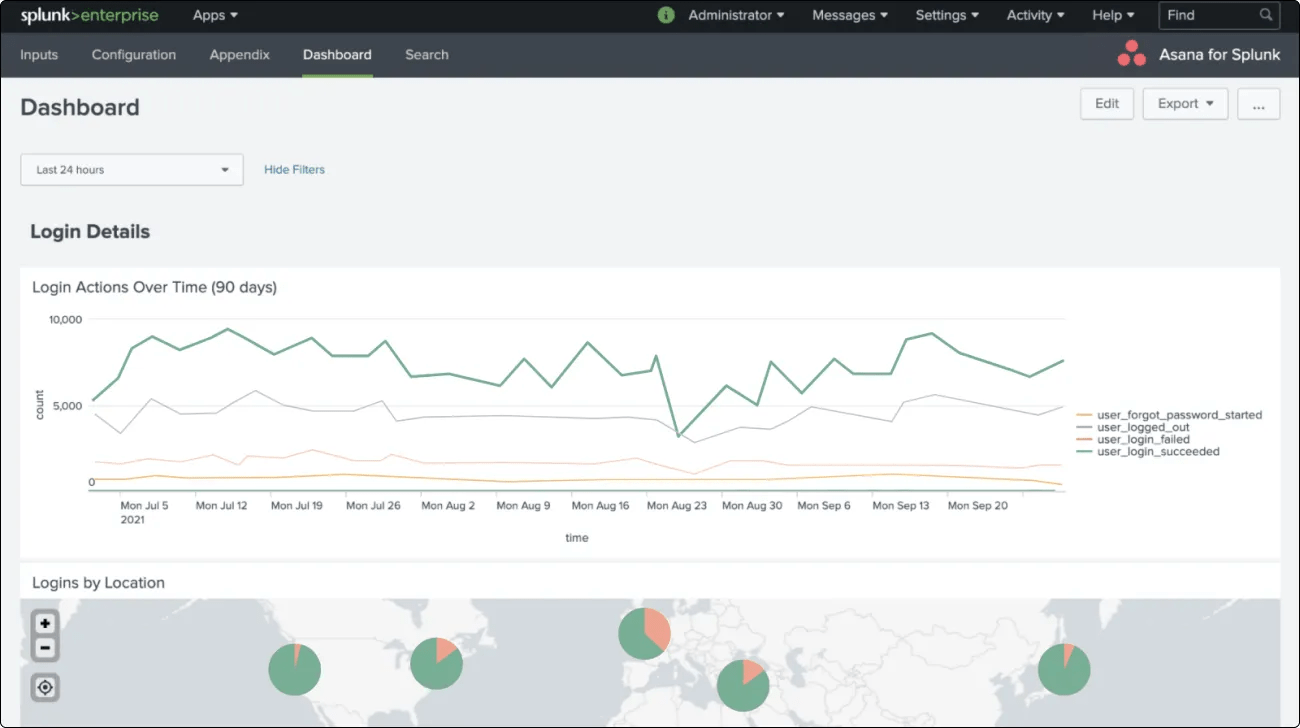
The Asana for Splunk integration is available for Splunk Enterprise and Splunk Cloud and is compatible with Splunk’s Common Information Model (CIM). The integration enables super admins to leverage Asana’s Audit Log API with Splunk.

With Splunk for Asana, super admins can utilize Splunk’s leading Security Information and Event Management (SIEM) suite to investigate, monitor, and analyze suspicious activity. For example, if an employee in one region suddenly attempts multiple logins in a foreign location, admins can use timely customized alerts to take action.

Asana for Splunk facilitates ingestion of all audit logs available through Asana’s Audit Log API.

Admissions

Splunk

Once in Splunk, super admins will have the ability to:

  1. Configure "alerting" to accommodate your organization’s risk posture
  2. Visualize aggregations of key security-and-compliance events in Asana using Asana’s pre-built dashboard
  3. Use Asana’s audit logs in tandem with Splunk solutions like Security Essentials

Configuration

To enable Asana for Splunk, you will need to be a super admin of an Enterprise organization in Asana and an admin of your Splunk instance. Visit the Splunkbase Website to begin installation.

Set up

To set-up the Asana for Splunk application, follow these steps:

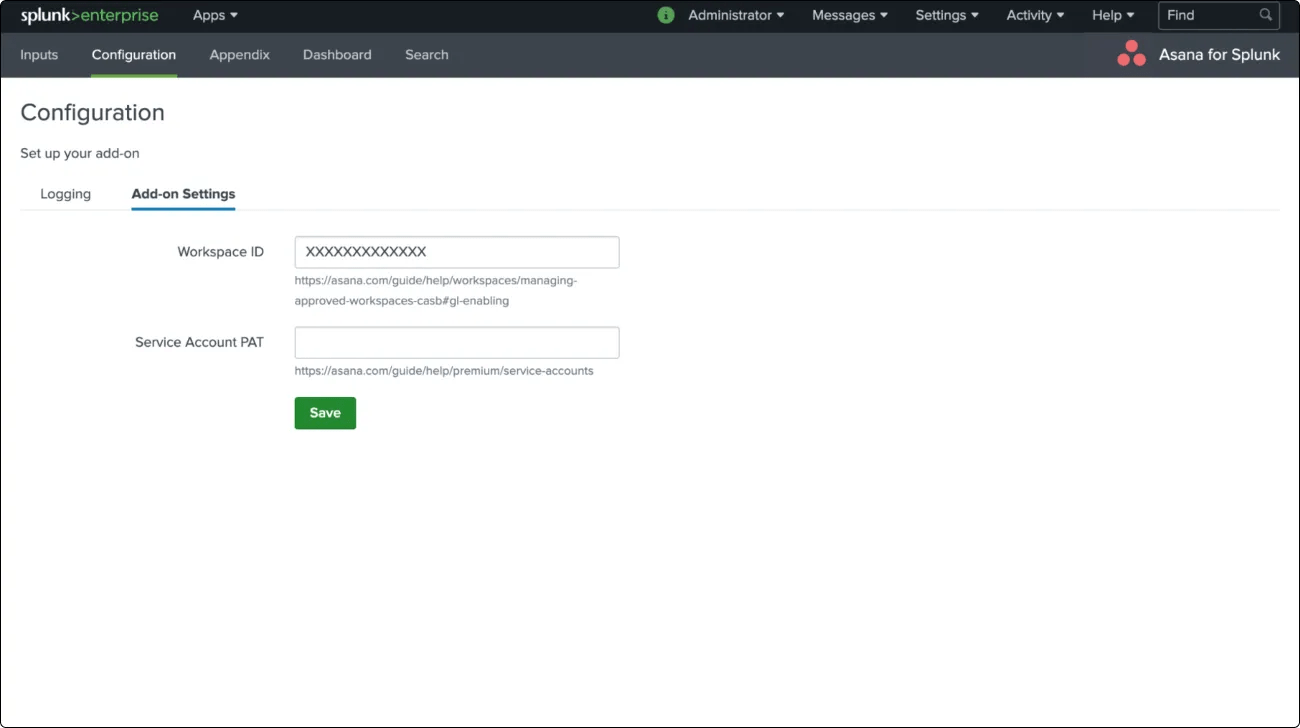
You’ll need the generated key to grant Splunk access to Asana.

  1. Visit the “Asana for Splunk" application on Splunkbase to begin the installation process and add the application.
  2. In Asana’s admin console, create a Service Account and copy the Domain ID from the settings tab. Enter these values on the Configuration page.
  3. Navigate to the input step, and enter an ingestion interval (in seconds) between 30 seconds and five minutes.
  4. On the same page, enter a backfill range (in number of days); if you leave this blank, we’ll default your installation to 30 days of backfill. Asana stores logs for 90 days after capture. You will also need to pick an index for your events.
  5. Depending on the period of backfill you select, full data ingestion may take several hours to appear.
  6. Finally, set up your index macro. This is accessed by navigating to Settings > Advanced Search > Search Macros. From there, you’ll click on “asana-index" and edit the description of the macro to be "index=" and save. Your Asana for Splunk dashboard and appendix will begin to populate after you complete this step.

If you have questions, feedback, or need further support, please contact the Asana Support team.

Like what you see? Get started with a free 30 day Asana trial today. Try for free