Products
AI Platform
Asana Foundations
Company Type
In This Article
Visit our pricing page for more information.
Available on Asana Starter, Advanced, Enterprise, and Enterprise+ tiers, as well as legacy tiers Business, and Legacy Enterprise.
Visit our pricing page for more information.
With conditions and branching, rule creators have more control over exactly how their rules are triggered and the actions they perform. Asana's rule builder provides the flexibility to create simple automations or complex configurations based on your needs.
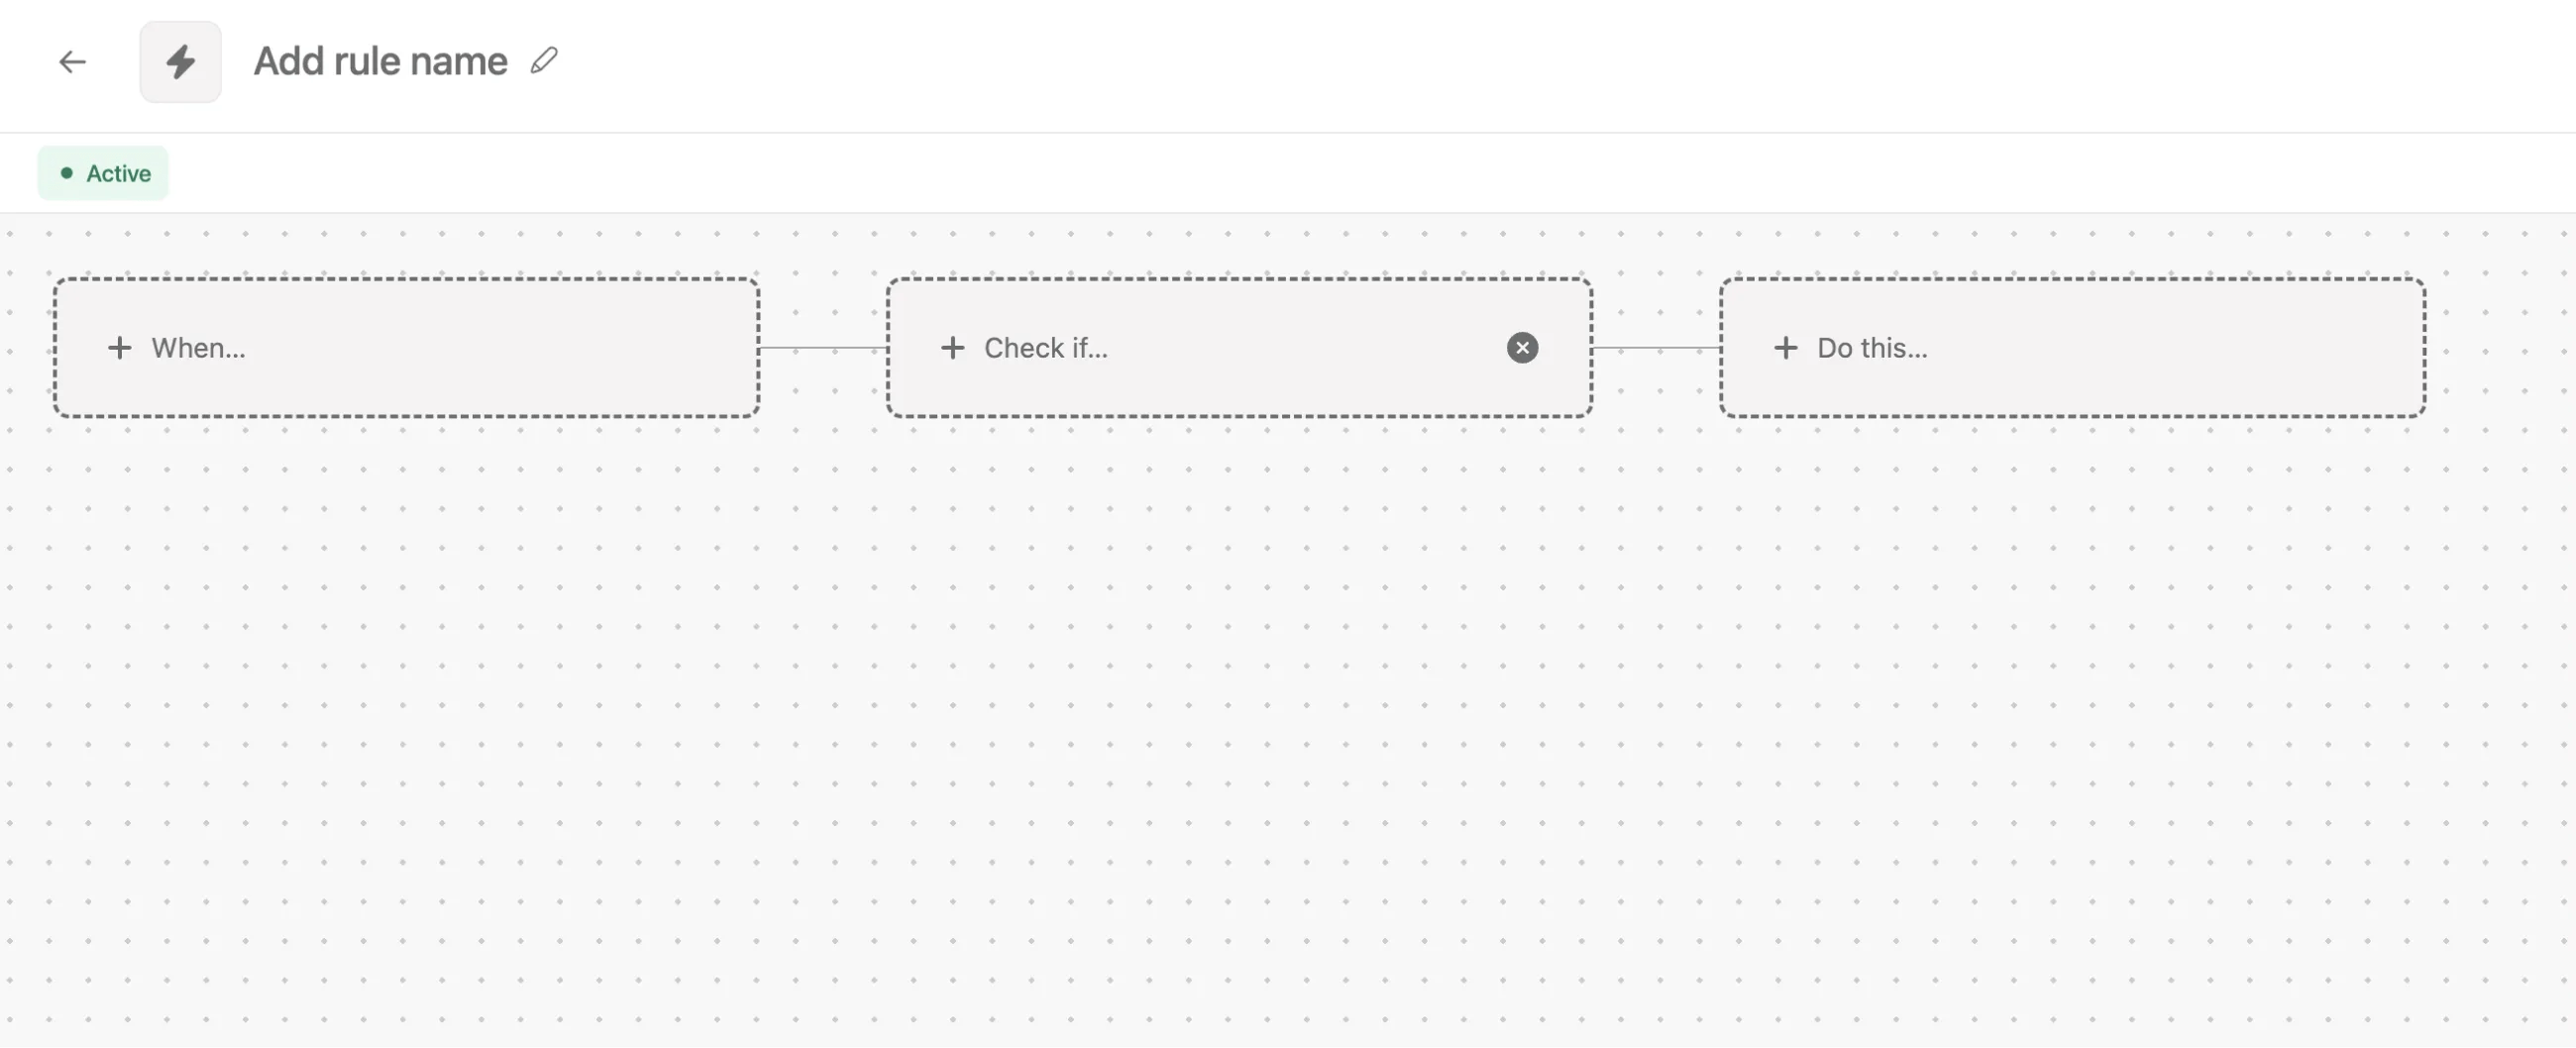
The rule builder introduces 3 card types that you can use to build your rule:
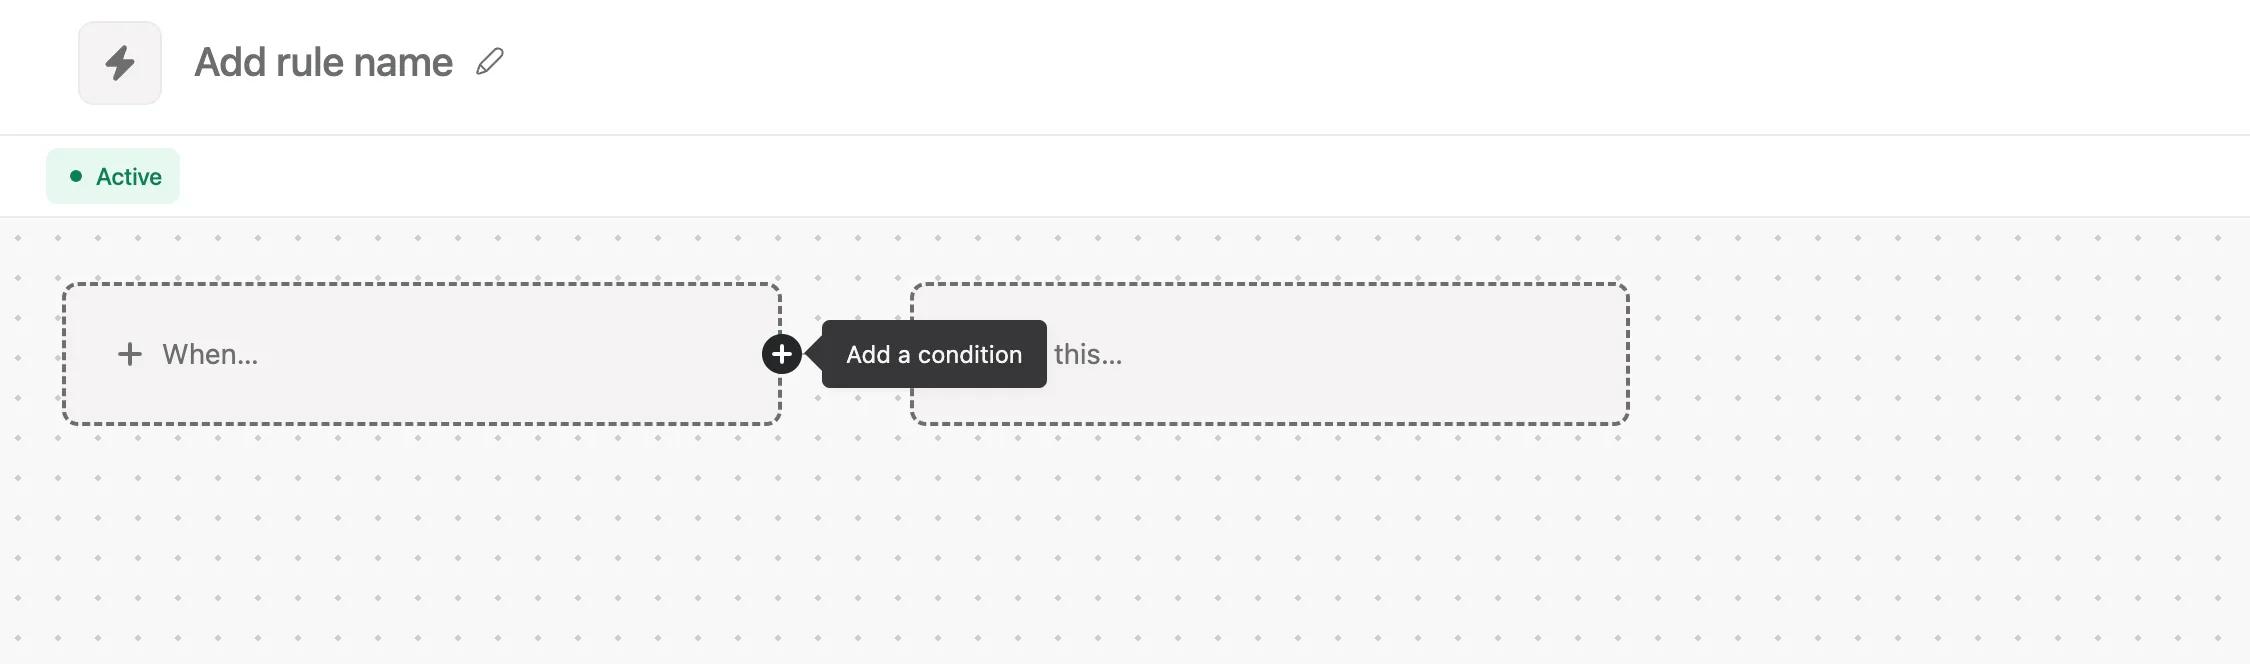
+ When... represents a trigger.
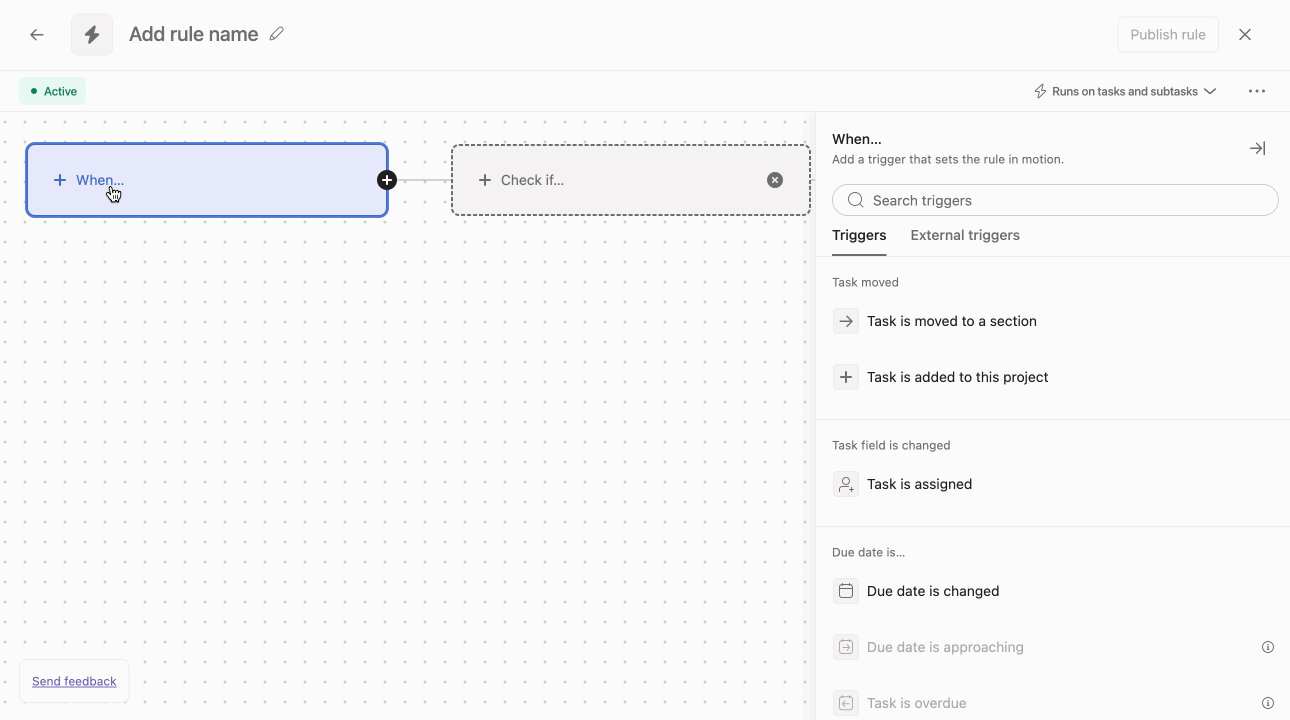
Click + When... to add a trigger that sets the rule in motion.
+ Check if... represents a condition.
Click + Check if... to add a condition that must be met for the rule to run.
+ Do this... represents an action.
Click + Do this... to add an action that occurs as a result of the rule.
Note
To add the Check if card, hover over the When card and click the + button.
In the example below, a condition is included in the rule. Although a trigger and action are set, the rule cannot run until the condition is met.
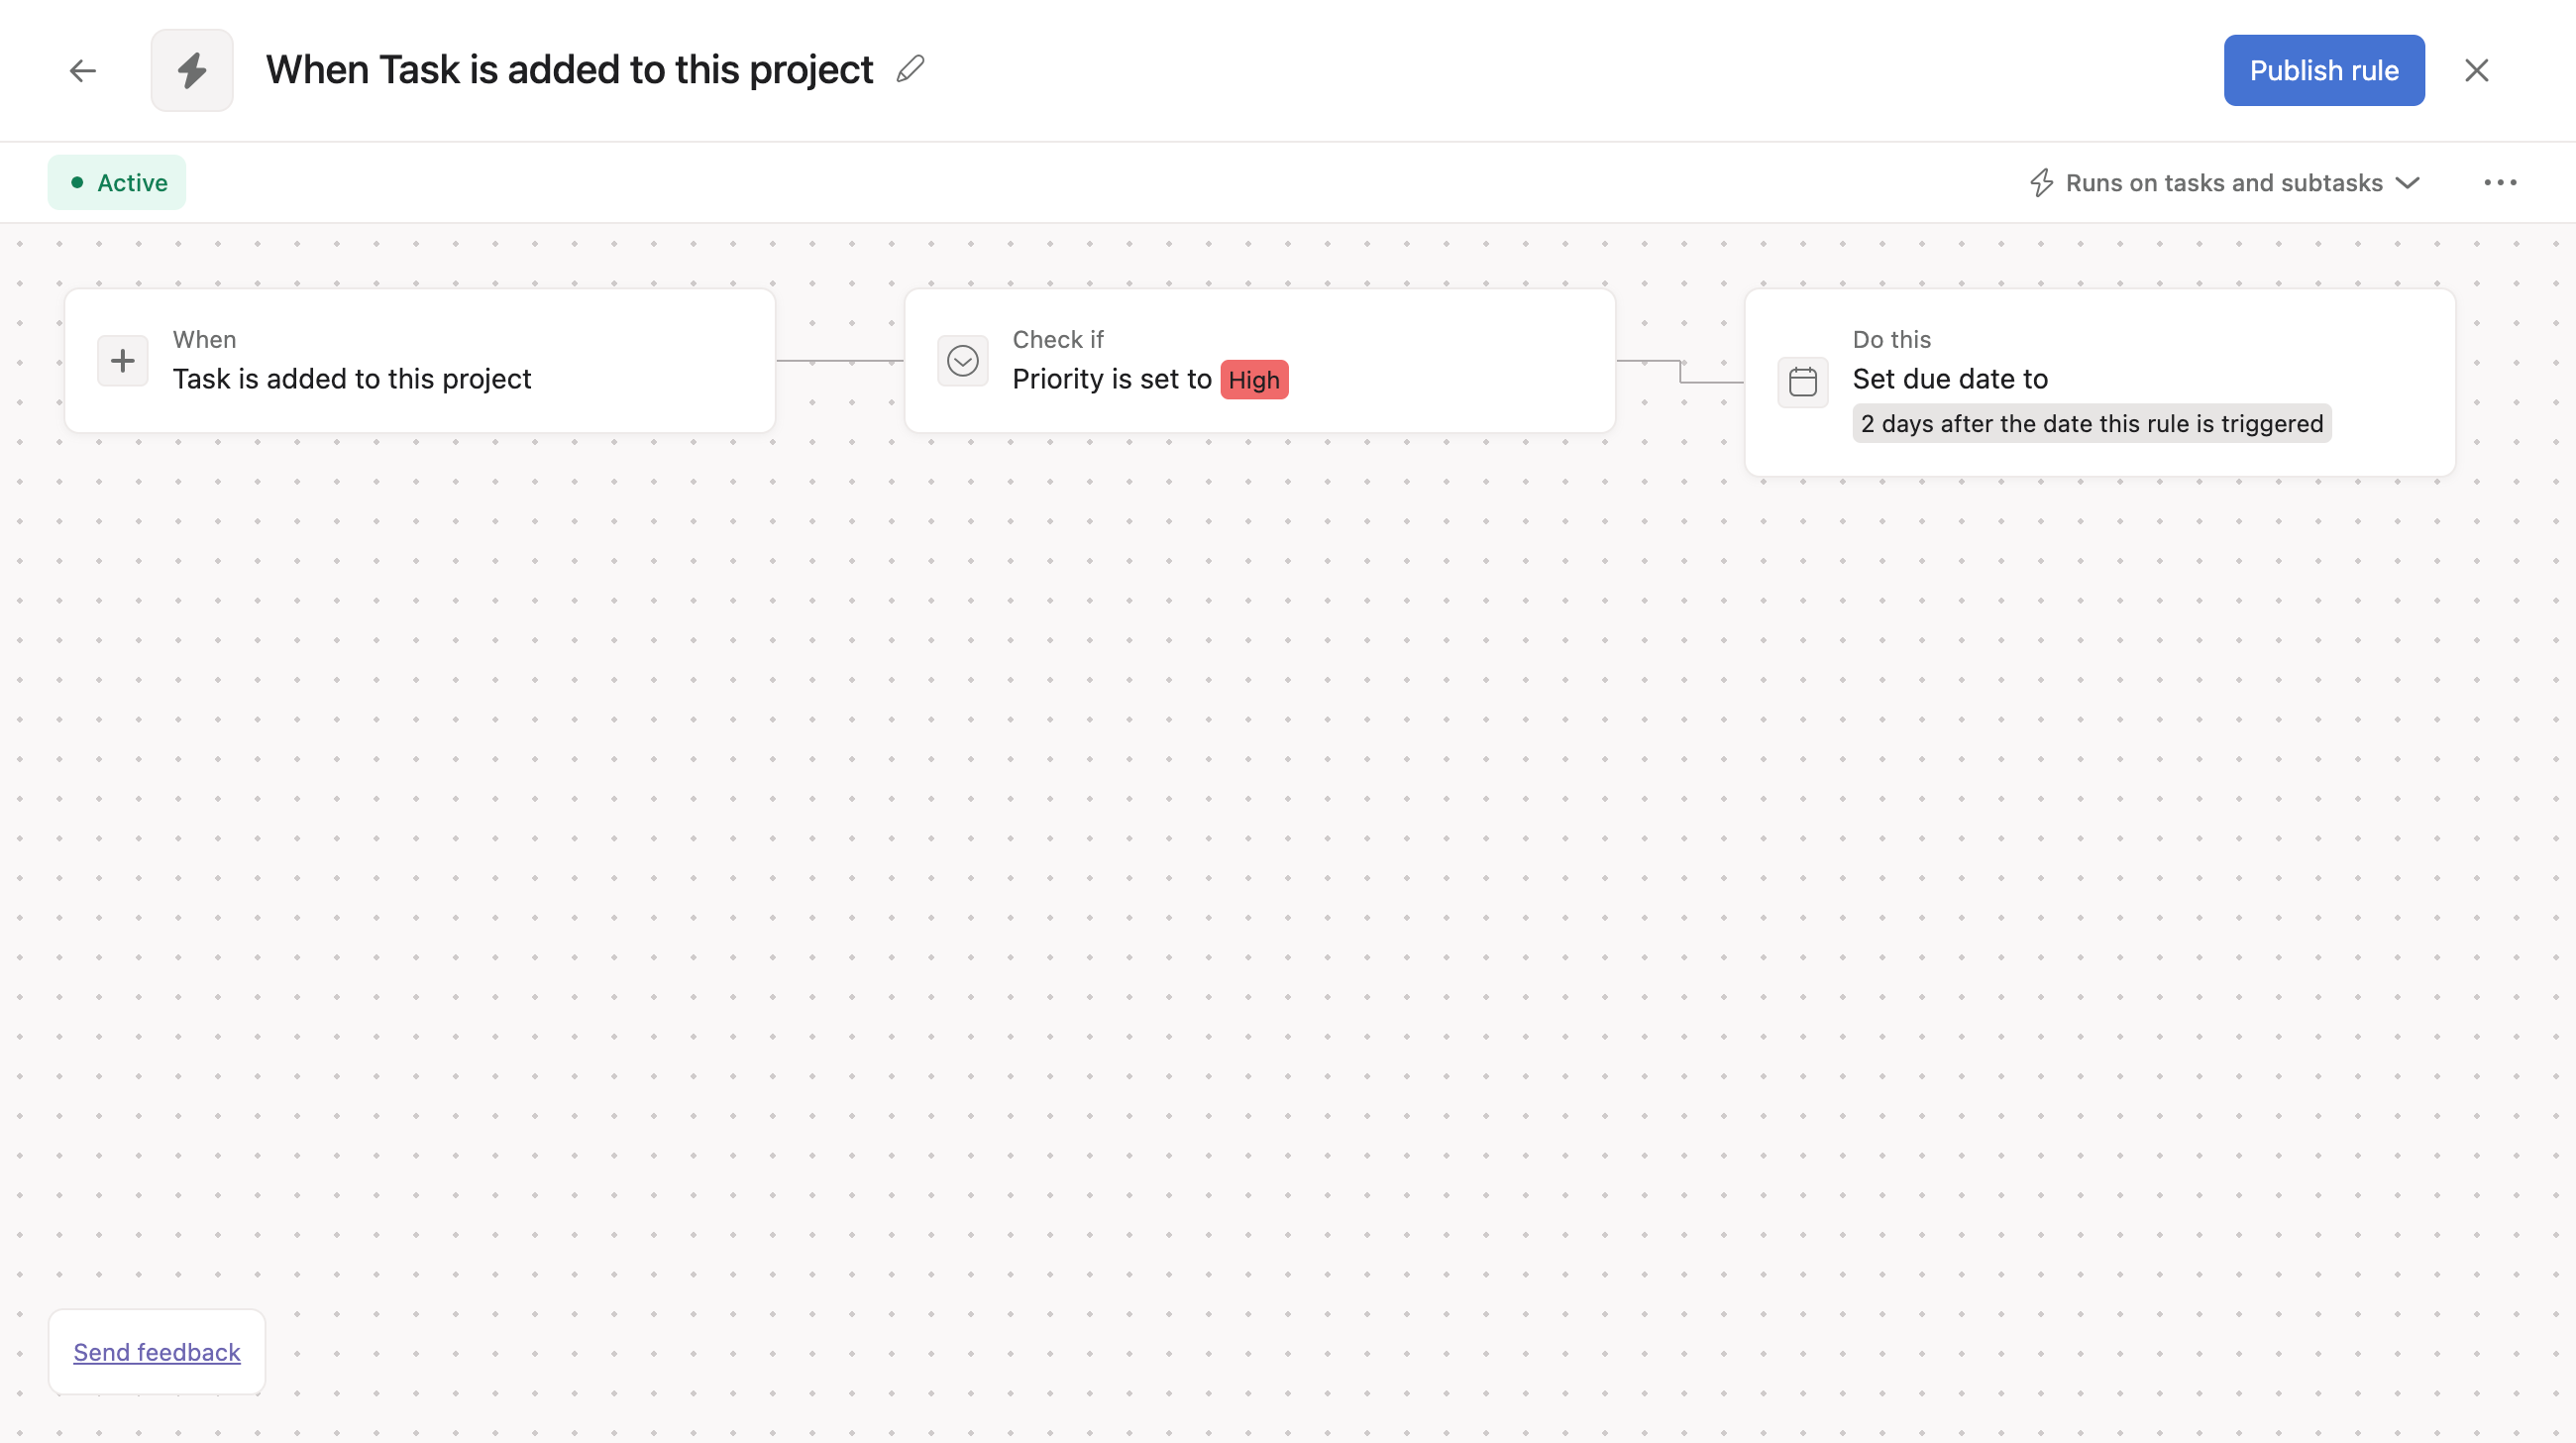
The condition is such that the custom field Priority must be set to the value High. If the trigger is activated by a task being added to the project, and the custom field value satisfies the condition, then the rule may perform the action on the task; in this case, the due date is set for 2 days in the future.
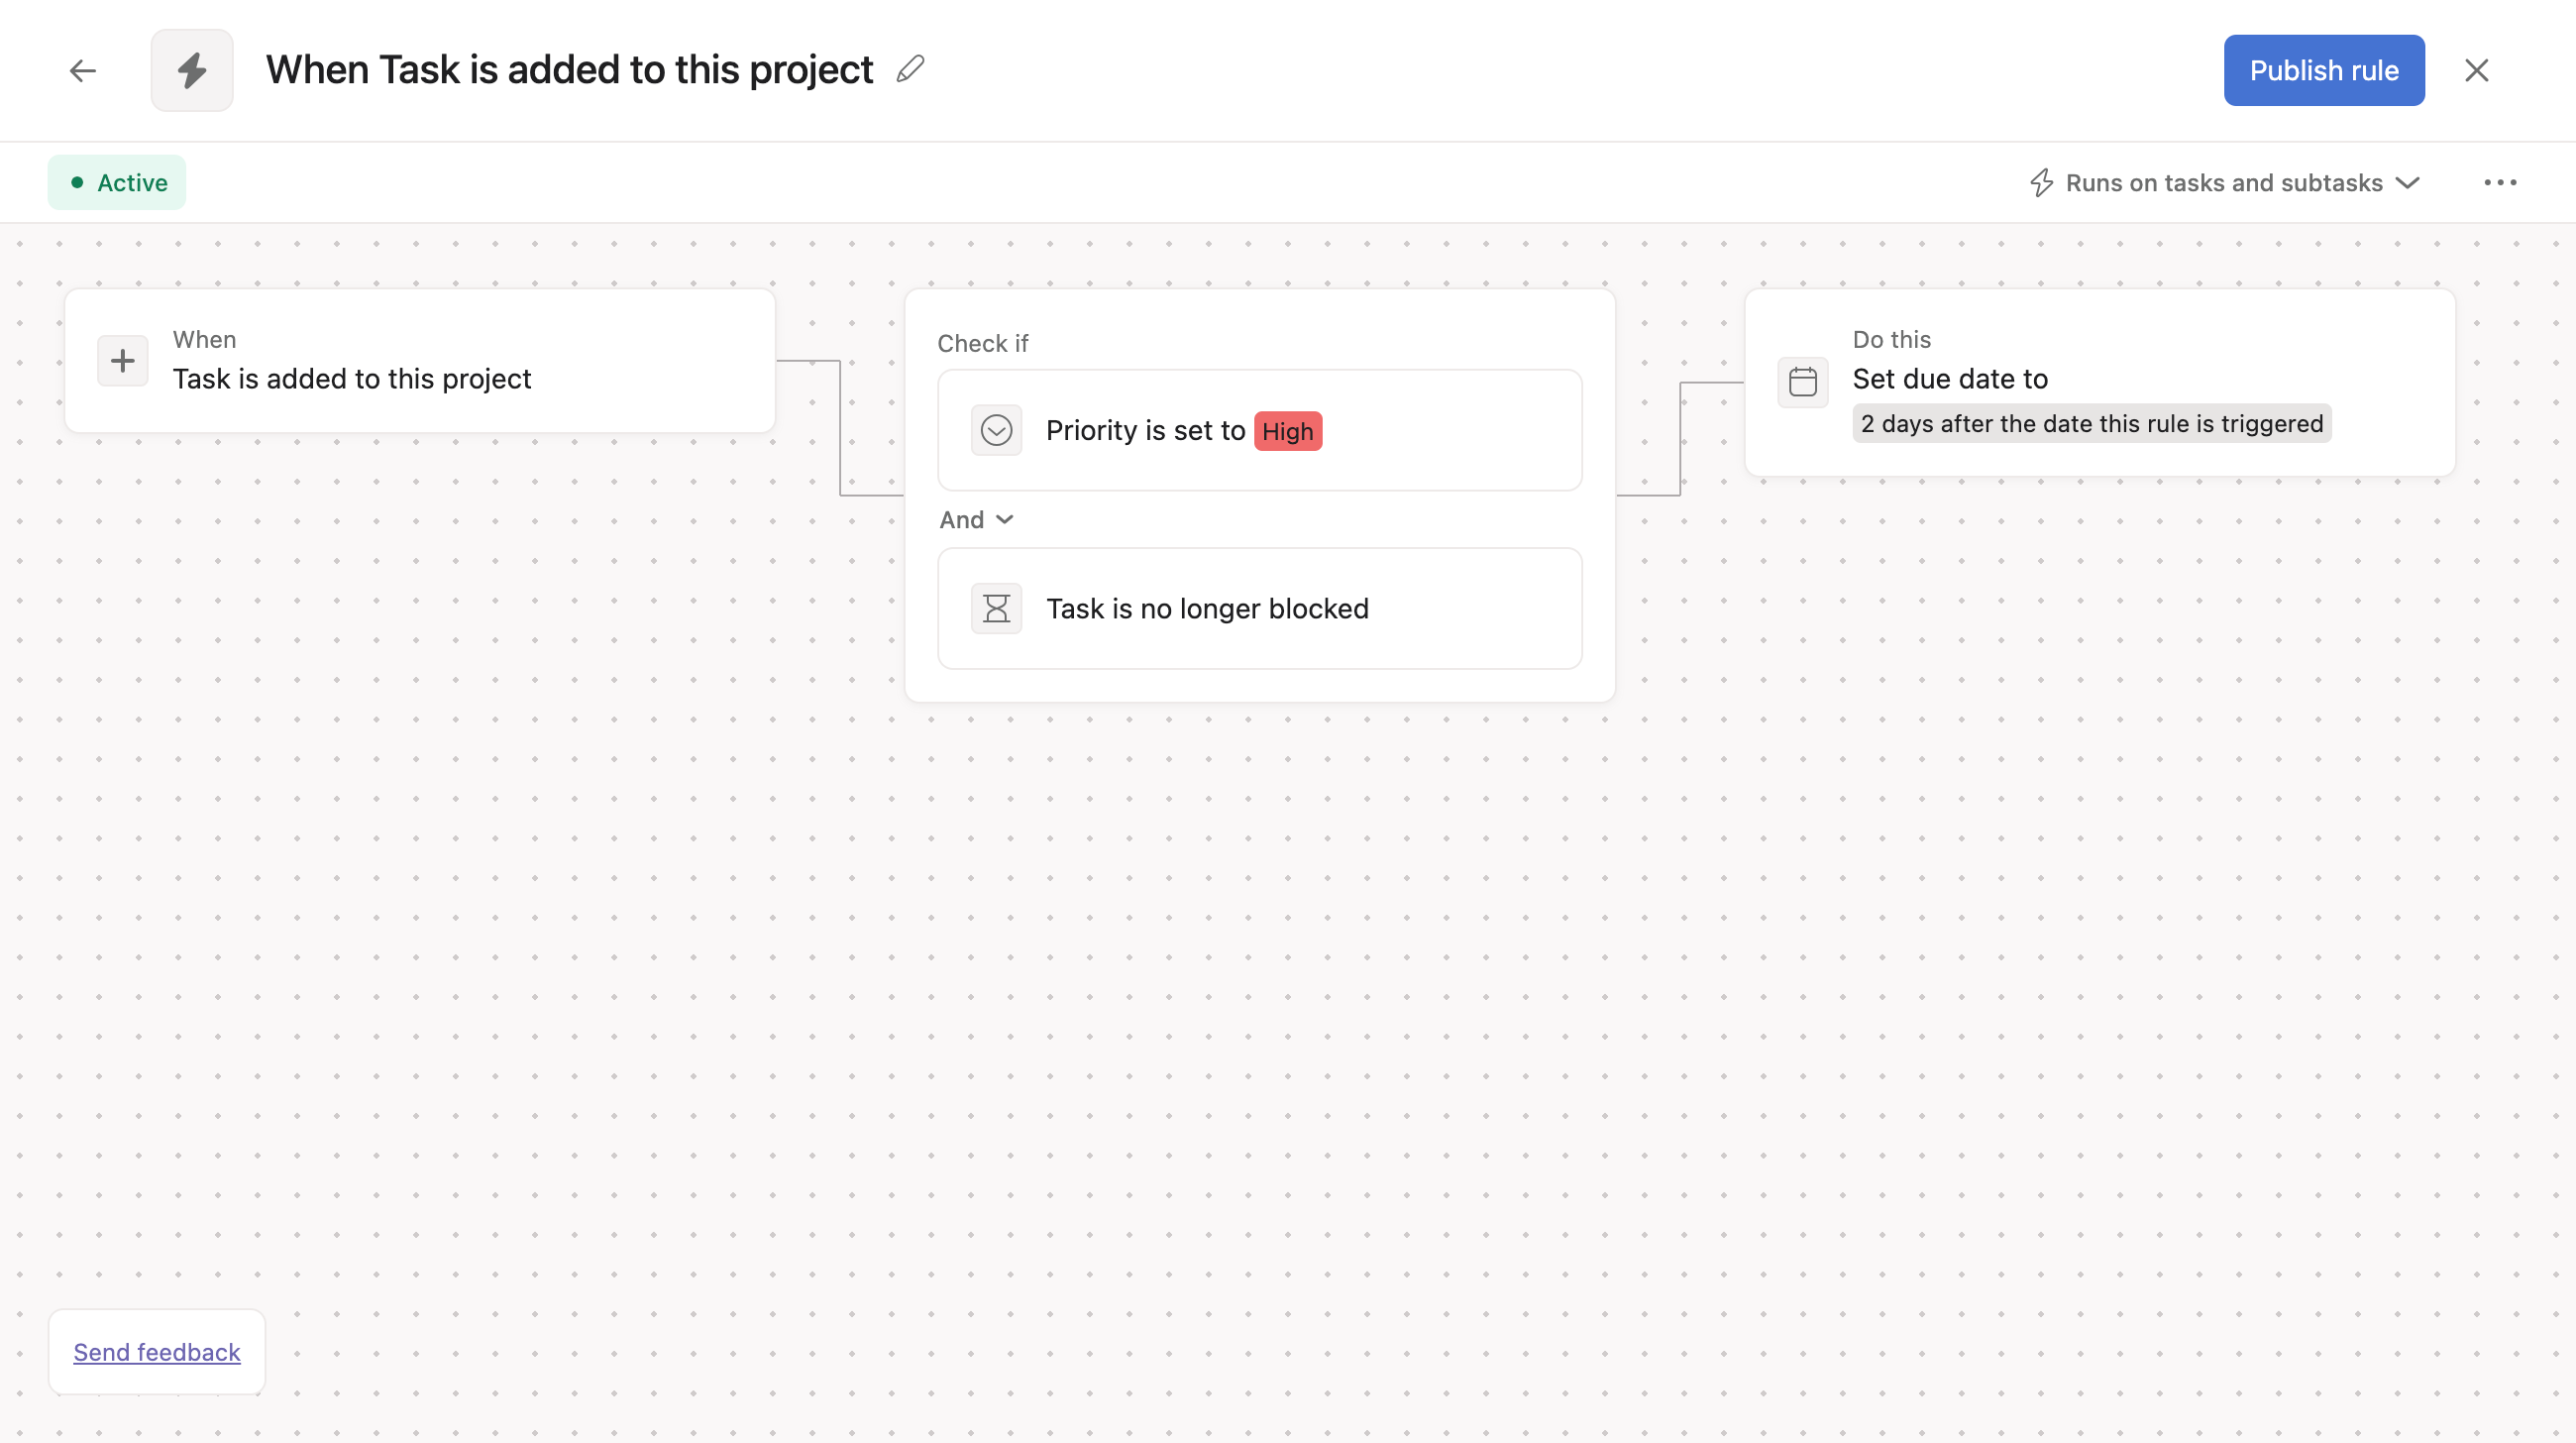
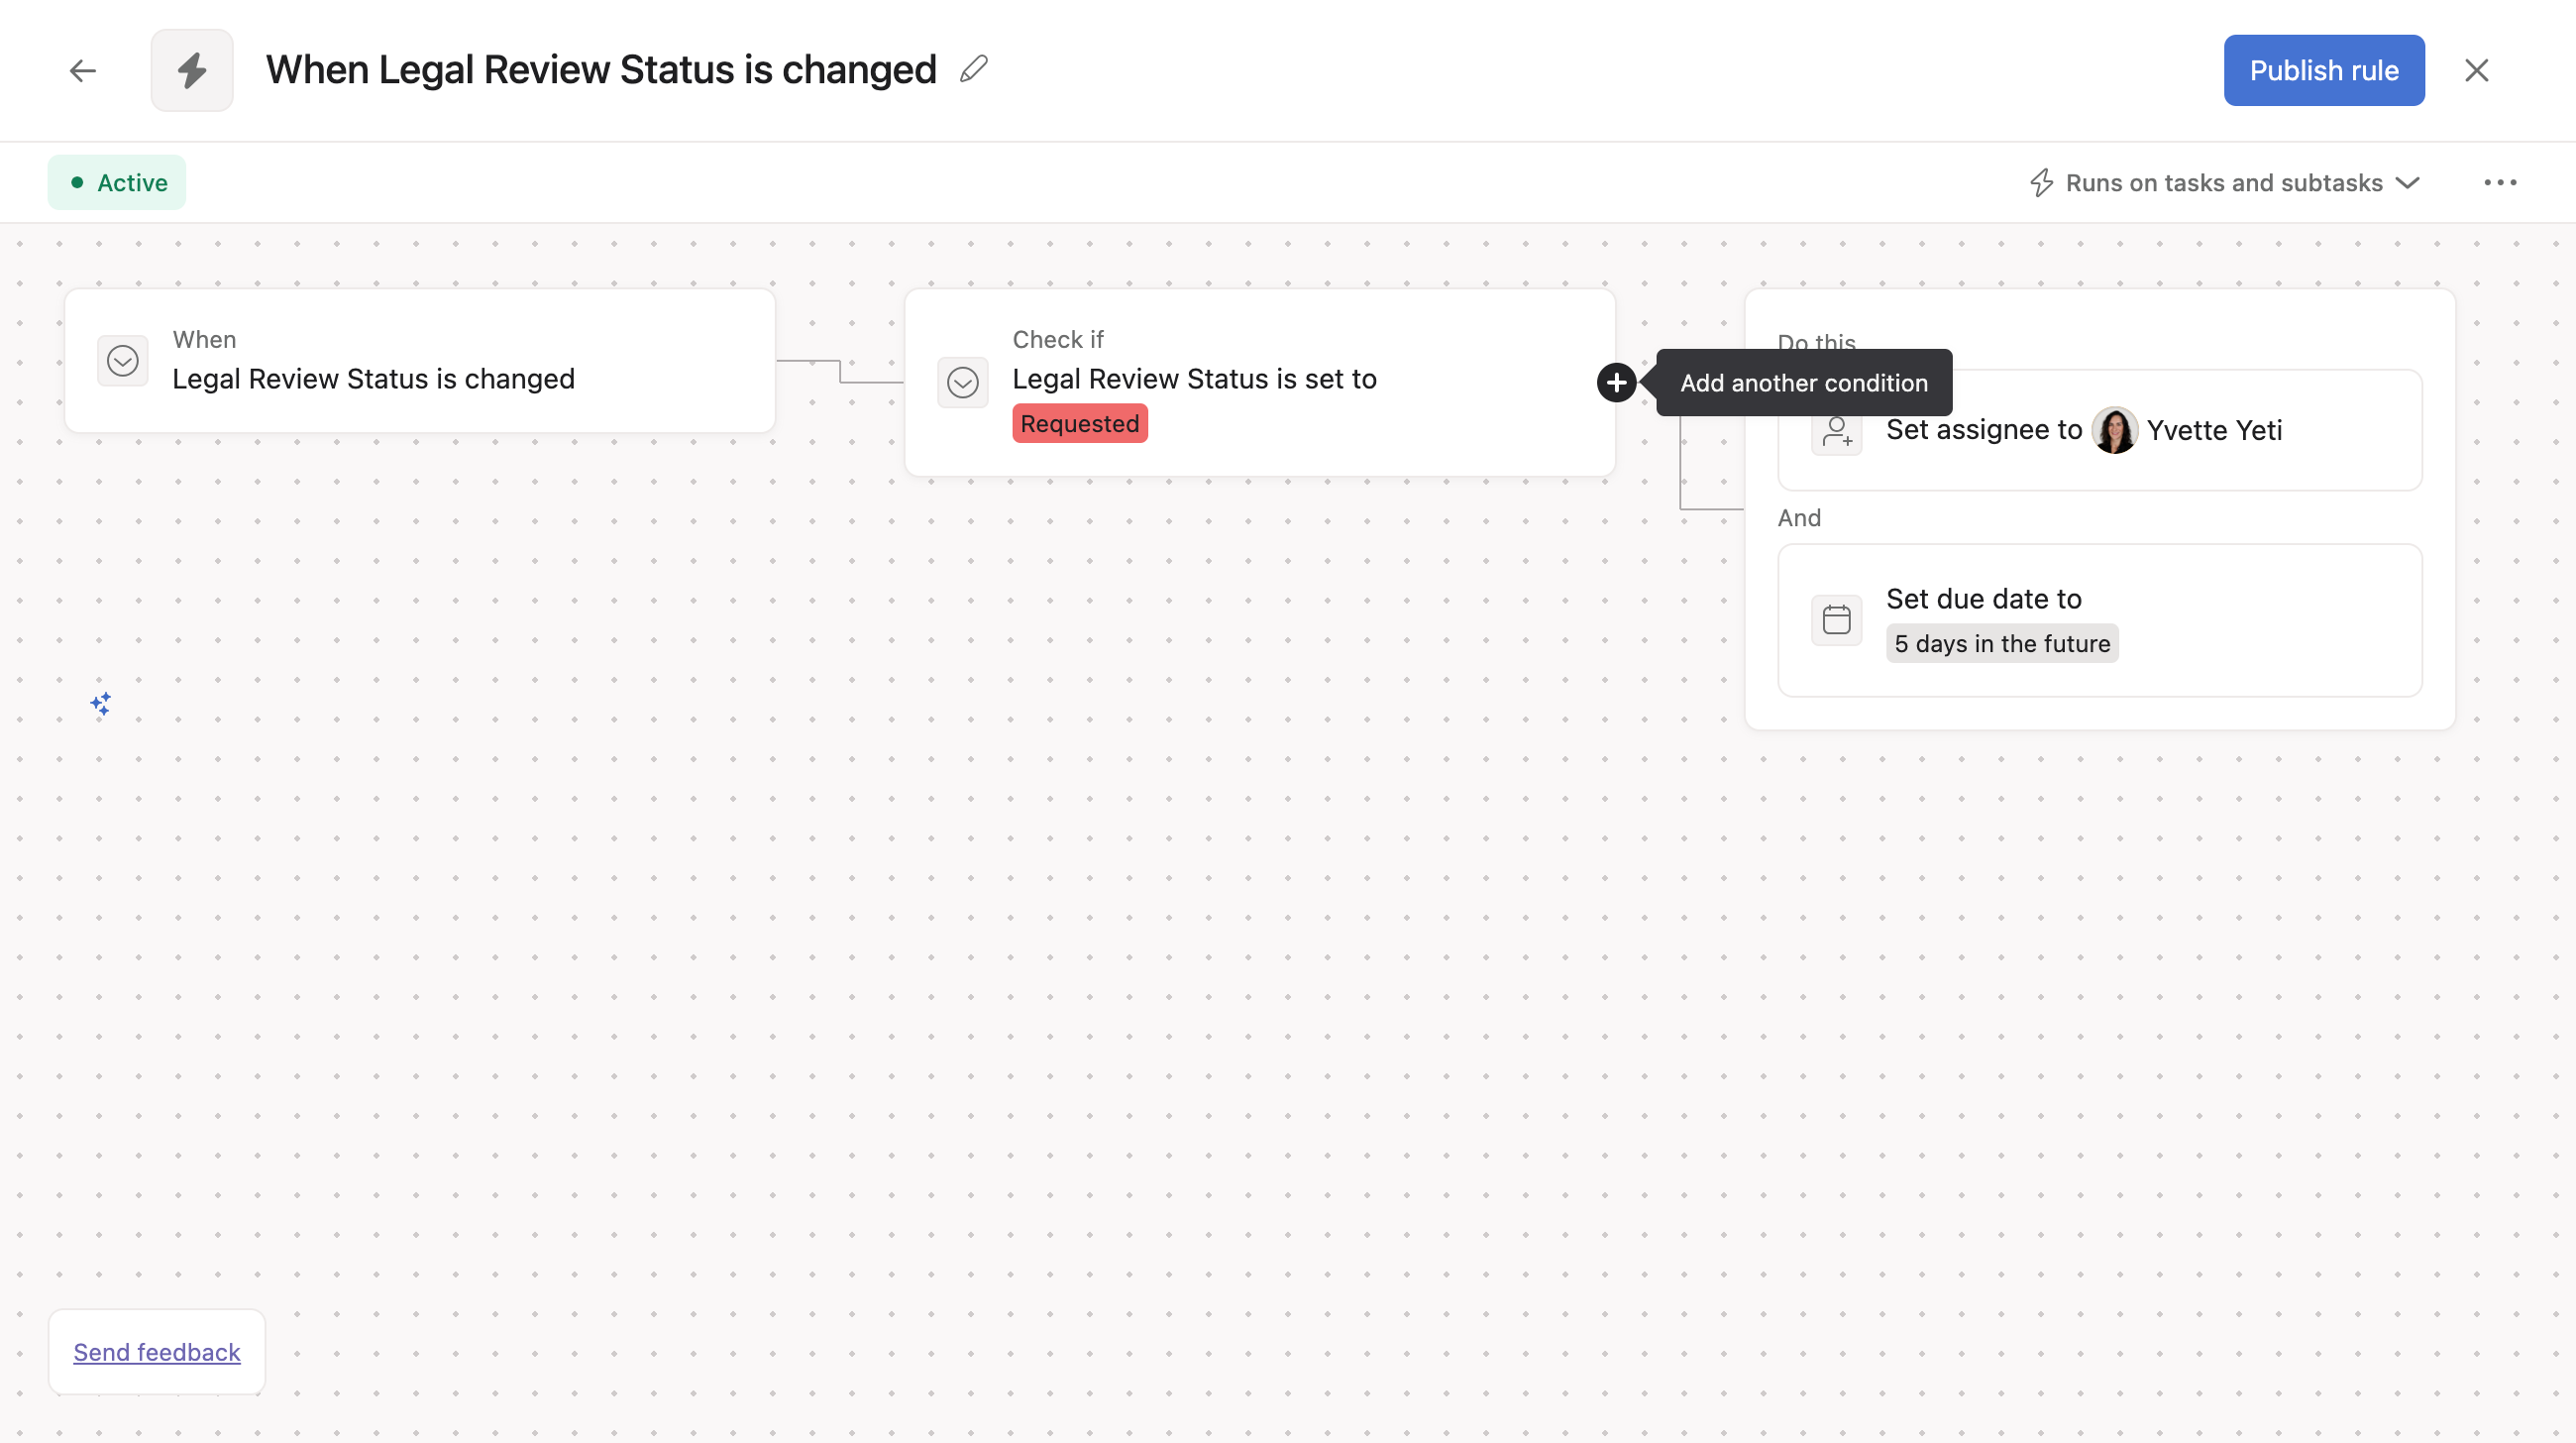
In the below example, both conditions must be met for the rule to run. Rule creators can choose if both conditions must be met, or if one of the conditions must be met for the rule to run. Within the condition card, rule builders can select And to specify that all conditions must be met, or Or to specify that any condition can be met for the rule to run.
In the below example, branching is employed to allow the rule to run in two different scenarios, each with different actions.
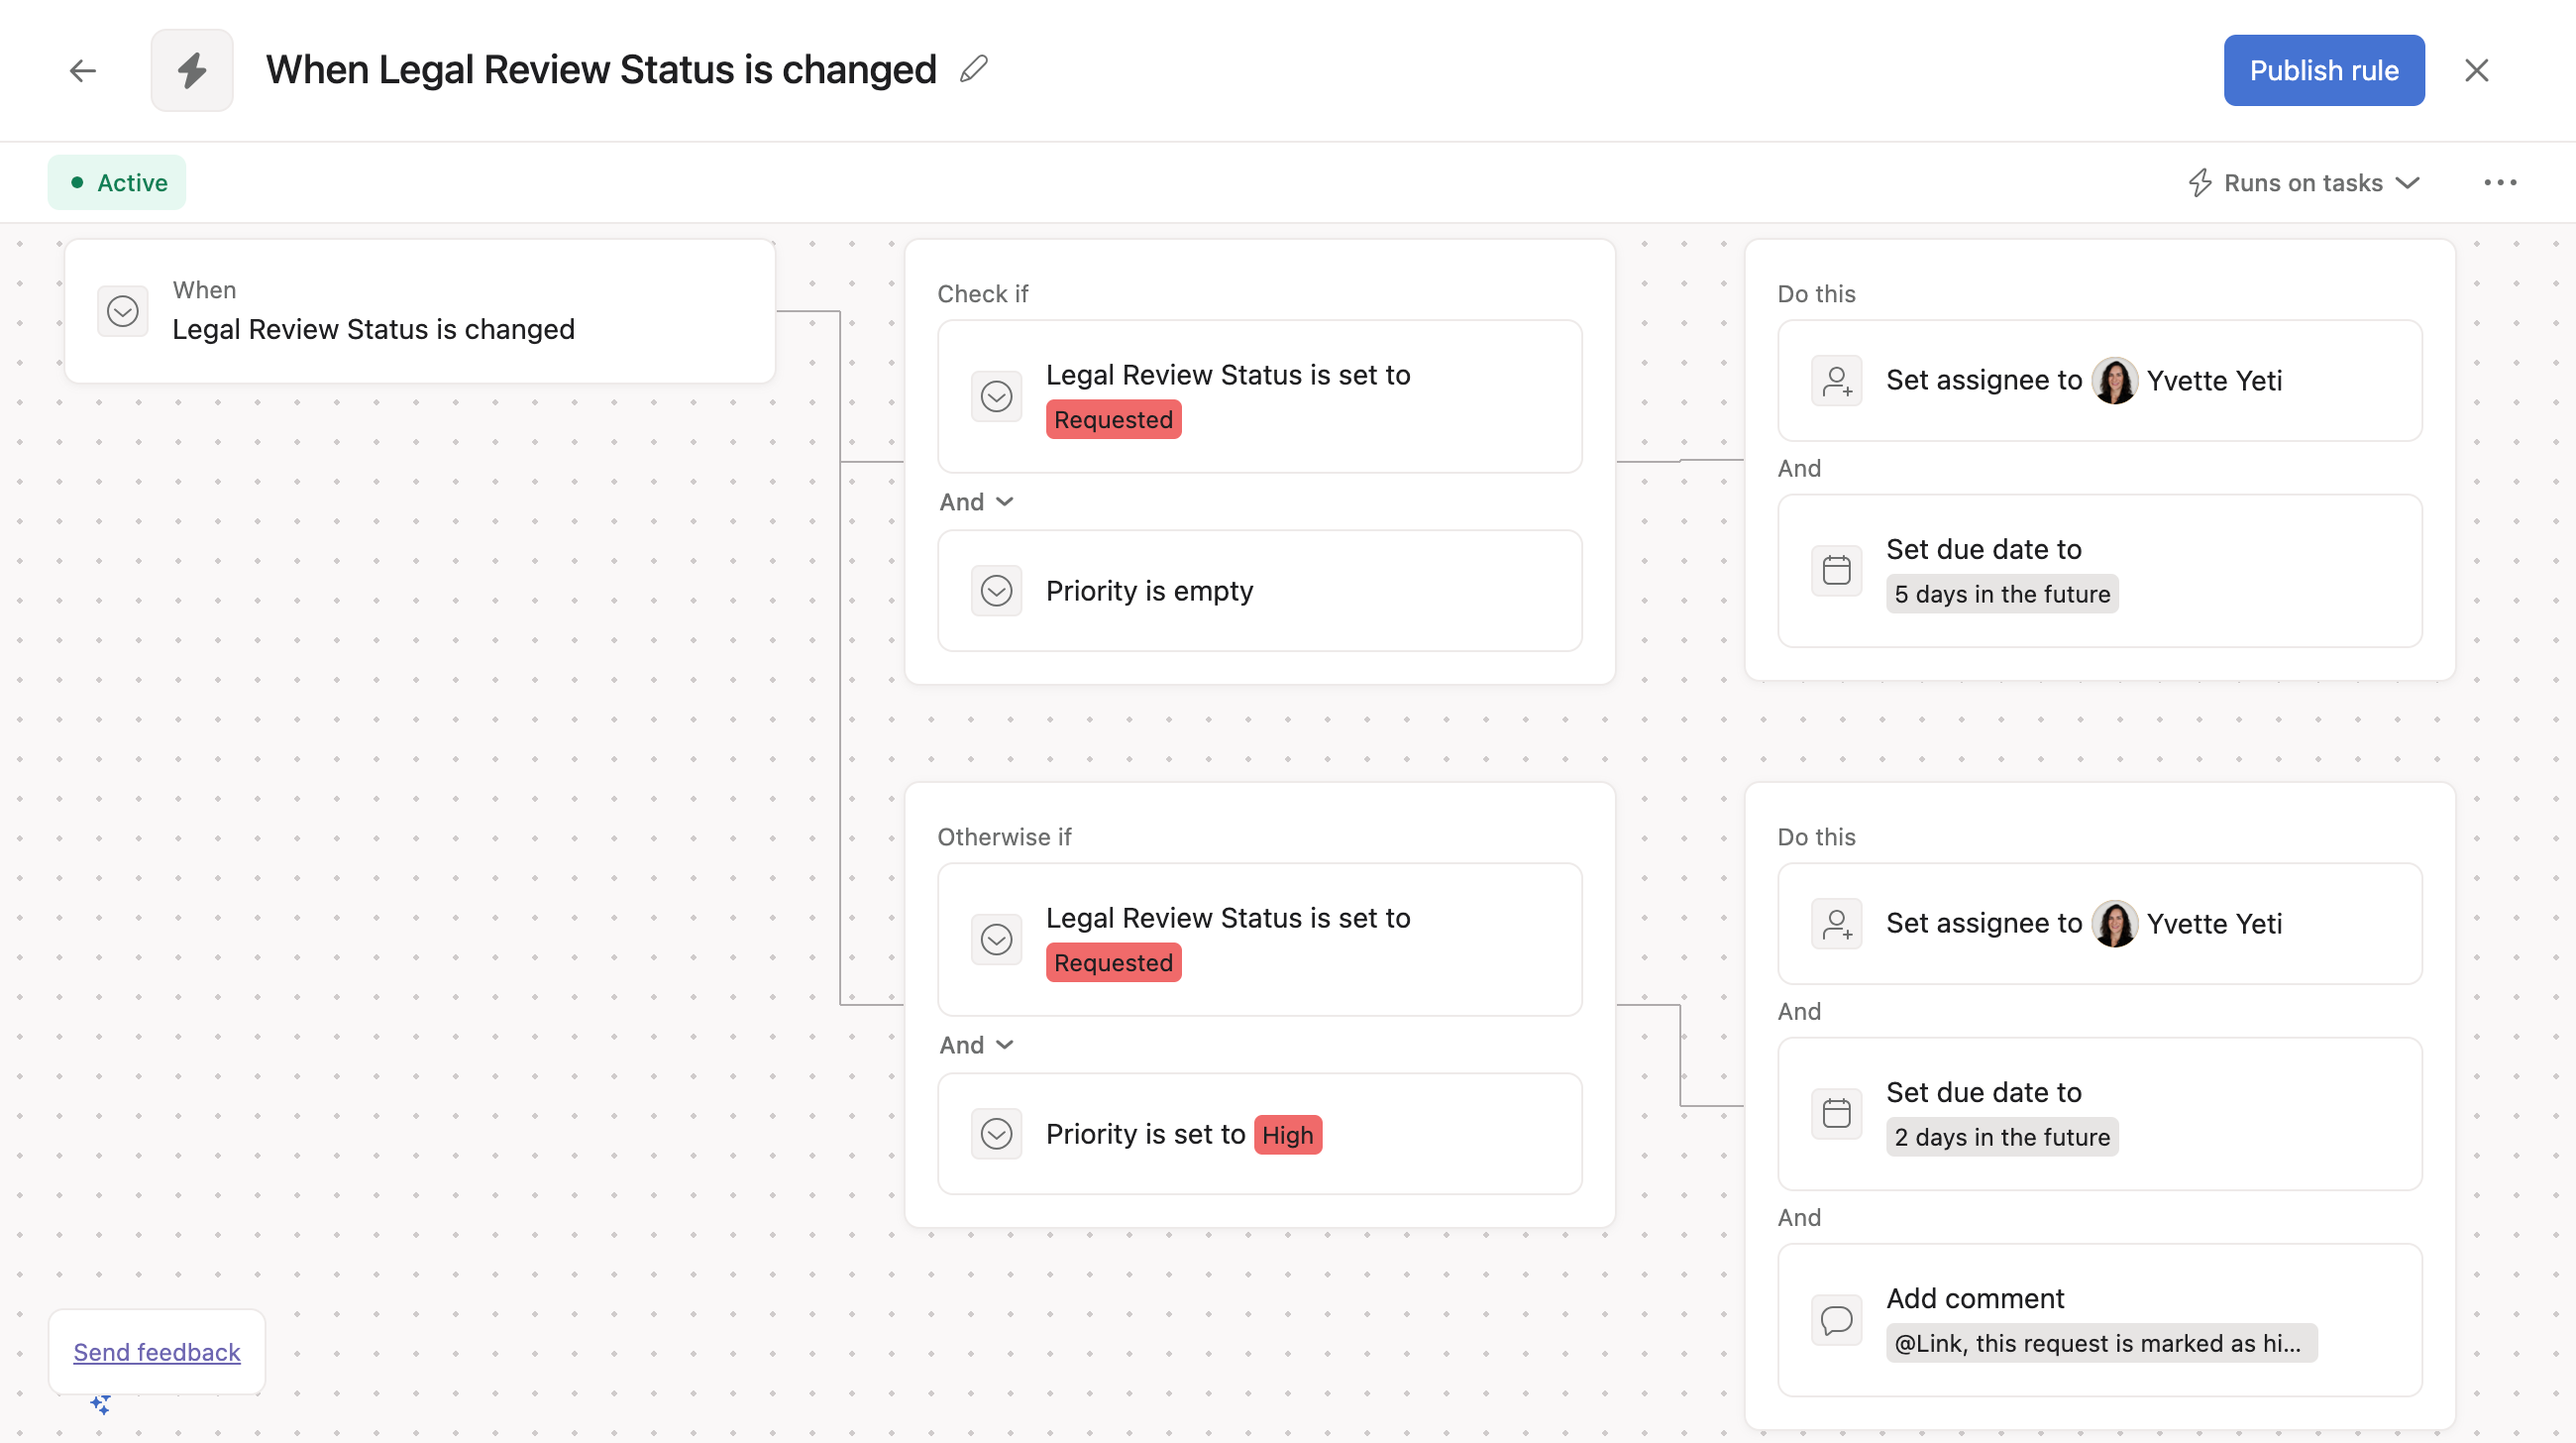
Both branches share the same trigger - the custom field Legal Review Status is changed. Both branches also share a common condition, Legal Review Status must be changed to Requested.
Otherwise if is used to add an additional condition so the rule can perform different actions based on different scenarios, even though both result from the same trigger.
In this case, if the custom field Priority is not given a value, the task is assigned and given a due date 5 days in the future. However, in the lower branch, we see that when the Priority custom field is set to High, the task is assigned, given a shorter due date of 2 days in the future, and the assignee is tagged in a comment.
If you don’t want to add specific conditions, you can use the Otherwise condition. The Otherwise branch will run if none of the other conditions are met.
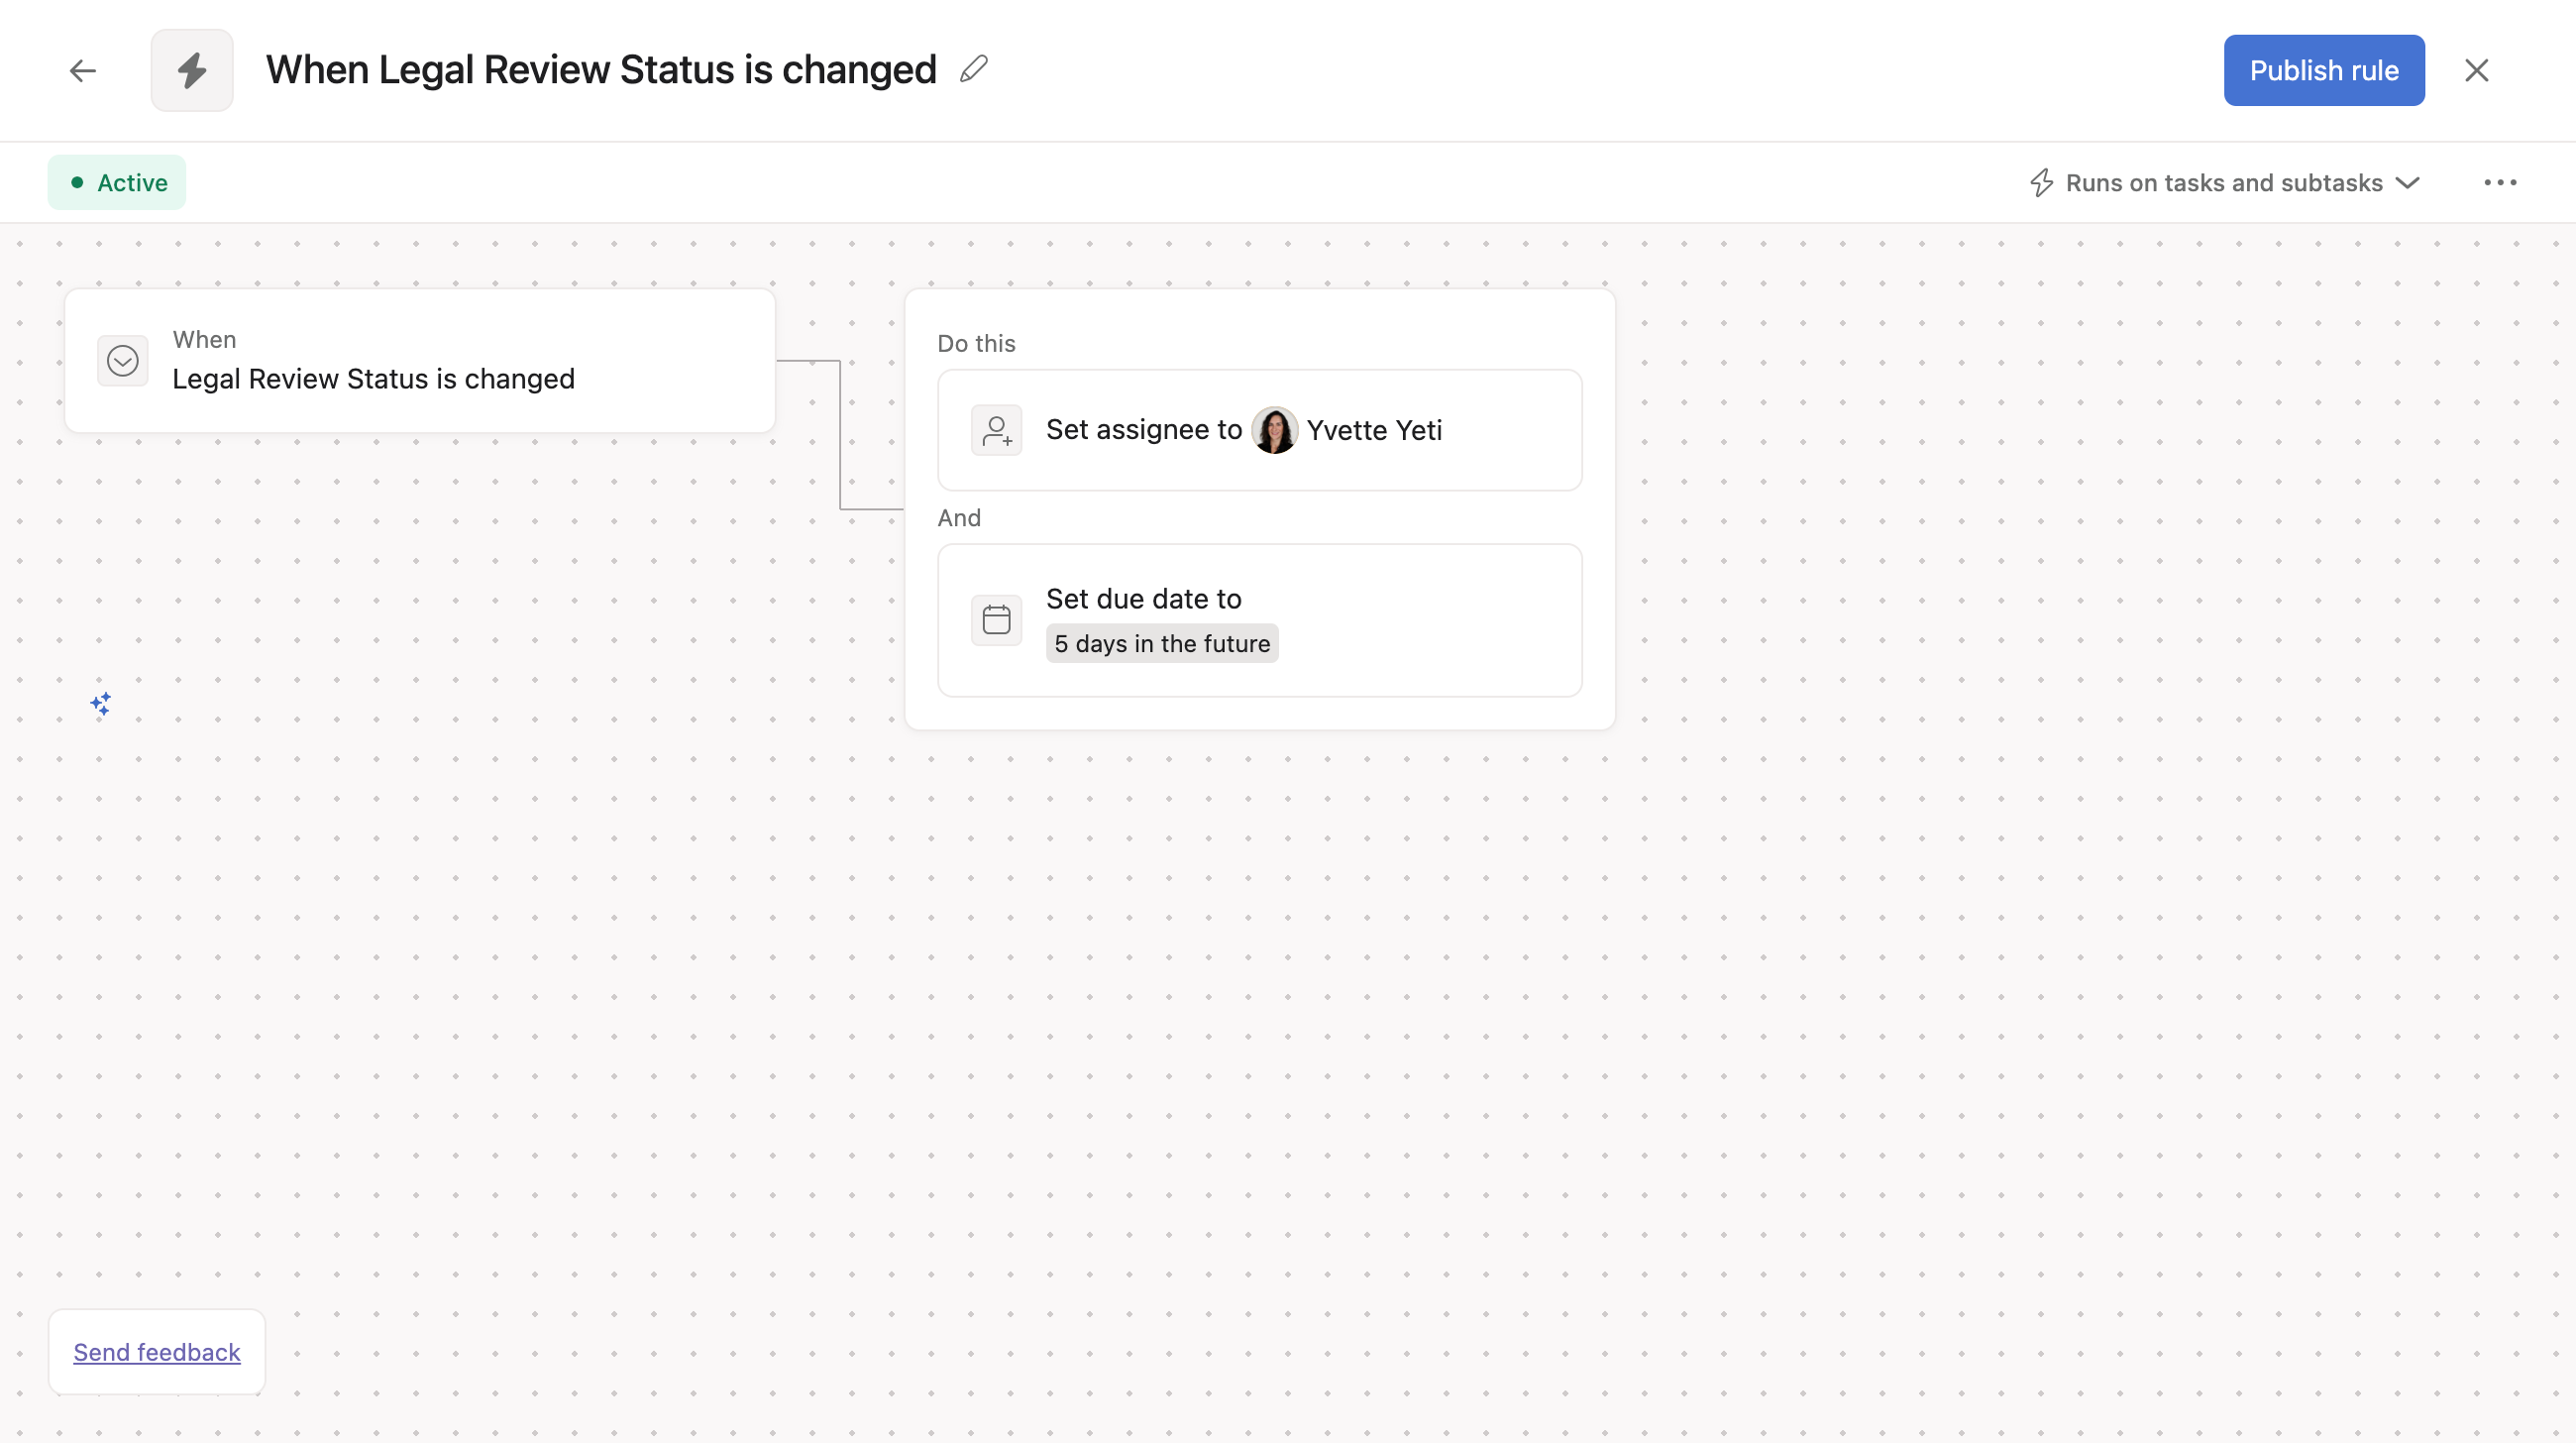
Rules can also be built without conditions. In the below example, any time the Legal Review Status custom field is changed, the action is performed. In this case, the rule is triggered when the custom field value is changed, regardless of the value selected.
Remove the condition card by hovering over the card and clicking on the X that appears on the right side of the card.

Add your first condition by hovering over the trigger card and clicking the + button that appears on the right side of the card.
Add further conditions in the same way by hovering over and clicking the + button on the right side of a condition card.
Clear the condition card by hovering over the card and clicking the trash icon that appears on the right side of the condition card.

Existing rules created in the classic rule builder do not currently support conditions and branching.
In the meantime, users may wish to incorporate conditions and branching into existing rules that were built in the classic rule builder. In this case, it is necessary to recreate the automation logic in the rule builder, adding conditions and branching as needed.
When testing the new rule, pause the old one first and check that the new automation works as expected. You can then safely delete the old rule.
Note: Rules with conditions can be created from the Customize menu of any project, from within a bundle, a project template, or from the workflow builder.
Coupled conditions for rules allow users the option to combine a trigger and a condition in certain scenarios. Coupling enables the creation of more intuitive rules and simplifies the process of creating certain types of rules by reducing the number of setup steps required.
Previously, rule triggers were decoupled into two components:
Coupled conditions allow triggers and conditions to be optionally coupled, or combined, in certain circumstances.
Will my existing rules be affected by this change?
No, this update will not impact any of your existing rules. It simply provides more flexibility when creating new rules moving forward.
When should I use coupled vs decoupled triggers and conditions?
Coupling is optimal for simple rules that don't require branching. The decoupled approach remains best for more complex rules with multiple branching paths based on different conditions. The rule builder will guide you to the appropriate option and the two approaches will coexist to provide maximum flexibility.
The number condition in rules allows you to check and compare numeric values. You can compare a variable against a static number or even against another variable, reducing the need for separate conditions for each field type or variable.
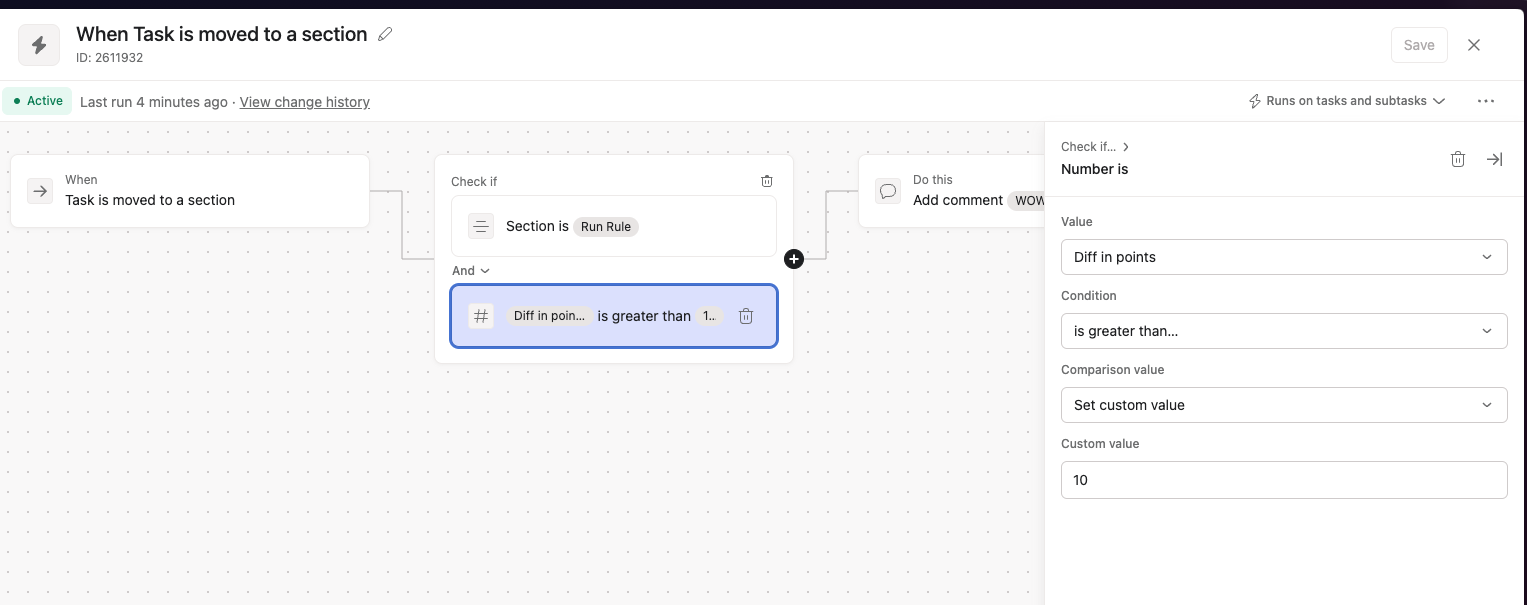
The number condition supports comparing operands using the following operators:
You can choose to compare the following values:
Can I compare a number field to a formula field?
Yes, the number condition allows comparing any combination of number fields, formula outputs, and static numbers.
Are decimal values supported?
Yes, the number condition works with both whole numbers and decimal values.
Can I use multiple number conditions in one rule?
Yes, you can add multiple conditions of any type to a custom rule, including multiple number conditions.