Products
AI Platform
Asana Foundations
Company Type
Visit our pricing page for more information.
In this article, you'll learn how to edit guest invite settings, controls for file attachments, team privacy settings, and how to define your organization's admins and super admins.
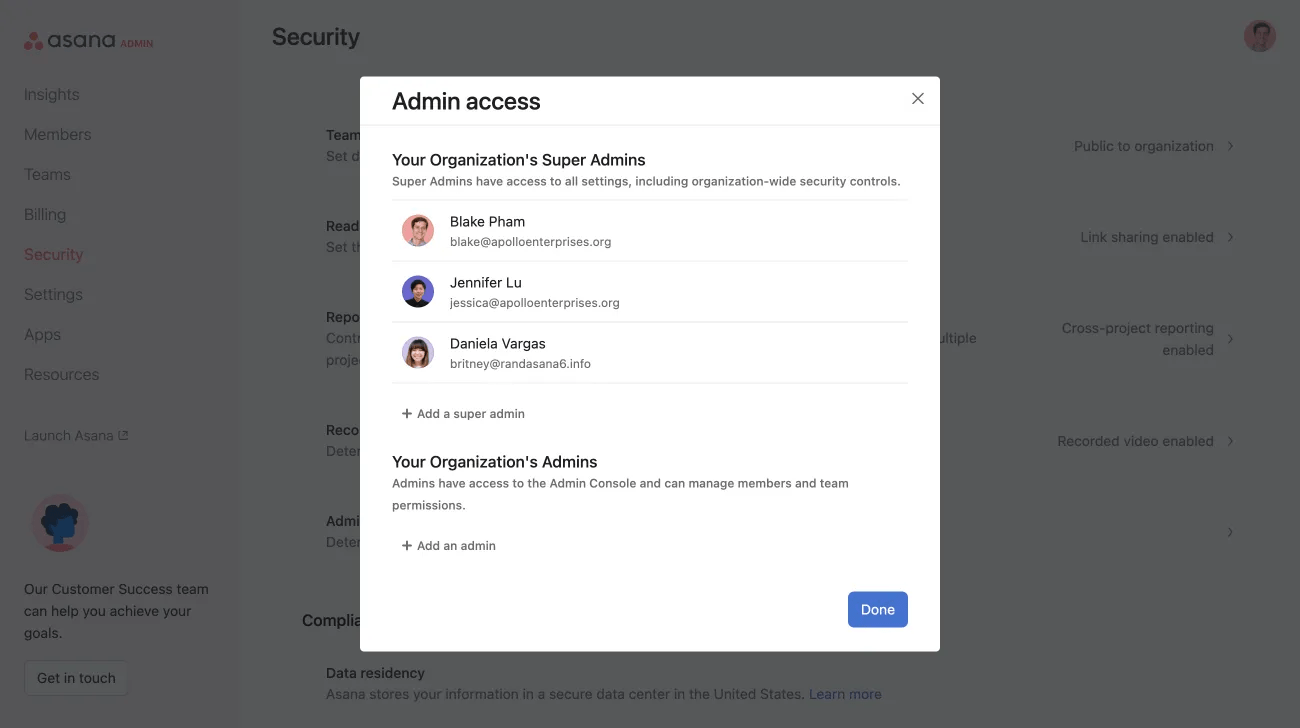
From your admin console, you can determine your organization’s admins and super admins. From the Security tab, under Admin Controls, click Admin access to determine the admins for your organization.
Note
Organization admins have edit access to the company’s mission statement.
Super admins of Asana Enterprise and Enterprise+ tiers, as well as legacy tier Legacy Enterprise organizations or divisions can control who can invite organization guests (those without a company email address) into your Asana organization. Super admins can select one of these options:
Admins only
Admins and members
Admins, members, and guests
To enable one of these options, navigate to the Security tab of the admin console, click Admin Controls, and click Guest invite settings. Once this has been enabled, those who no longer have the ability to invite organization guests will receive an error message when trying to do so.
Ent+ tiers need to control permissions through the Role-based access control. To access guest invite settings, navigate to the admin console, click Members, and select Manage roles.
Available on the Asana Enterprise+ tier.
Admins and super admins can create a list of approved external domains from which users with guest invite permissions can invite guests.
Guest invites can only be sent to those email domains on the approved list, ensuring greater security and control over your organization's collaborations. If a user attempts to send a guest invite to someone from an unlisted domain, they will receive an error message.
Trusted guest domains can only be enabled if guest invite permissions are set to Admins and members or Admins, members, and guests. The feature cannot be activated if guest invite permissions are set to Admins only.
Ensure the domains are an exact match. Adding the domain acme.com does not cover subdomains like app.acme.com or acme.co.uk. Such subdomains must be added separately.
Find the domain in the list you want to remove, click the trash icon, and confirm your choice by pressing save.
To revert the settings, simply switch the trusted guest domains control back to Any domain.
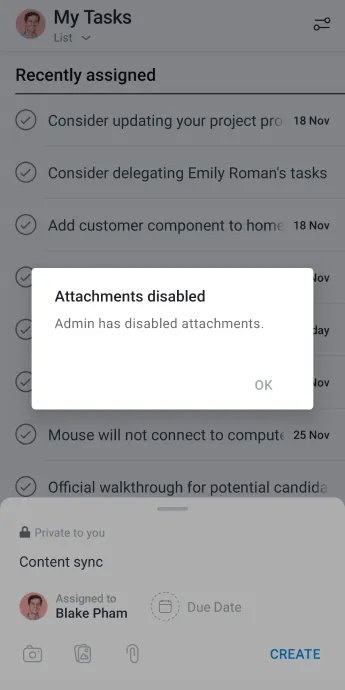
The ability to disable file attachments is available to super admins on the Asana Enterprise+ tier, as well as legacy tier Legacy Enterprise.
The disabling file attachments feature allows super admins to ensure that Asana implementations across their organization meet all security and consistency requirements related to blocking any file attachments that are restricted as per their company’s security policies and preferred file integrations.
This feature gives better controls at a domain level to ensure strict upload policies in accordance with their organizational requirements.
IT admins will also have a quick way to enable or disable one or more or all of computer, Dropbox, Google Drive, Box and Onedrive / Sharepoint upload sources as per their company’s IT security policies and have it applied across all Asana product surface areas where attachments can be added.
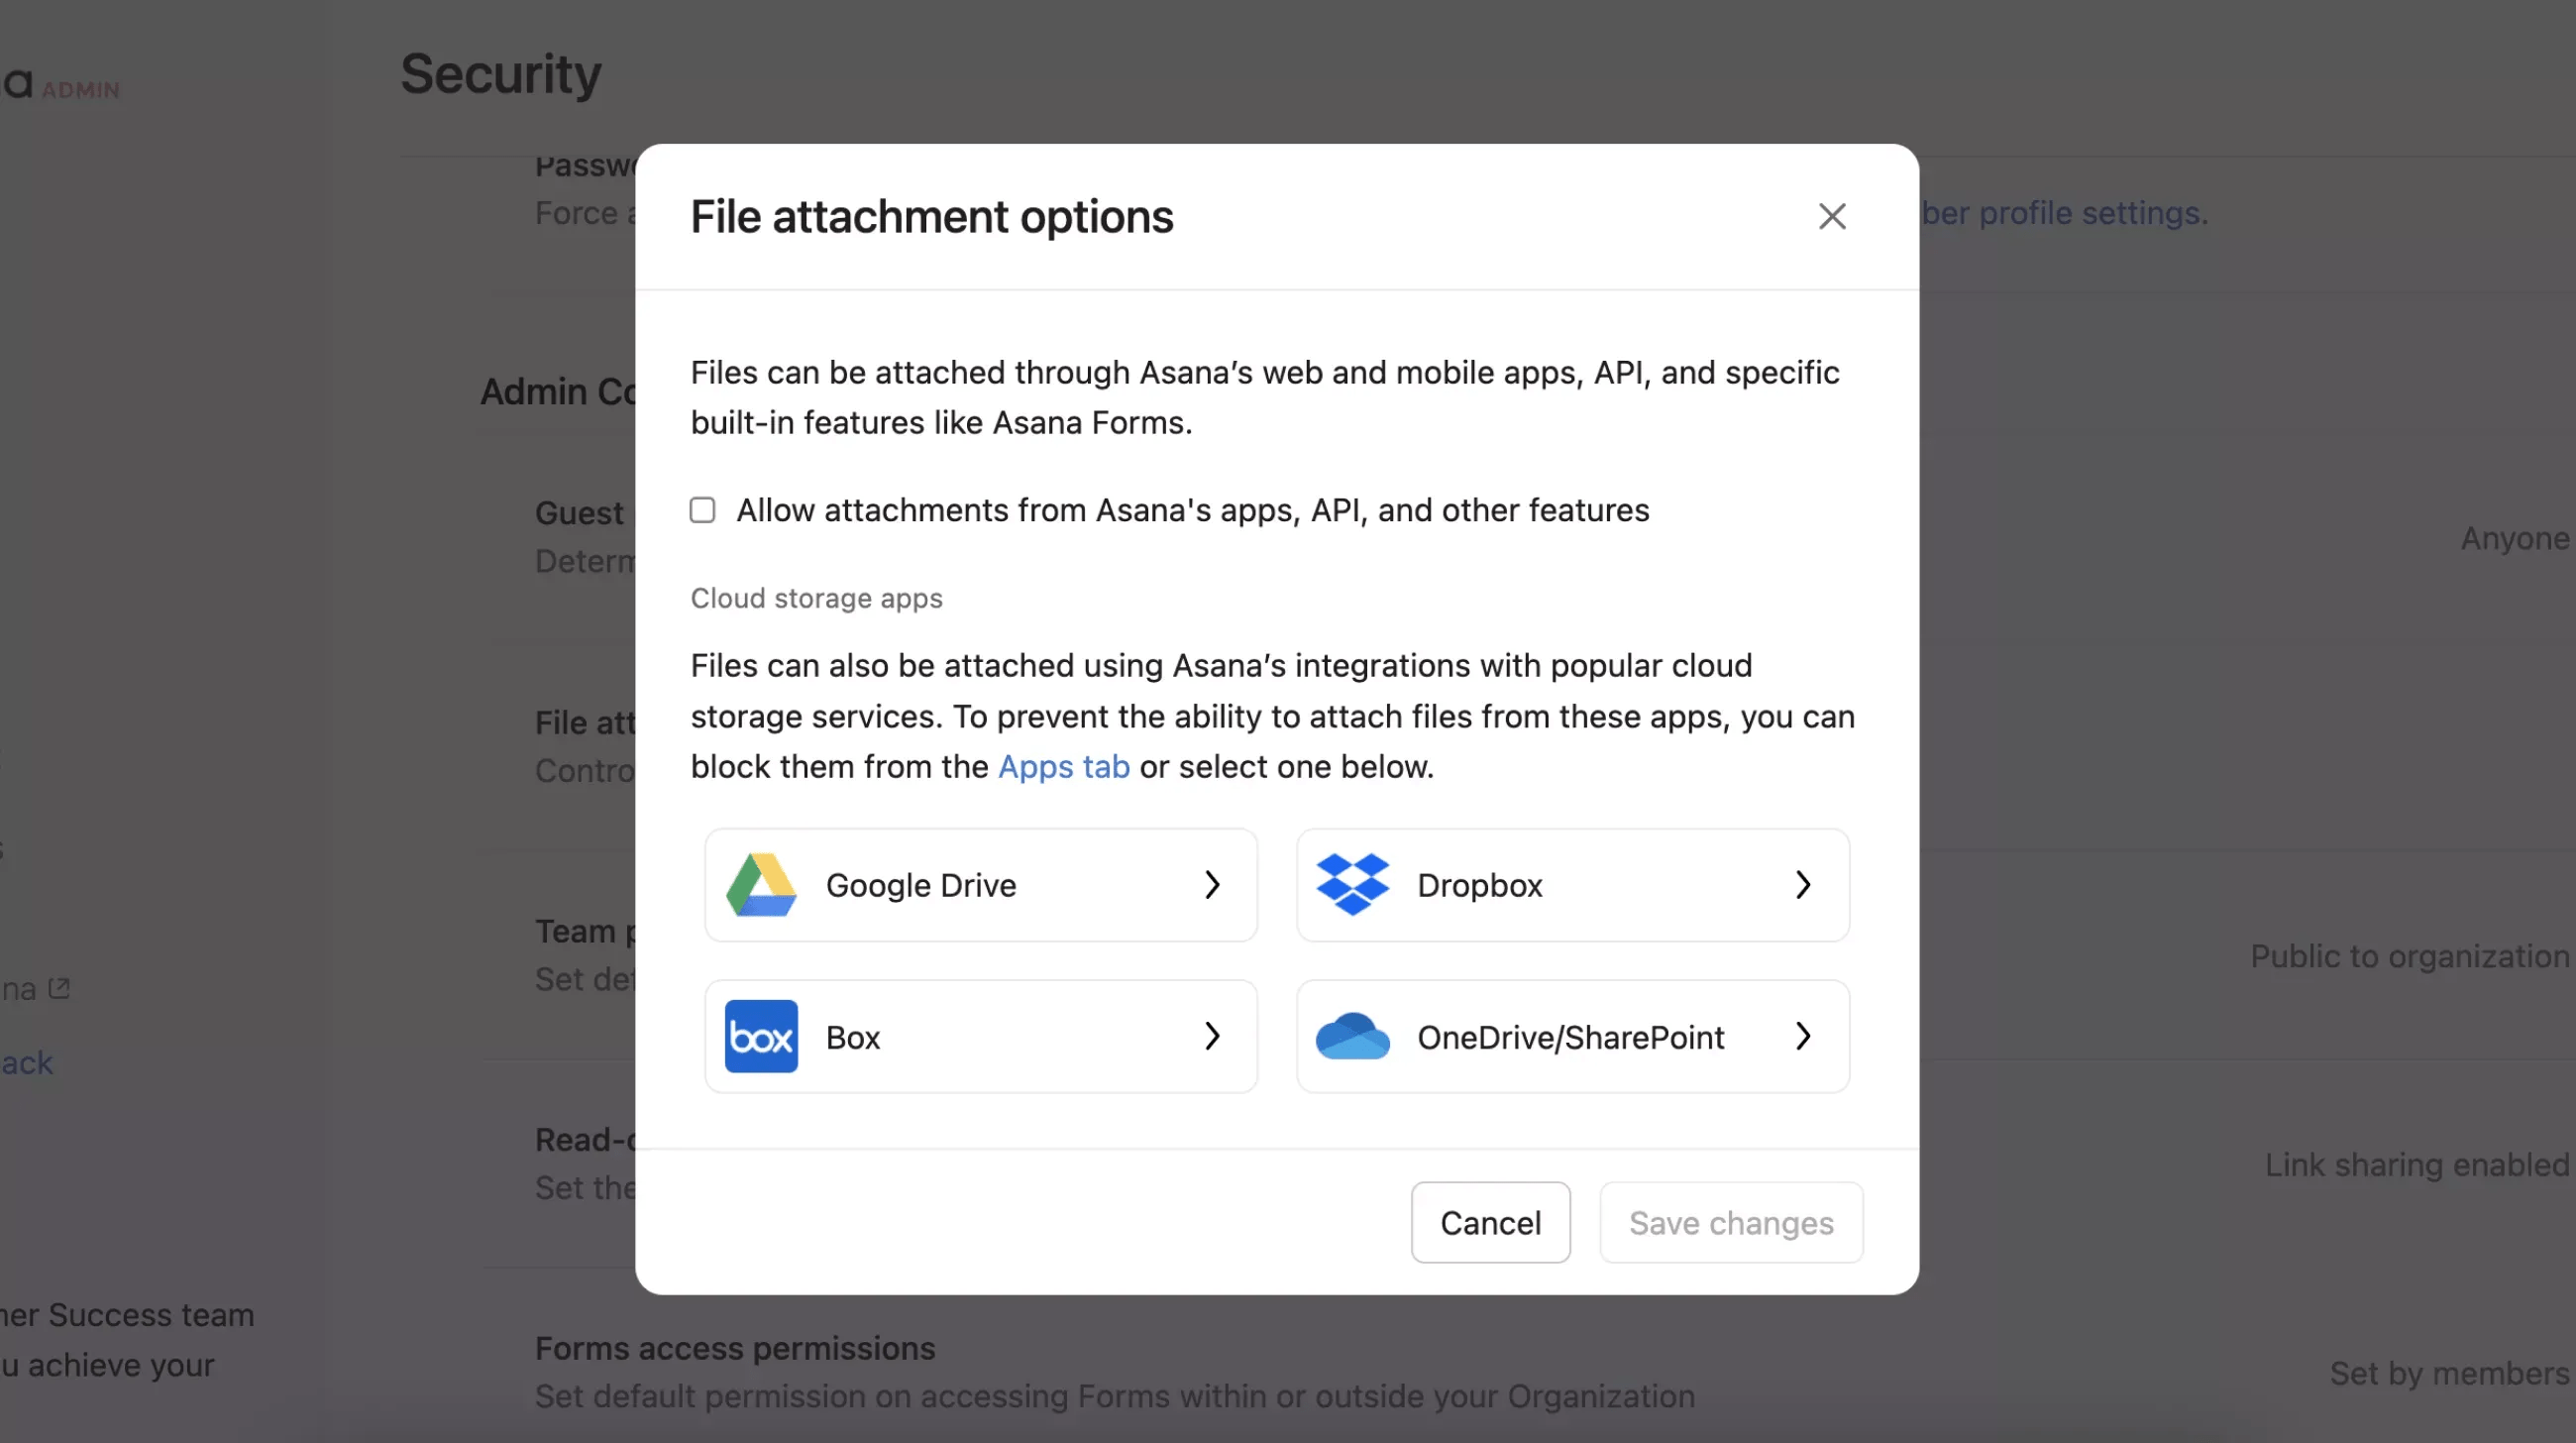
Super admins can access their file attachments options settings through the Security tab of their admin console.
From the Security tab, scroll down to Admin controls and click File attachment options.

The default setting is all attachments are enabled.
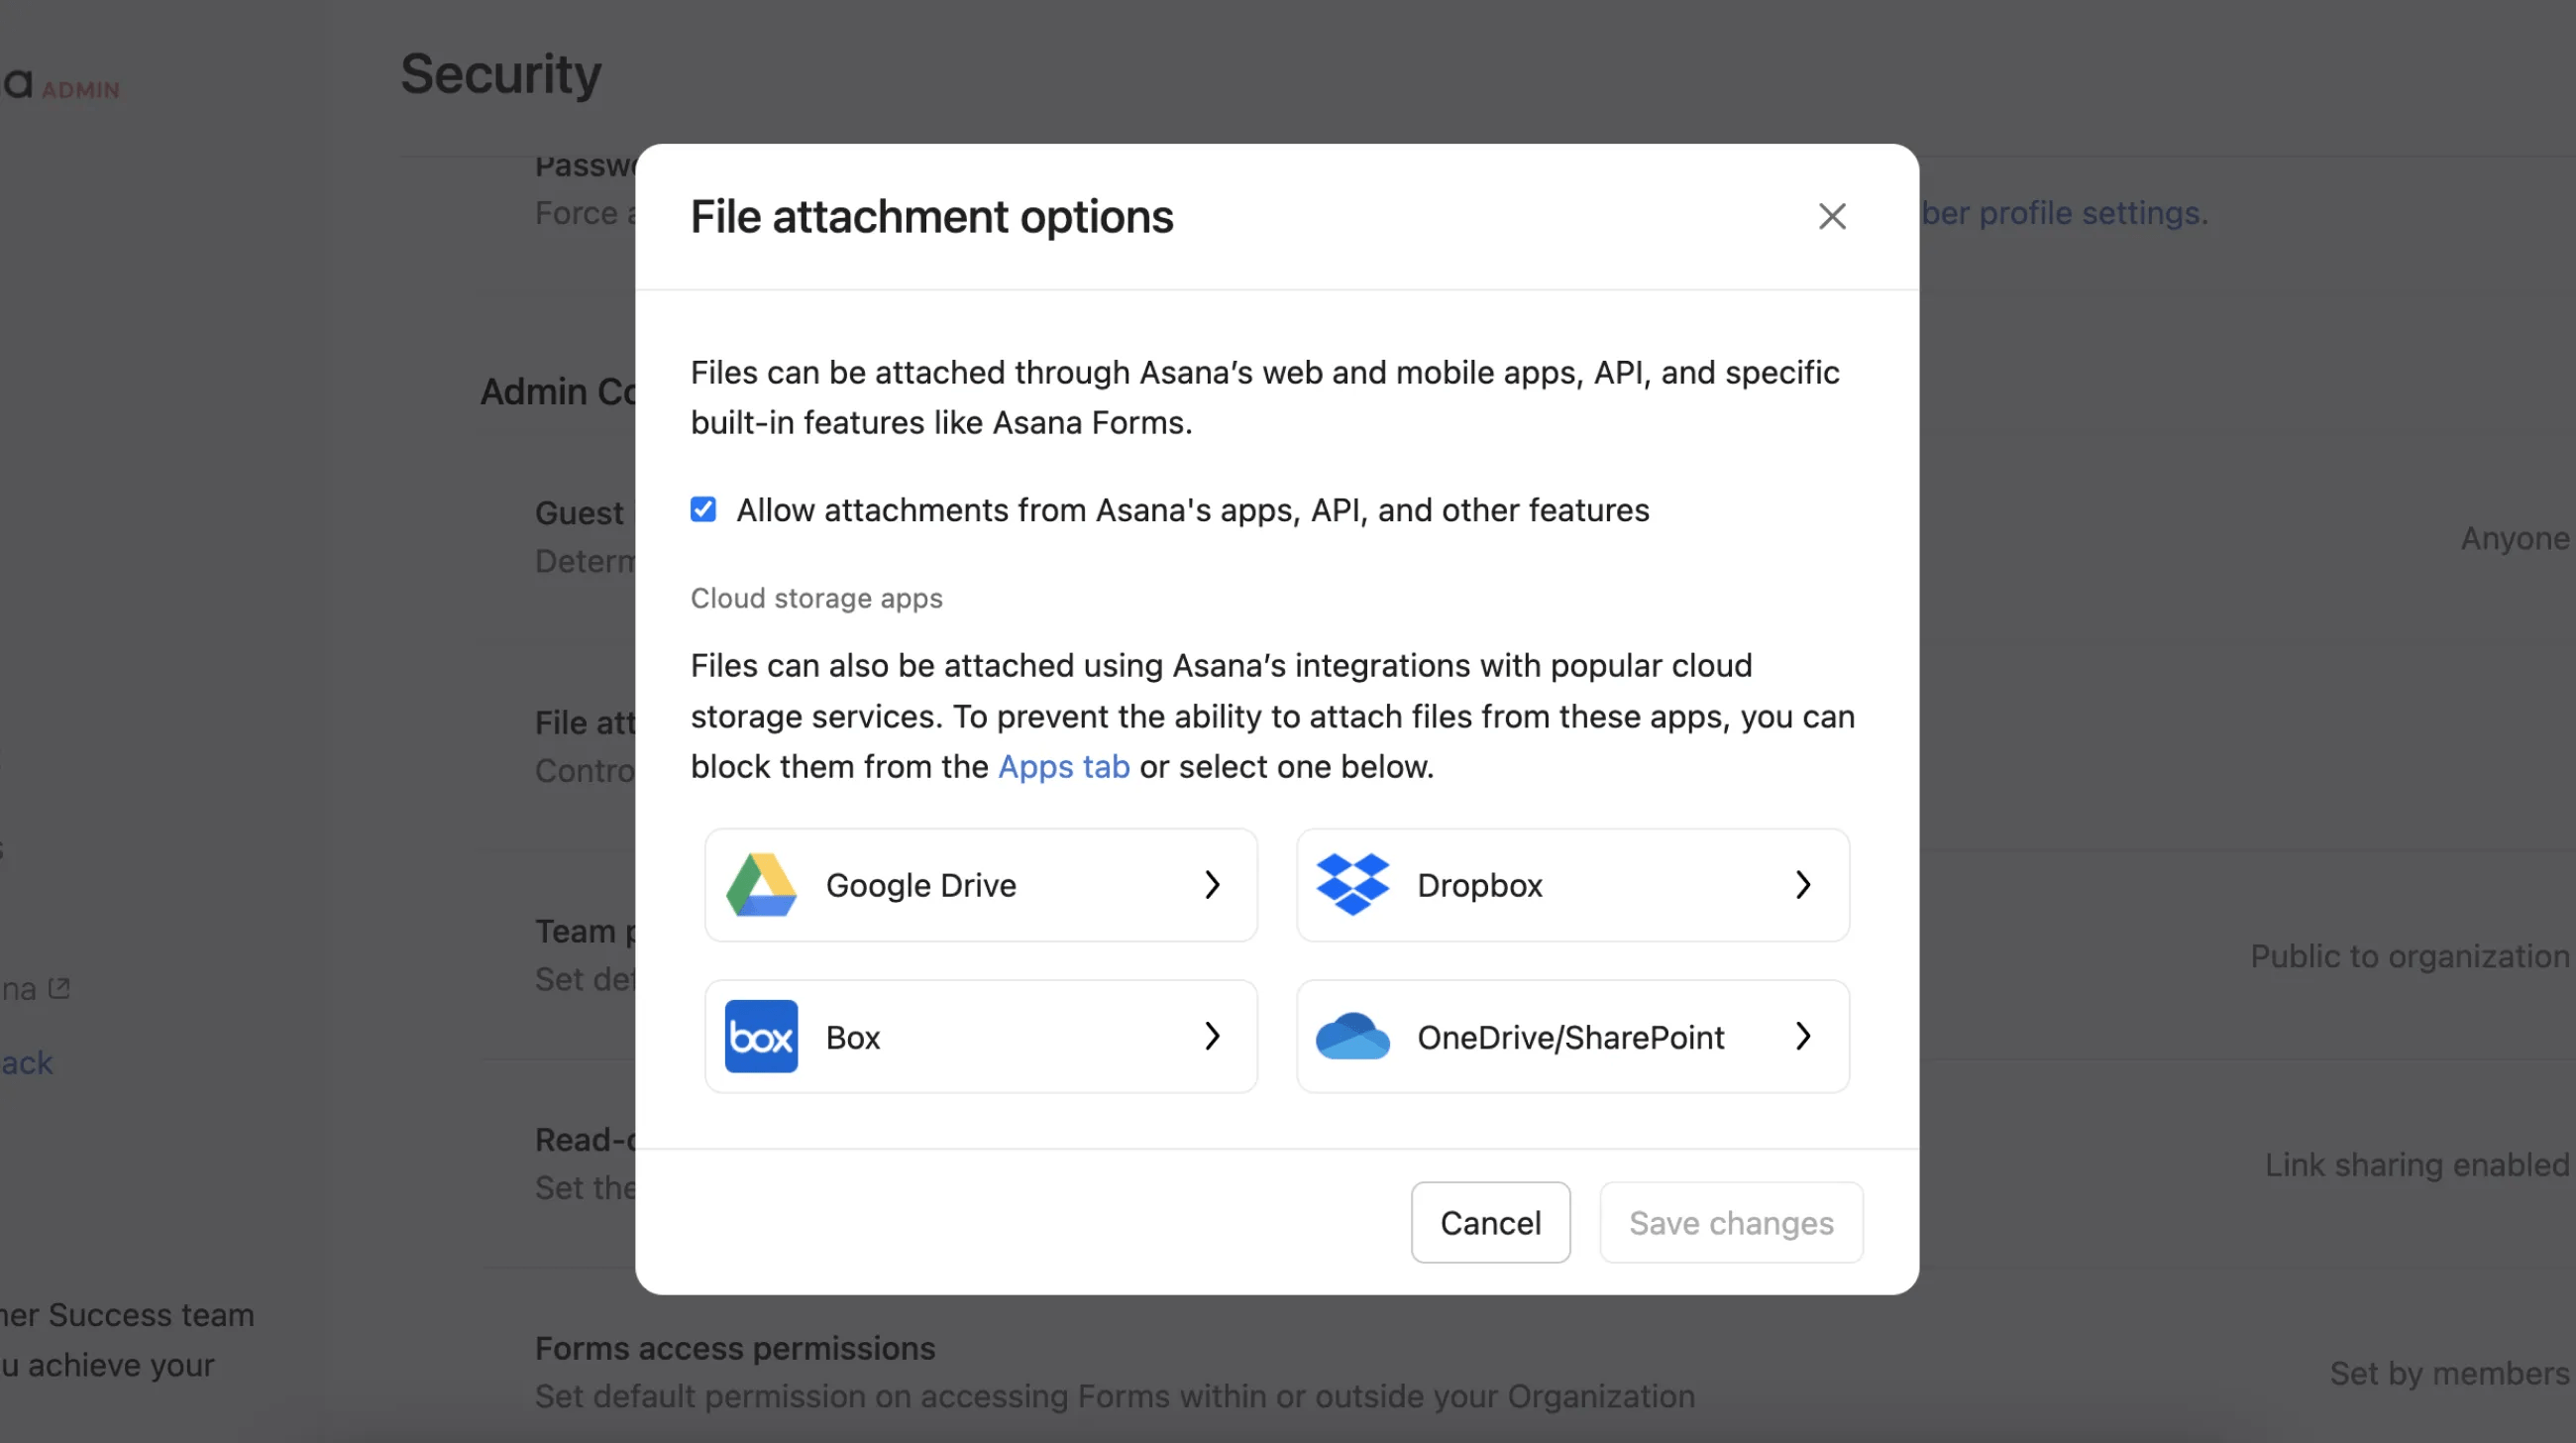
From the next window, you can select your file attachment preferences.
To prevent the ability to attach files from third-party apps, you can block them from the Apps tab or select the desired app from the pop-up window. This means that the ability to add attachments from Dropbox, Google Drive, Box, and OneDrive/ SharePoint will no longer be allowed.
There’s no differentiation on the mobile app on attachments between uploads from third party apps and attachments from the device. This is because everything downloads to the device first.
The only way to disable on mobile is by disabling allow attachments from Asana's apps, API, and other features.
Super admins for Enterprise and Enterprise+, as well as legacy tier Legacy Enterprise organizations can set a default privacy level for teams in their organization.
When set, this will be the pre-selected option when creating a new team. Team creators can still create teams with other privacy levels as they choose.
To set your default privacy settings navigate to your admin console and click on the Security tab. Then, click on Team privacy settings.

From the next tab, you can select your default setting.