Products
AI Platform
Asana Foundations
Company Type
Visit our pricing page for more information.
The Settings tab in the admin console allows admins and super admins to control your organization's domain settings, announcements, and company profile. In this article, you'll learn what you can do from the settings tab.
Asana sets up a default fiscal year for all organizations, and new goals will immediately have time periods attached. These time periods help you to align Asana with your fiscal year, and can be used for company and team goals. The default annual start date is January 1, but you can use your admin console to change this.
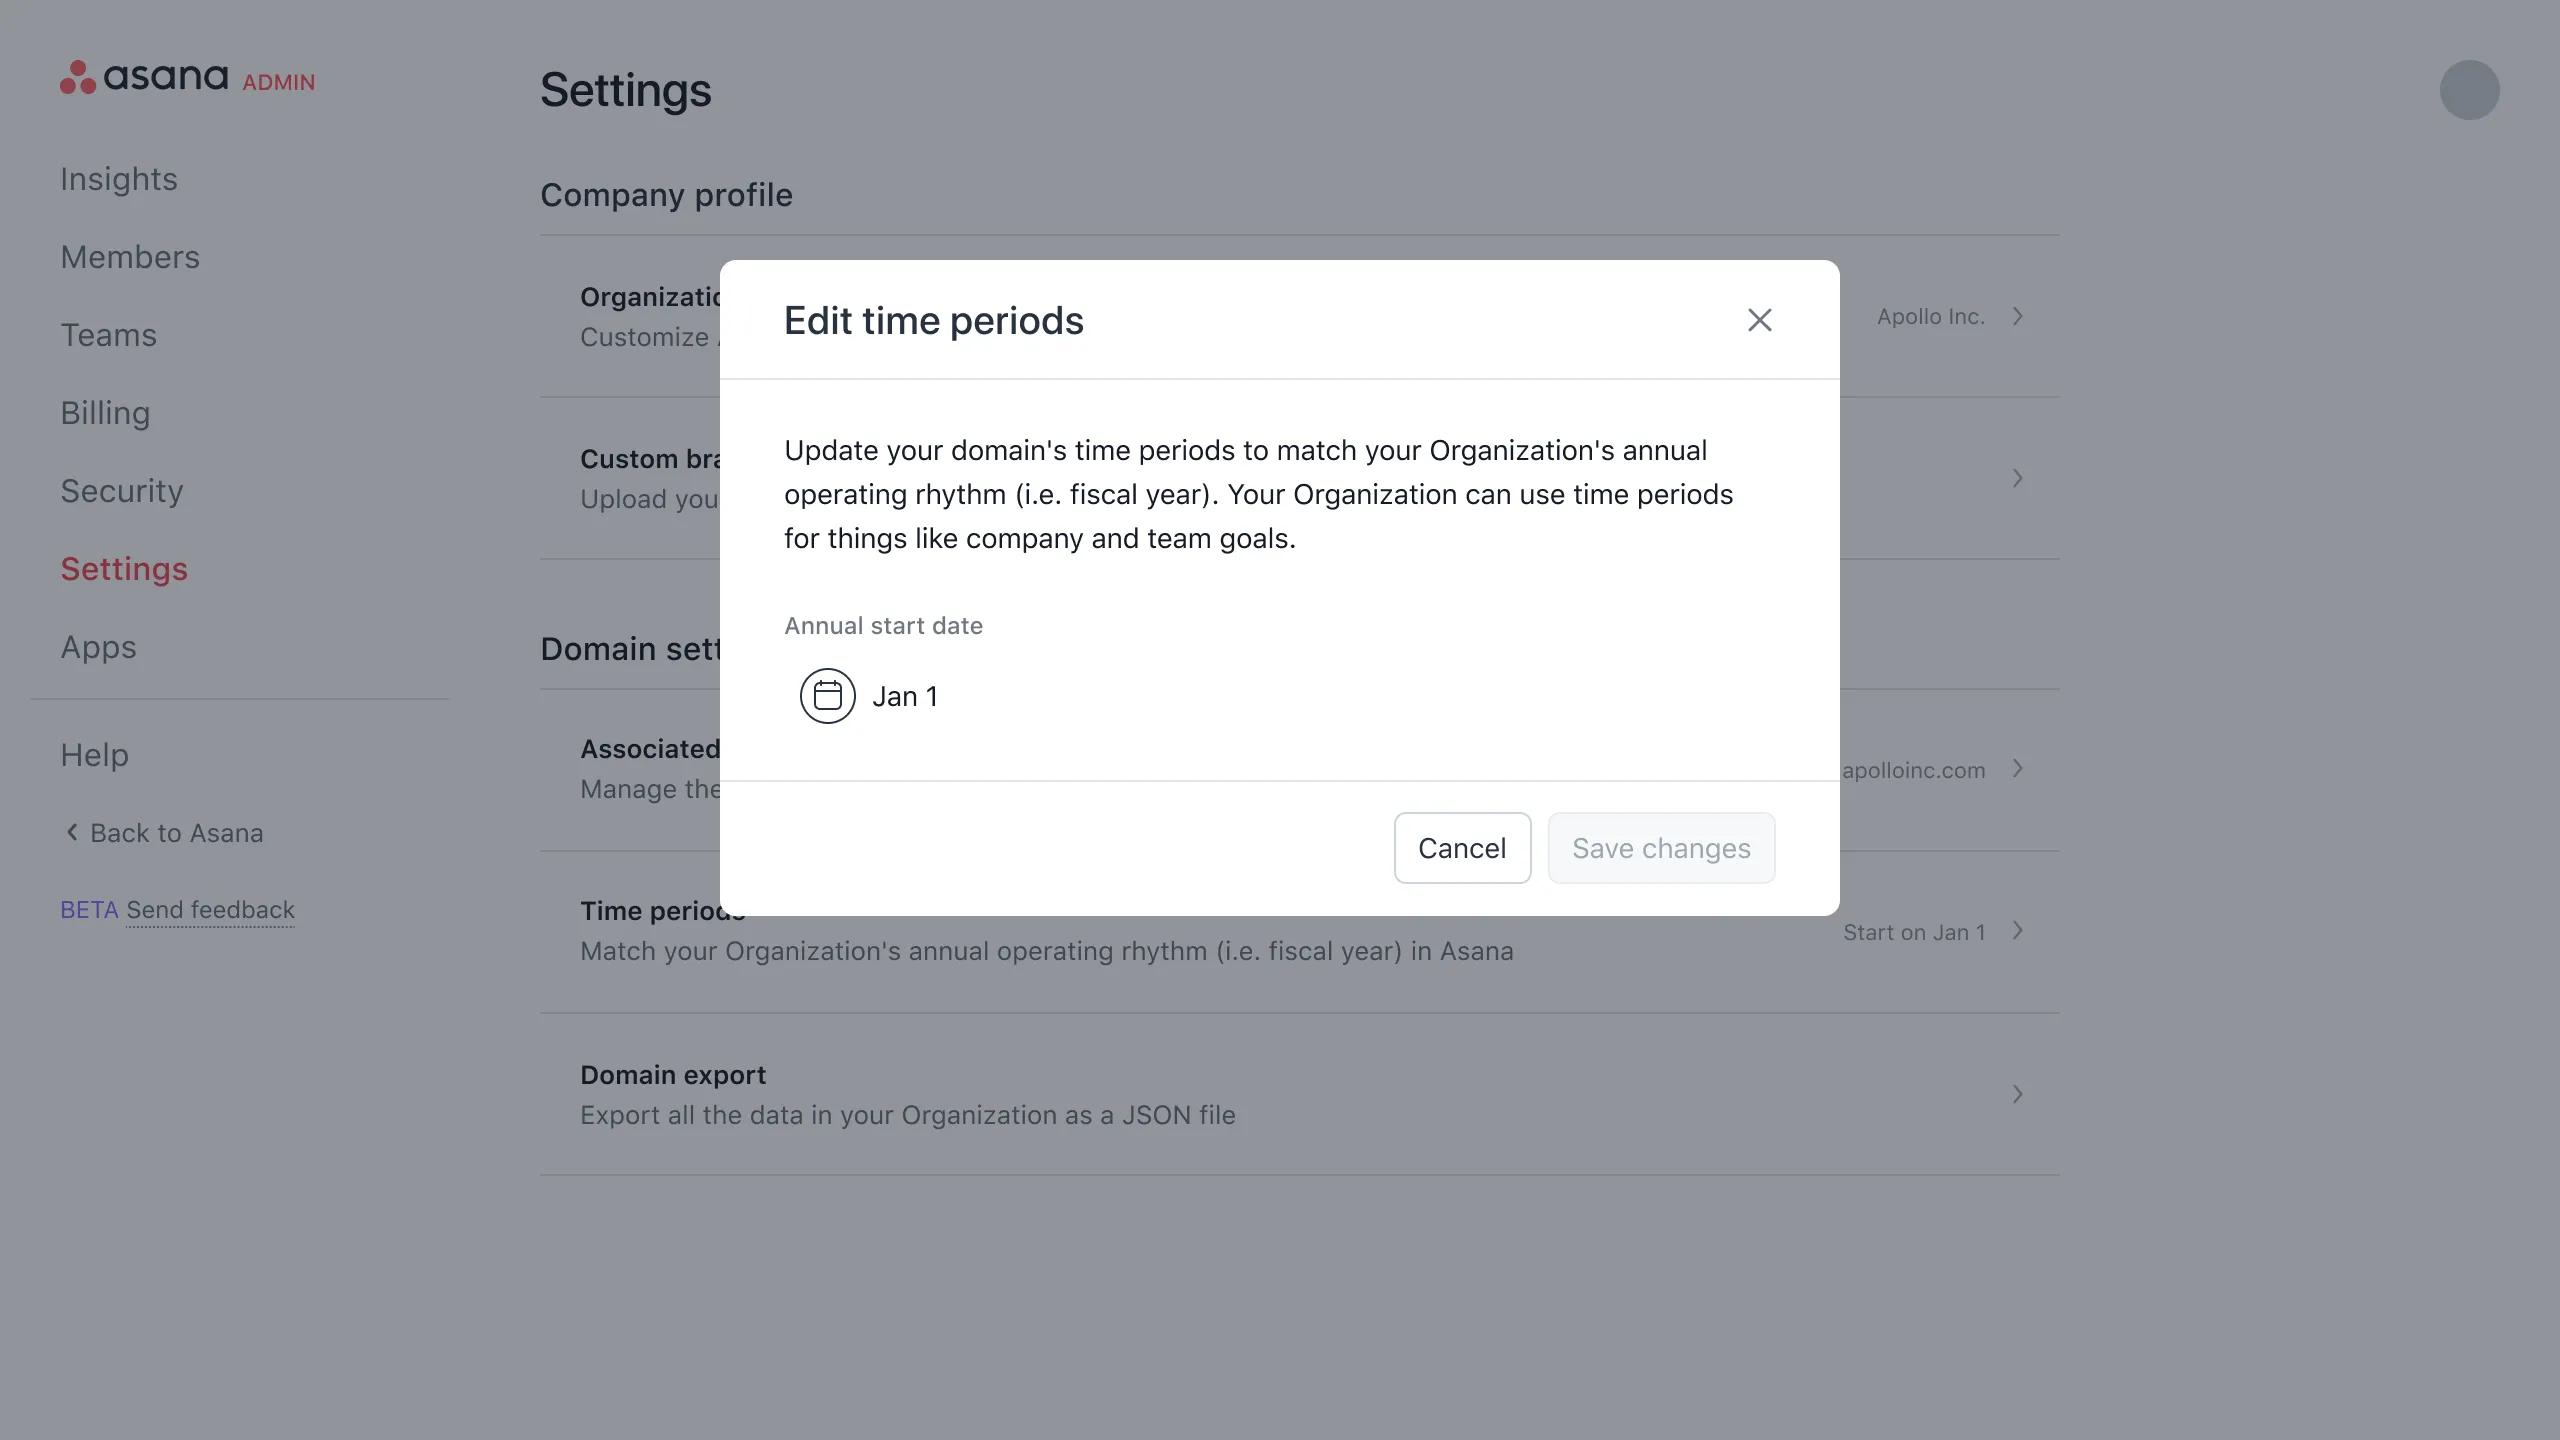
From your admin console, click into the Settings tab and then Time periods. From there, select the time period to match your organization's annual operating rhythm and choose when you want this time period change to begin. Time periods are organization-wide and you will need to be an organization-wide admin to update these time periods.
Only organization and workspace admins can update time periods through the admin console. When there's a division in an organization, only super admins can update time periods. All other admins will need to contact support to update time periods.
Note
Individual users can also manually add time periods to existing goals. When admins make changes to their fiscal year, it affects all goals across your organization. Asana will automatically update every goal that does not have a custom due date, including goals from prior years, to align with the new fiscal year. There is no automatic rollback if you change your mind after saving.
Super admins for paid organizations have the ability to add a security contact e-mail in their admin consoles to receive security updates from Asana. This feature allows Asana to know where to send important communications.
Super admins for paid divisions can access this feature by contacting our support team.
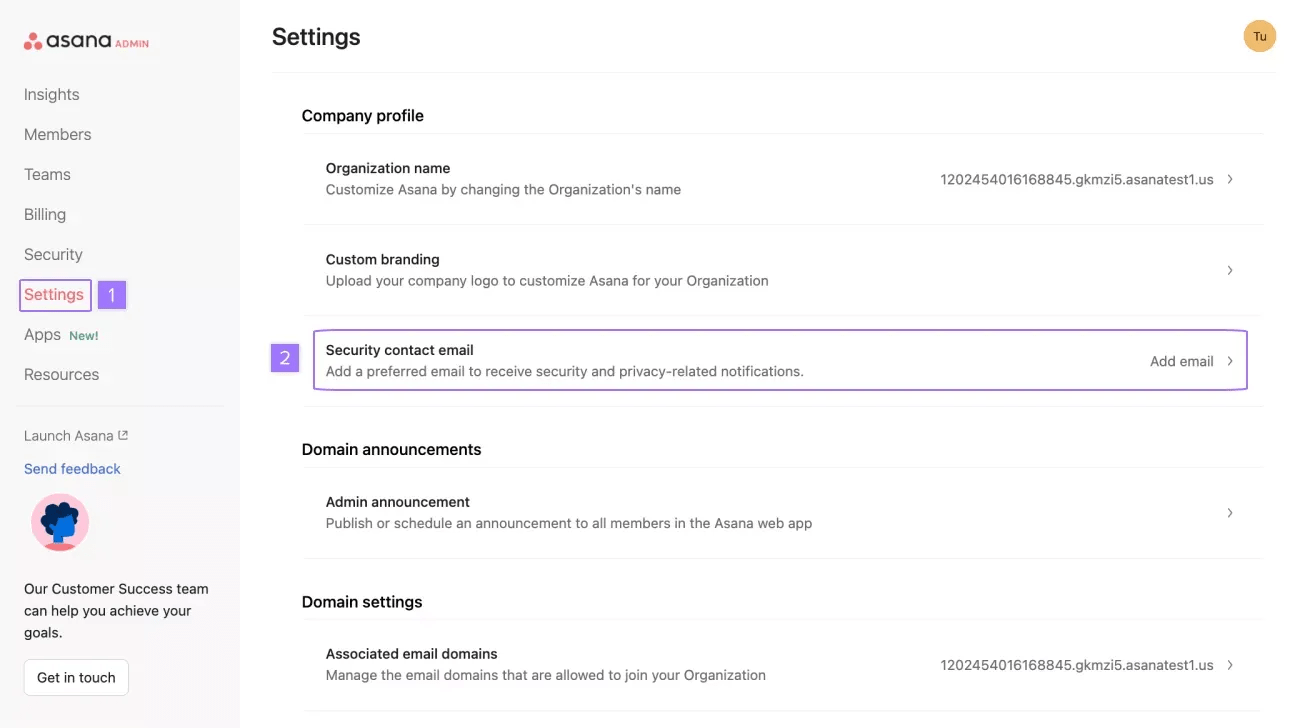
Navigate to the admin console, then click Settings, click Security contact email, and enter the email address you would like Asana to send communications to regarding security.
Asana AI features use artificial intelligence (AI) to sort, filter, categorize, or otherwise analyze data and/or content to help users in your organization optimize their work.
To learn more about what data is used and which AI-powered features can be administered by admin controls, please refer to this Help Center article.
Customers can choose to enable Asana AI features for their organization or workspace. If Asana AI features are not enabled:
From this page you can choose to enable or disable Asana AI for your entire organization or workspace. By disabling Asana AI, your organization’s data will not be used to inform artificial intelligence features and these experiences will be disabled for the entire organization.
If you are an admin of an organization that does not have any super admins, you can disable these features, but cannot enable them again. To enable them, you will need to complete the super admin verification process or contact the Support team. A warning banner will be displayed in-product before an admin makes this change. This also applies to divisions in Asana as divisions do not have super admins. In order to enable Asana AI features for a division, a division admin would need to complete the super admin verification process and become a super admin of the organization.
Asana commits to always being open and clear about our AI partnerships, security measures, data handling, and governance practices. Asana customers can learn all about these protections in Asana AI FAQ as well as in the Asana Trust Center.
Asana Machine Learning, or Asana ML, is a feature set powered by Asana’s own proprietary machine learning models.
Customers can choose to enable Asana ML features for their organization or workspace. If Asana ML features are not enabled:
The users in the organization/workspace will not have access to some features.
The organization/workspace's data will not be processed to power these features.
Super admins of organizations and workspace billing owners and creators can enable or disable Asana ML features as follows:
Click your profile picture in Asana and navigate to the Admin console
Click the Settings tab
Under Domain settings select Optimize with Asana ML
From this window you can choose to enable or disable Asana Machine Learning for your entire organization or workspace by checking or unchecking the appropriate box.
By disabling Asana Machine Learning, your organization’s data will not be used to inform artificial intelligence features and these experiences will be disabled for the entire organization.
If you are an admin of an organization that does not have any super admins, you can disable these features, but cannot enable them again. To enable them, you will need to complete the super admin verification process or contact the Support team. A warning banner will be displayed in-product before an admin makes this change. This also applies to divisions in Asana as divisions do not have super admins. In order to enable Asana AI features for a division, a division admin would need to complete the super admin verification process and become a super admin of the organization.
Asana customers can learn more in the Asana Trust Center
Super admins can request an export of all the data in your organization as a JSON file. Please note that domain export feature is only available on Asana Enterprise+ tier, as well as legacy tier Legacy Enterprise.
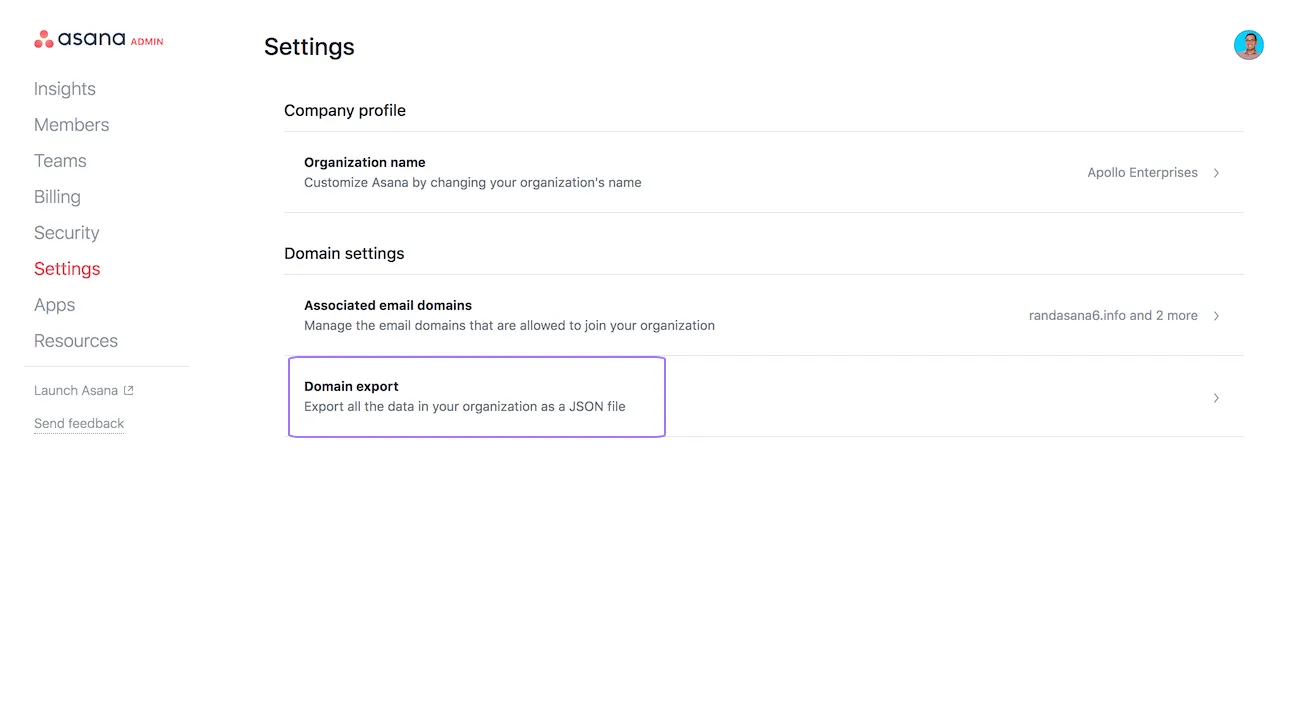
Learn more about a full export of an organization.
Super admins can choose to export only text, or export text and attachments.
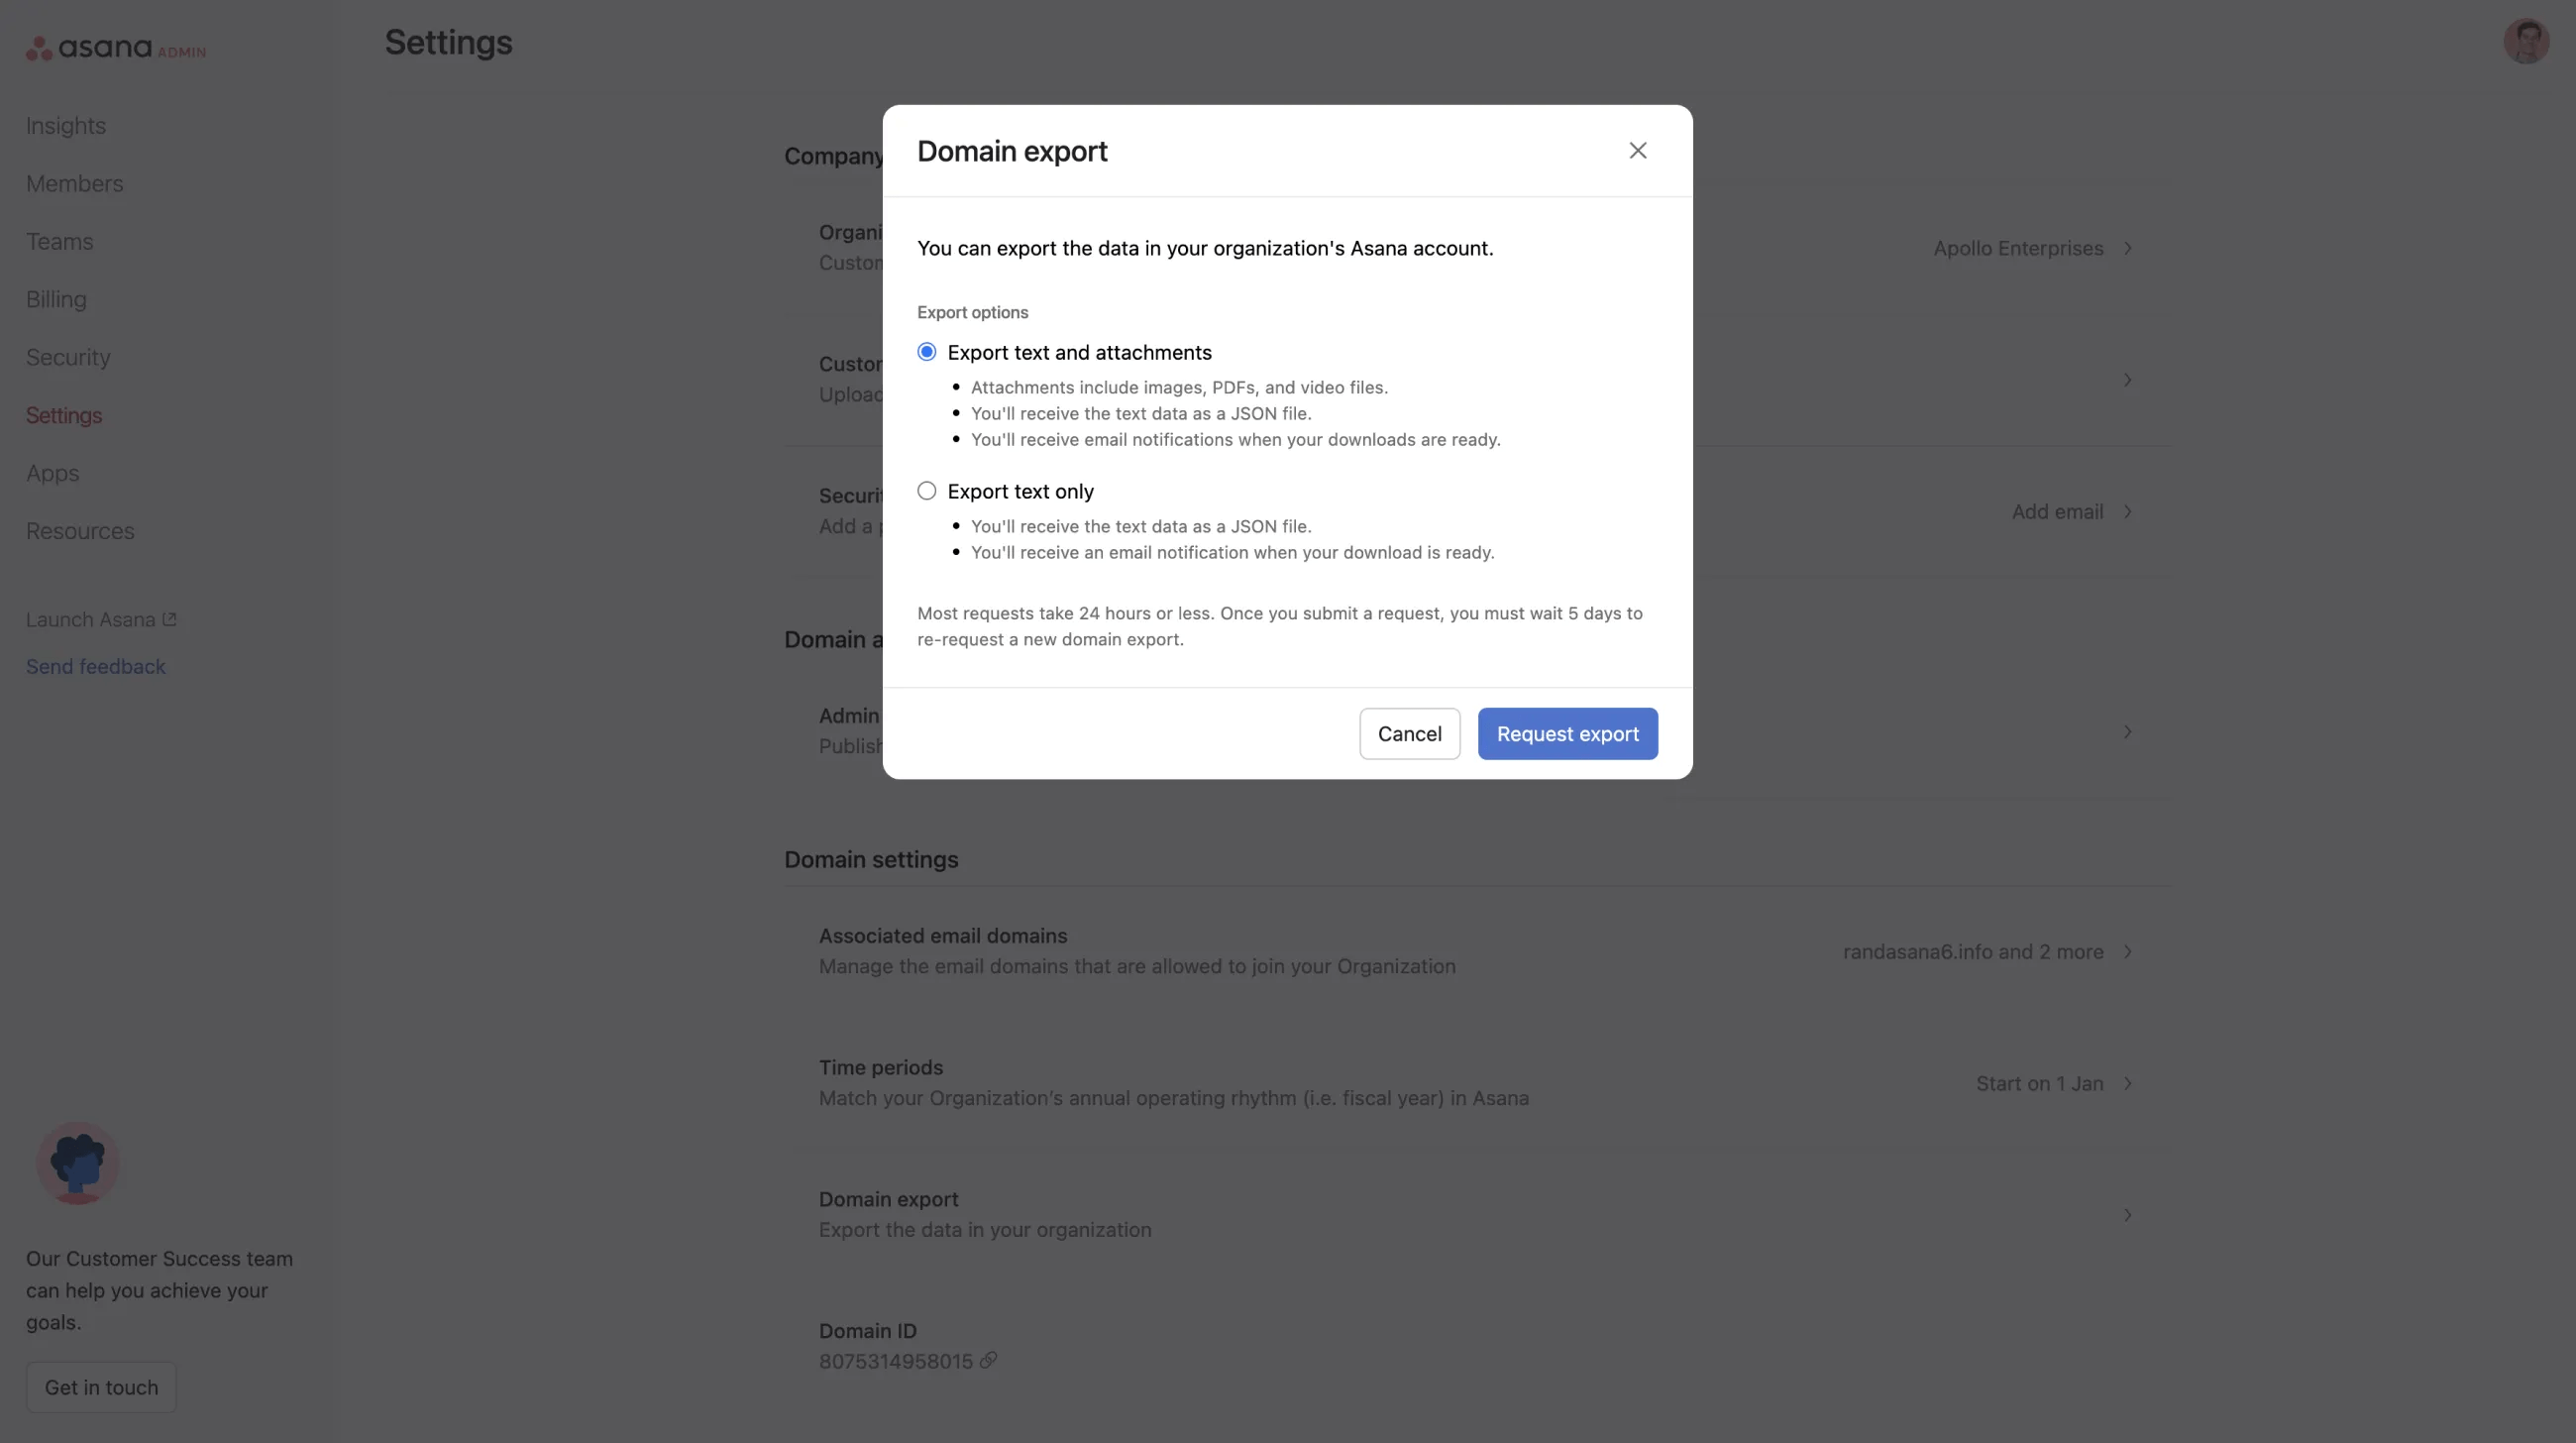
Certain attachment types including video transcriptions, cover photos for forms, and user profile pictures are not currently included in the attachment export. If you require data that you aren't able to export, please contact us.