Products
AI Platform
Asana Foundations
Company Type
Visit our pricing page for more information.
Set up a consistent system to plan, publish, and track content in one place. This article walks through creating a calendar-focused project, structuring it with sections and fields, standardizing tasks, connecting work across teams and tools, automating handoffs, and tracking results.
Create a new project for your editorial planning and name it clearly (for example, Monthly Content Calendar). Switch to calendar view to see your plan on a monthly grid and save it as the project’s default layout. Calendar becomes the day-to-day planning surface, while you can still use List or Board for bulk edits and triage.
Use sections to mirror how you’ll group work on the board and in reports. Many teams organize by week (Week 1, Week 2, etc.), so you can see distribution across the month at a glance; others prefer lifecycle stages (Ideas, Drafting, In review, Scheduled, Published). Pick one model and keep it stable so data stays clean.
To create sections:
Add custom fields to capture the structured information you’ll use for routing and reporting. Common fields:
You can use Asana AI to suggest additional fields you can add to your project.
To add recommended fields:
You can choose to Remove, Add or Add and Fill the AI generated fields.
Turn a single content task into a repeatable checklist. Create a task template like “New content asset” with subtasks (Draft copy, Create visual, Compliance review, Final QA, Schedule/Publish).
If a specific producer or approver should always be looped in, add them as a collaborator in the template so they’re notified automatically when the template is used. Templates reduce setup time and help the team follow the same path from idea to publish.
To create a task template:
Content often supports larger campaigns. Use multi-homing to add a single task to multiple projects—e.g., keep a blog post in the “Content Calendar” and also in the “Product Launch” project. Both teams see the same task, fields, comments, and attachments in real time, without creating duplicates.
Keep assets close to the work by integrating Google Drive. Attach briefs, drafts, and final files directly to the task so creators and reviewers open the latest version from one place. Linking files to tasks also helps dashboard metrics and reviews stay grounded in the current source of truth.
Use rules to automate routine handoffs and status changes. For example, when Stage = In review, automatically assign the task to an editor and move it to a Ready for review section. When Stage = Published, move it to Published, add a “Published” custom field, and notify stakeholders. Time-based nudges can help maintain momentum—if a task sits in Drafting for more than five days, add a comment or @mention the owner.
Add AI rules where judgment helps: analyze the description to set Stage or suggest Channel, or generate a draft checklist for specific formats. Keep prompts short and map outputs to your existing custom fields so the results are consistent and reportable.
Use a portfolio to group your content-calendar projects (for example, monthly or regional calendars) and monitor their health in real time, with the ability to drill into any project for more detail. In one place, you can review status updates and owners, see custom-field rollups, and use the portfolio dashboard for high-level charts.
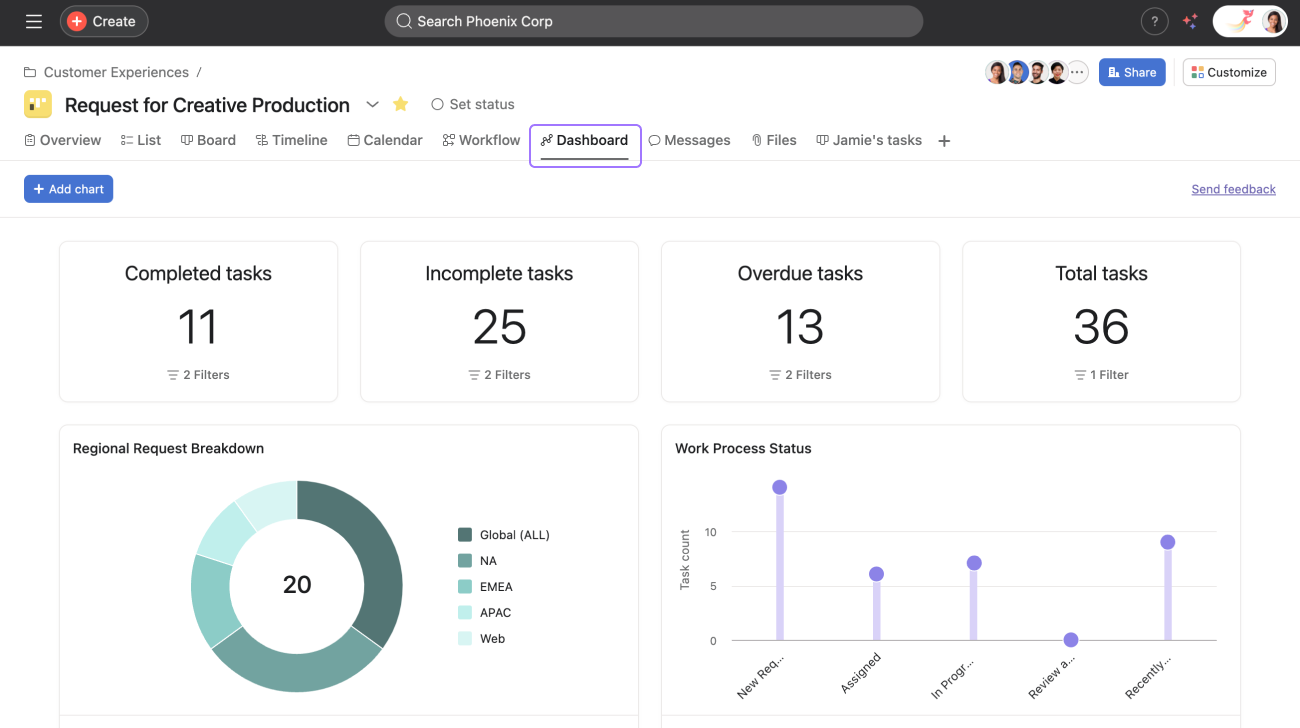
Use the project Dashboard tab to visualize progress: build charts like posts by channel per month, workload by assignee, and time in stage. Filter charts by fields (e.g., Audience or Region) to answer common questions quickly. Dashboards update in real time, so status meetings focus on decisions rather than data gathering.