Products
AI Platform
Asana Foundations
Company Type
Visit our pricing page for more information.
The Members tab offers admins a comprehensive overview of the organization's membership, including the ability to invite new members, assign administrative privileges, and deactivate or remove members as needed.
The Members tab gives you a clear overview of the people in your organization, with columns that highlight important account details at a glance.
Note
Filtering actions are rolling out incrementally in late 2025 and early 2026. You may not see these options immediately in the admin console.
Bulk actions are rolling out incrementally in late 2025 and early 2026. You may not see these options immediately in the admin console.
Bulk actions are available from the Members page. Admins can select multiple rows using the checkboxes, or by using:
Shift to select a range of consecutive rows
Cmd (Mac) / Ctrl (Windows) to select multiple non-consecutive rows
When one or more rows are selected, the bulk actions bar appears at the bottom of the page. From here, admins can:
Change status: Pause or unpause a user, or remove or restore a user
Change license: Assign an Enterprise or View only license
(Coming soon) Manage invites: Resend or cancel invites
(Coming soon) Add to team
To remove a person from your organization, navigate to the Members tab of your admin console. Click the three dot icon next to the person's name and select Remove.
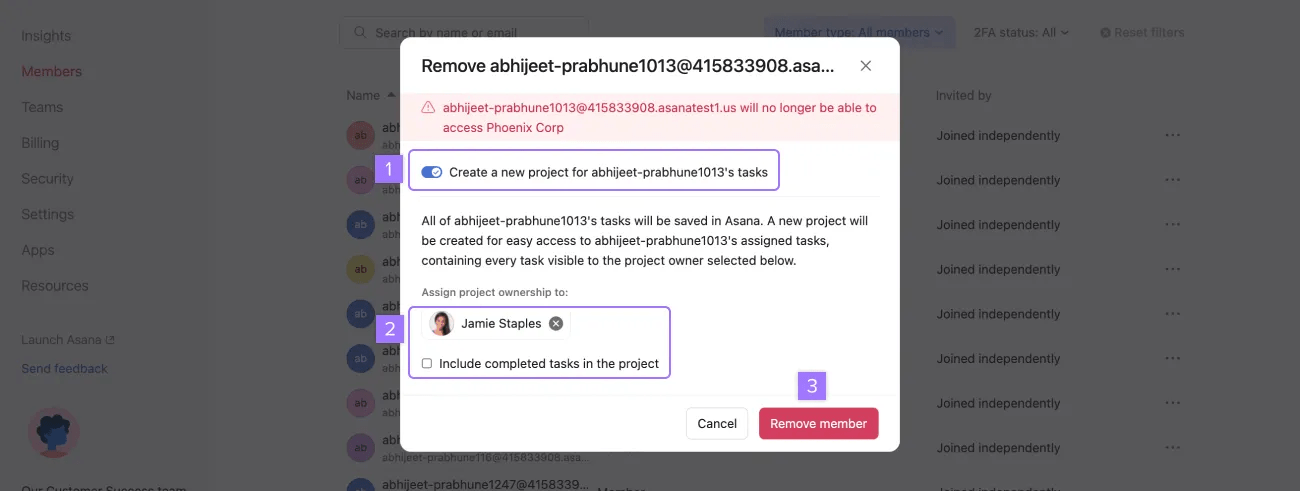
The deactivated member will then show in your member’s list as Removed.
After you have deprovisioned someone from your organization, a private to members project containing their previously assigned tasks will be auto-generated. You can assign this to yourself or another member of your organization. This allows you to easily assign pending tasks to the appropriate person to manage.
A simple next step solution to delegating would be to multi-select deprovisioned tasks, where you can take mass actions on tasks and even bulk assign them to yourself or other organization members.
You can read more about this in our FAQ article.
The time of the deactivation will appear in the Last activity column.
Available on paid plans, automatic reactivation means that previously deactivated users returning to Asana have access to their previous data including projects and teams, provided they return with the same email address as used previously.
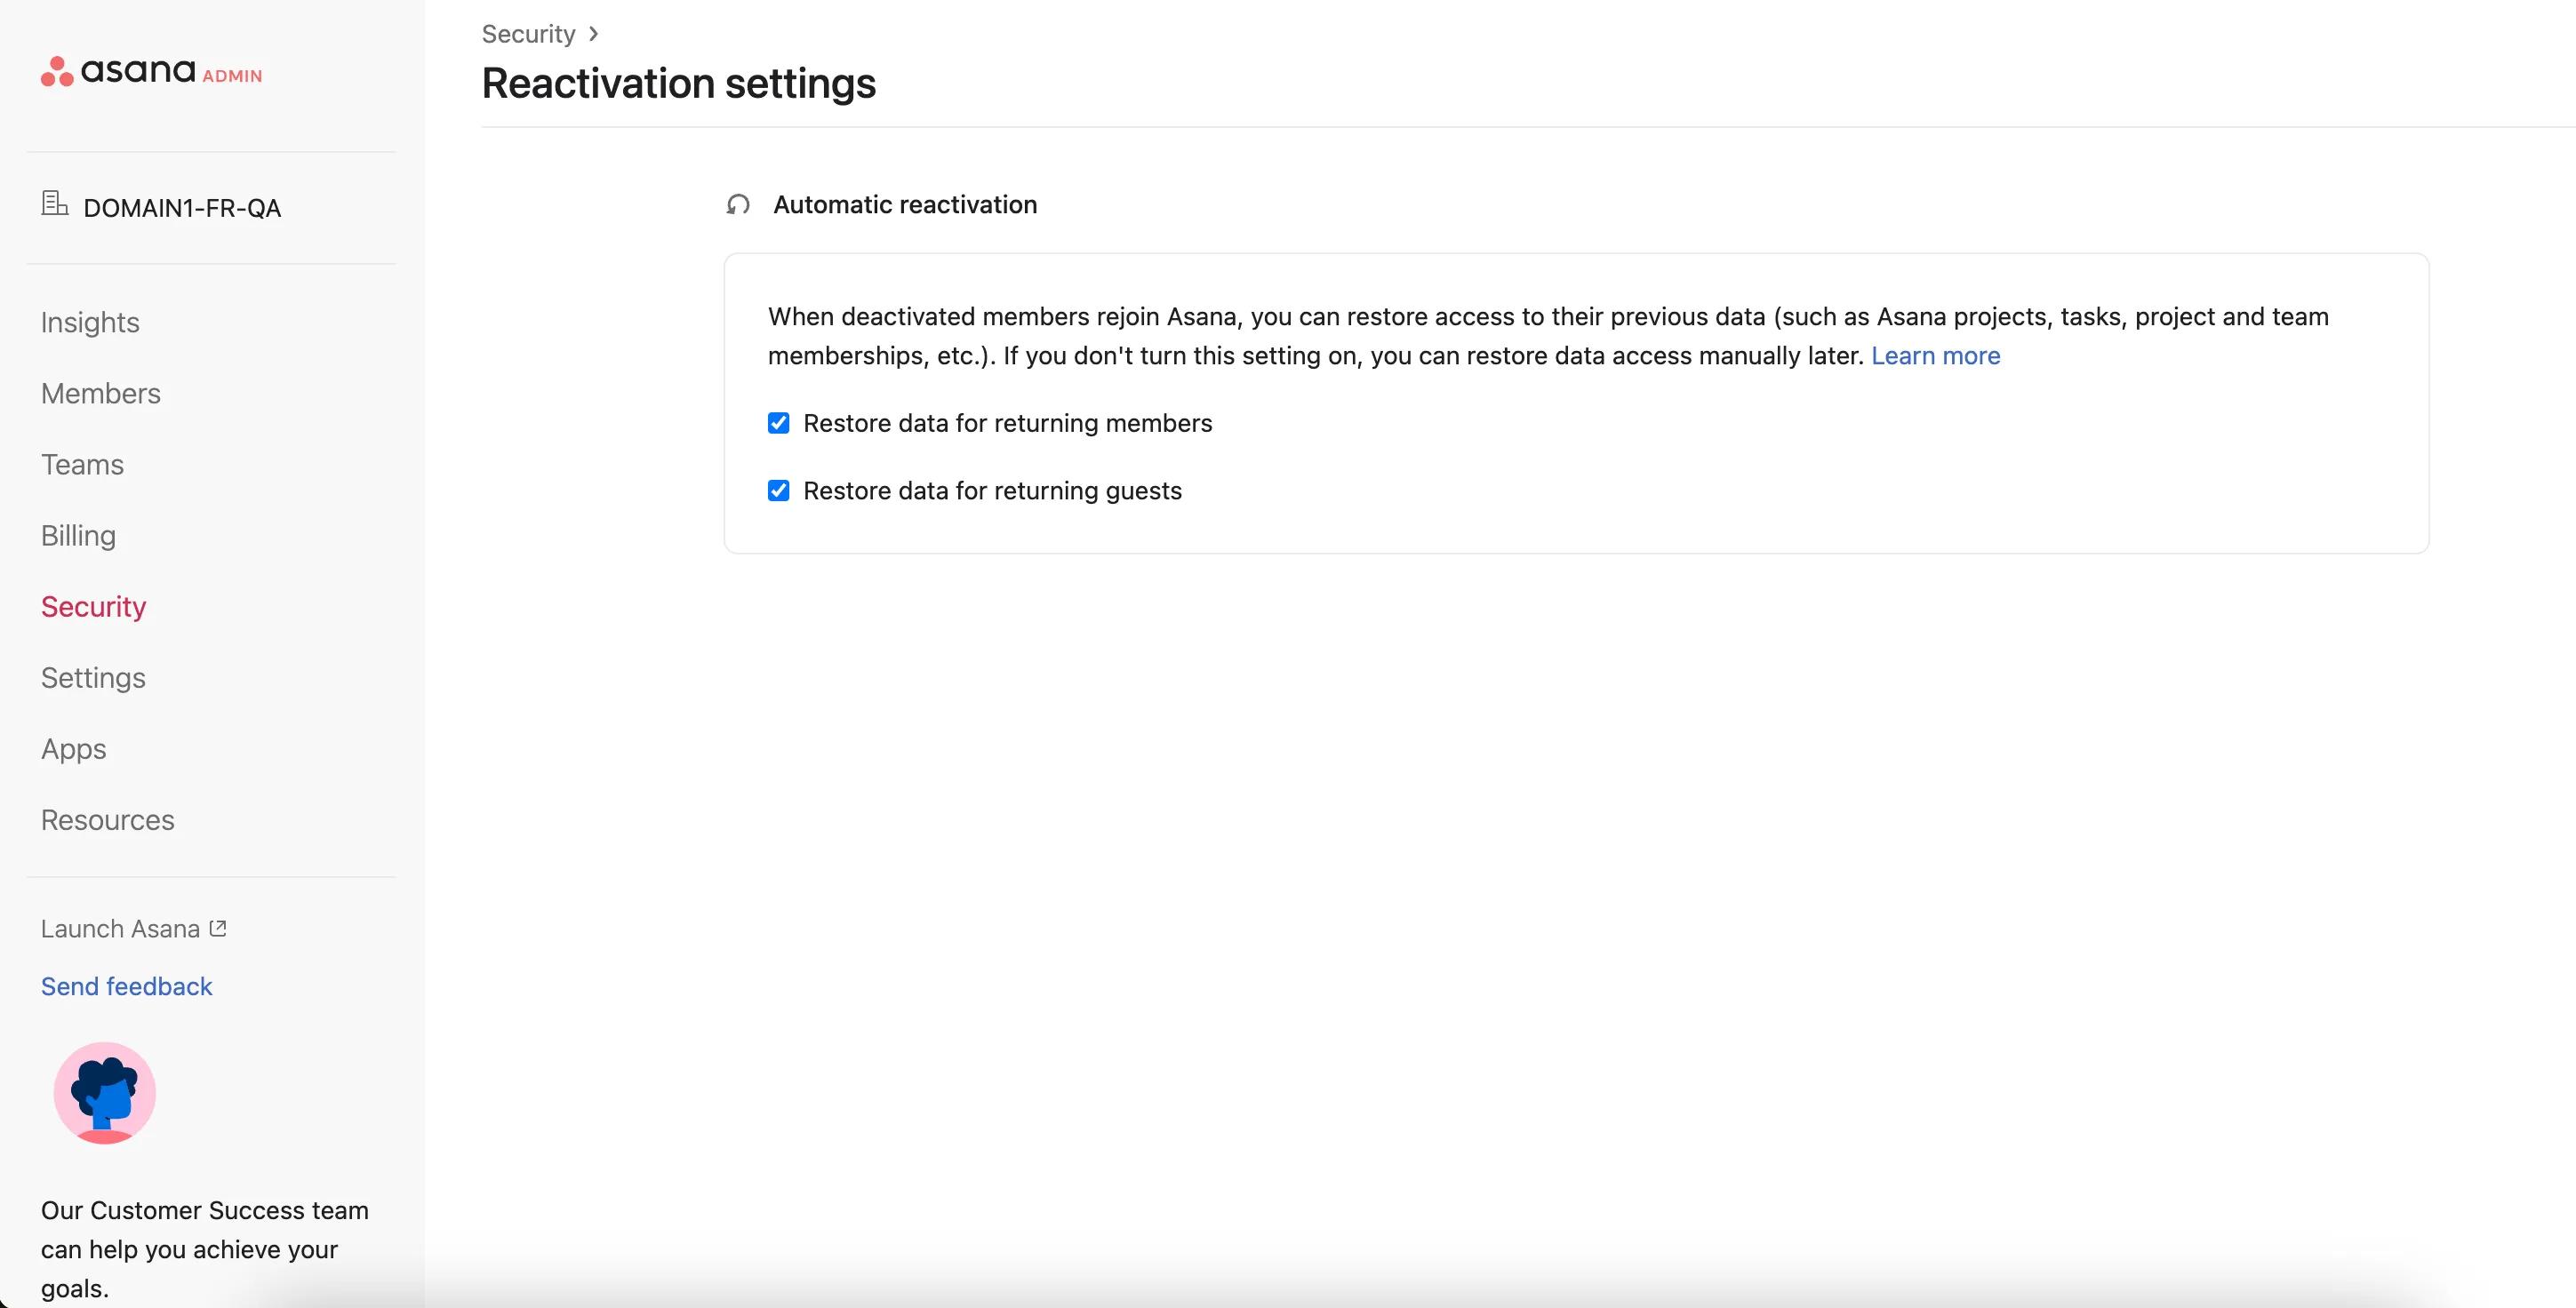
Automatic reactivation can be configured in the Security tab in the sidebar and then clicking Reactivation settings. Here you can select to turn this feature on or off for members or guests. If you choose to turn this setting off, you will still be able to restore data access manually. Only super admins can turn this feature back on once it's switched off.
User's reactivation only happens after the user accepts their invite or completes signing up for Asana on the website. Inviting a user by itself doesn't reactivate the user.
Automatic reactivation will only be available for users who were deactivated less than two years ago.
Restore a deactivated member by finding their name in your member’s tab. Then click the three dot icon and select Restore.

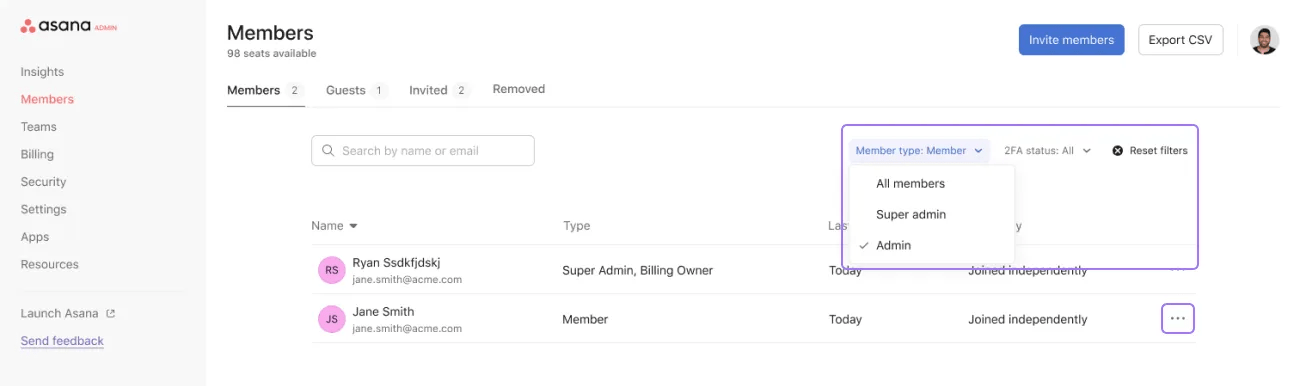
To filter your member list by member type, click the drop-down arrow next to the member type filter.
The Team access tab on a member's profile settings gives admins insight into what specific users have access to and the ability to edit membership status.
From Edit profile settings admins can navigate to a member's Profile settings to access and manage teams. To access a member's settings click the three dot icon and click Edit profile settings.
From here, navigate to the Team Access tab where you can browse teams, edit team access and add or remove members from teams.

Click on Team Access to:
The CSV file downloaded has the following fields:
Need help managing organization members in Asana? Ask the Community.