Products
AI Platform
Asana Foundations
Company Type
Visit our pricing page for more information.
Get started in Asana using your own data in an easy and fast way. The CSV Importer will help you move your workflow out of spreadsheet software such as Excel or Smartsheet to Asana, so you can get started right away on any project. You can also import data from other work management tools.
When preparing your data for CSV import into Asana, it's essential to ensure that your CSV file is correctly formatted. Below are detailed steps and important tips to help you successfully import your data.

The order of columns in your CSV file must be precise. The Task Name must be the first column, followed by Description, Sections, and Assignee. Follow the order below for other fields.
If any column contains incorrect data, such as an email address in the Due Date column, none of the due dates will import correctly. A new text-based field will be created instead.
Note
Always include a header row with column names so that the CSV Importer can recognize the type of data you are importing. The headers must use title case.
Even the smallest errors can affect the import process. For instance, a space or a period after a number can cause issues. If you have 1,000 rows and one row has an extra space or character, it will not import correctly as a number custom field.
When creating a new project via the CSV importer, custom fields are local, not global. To use these fields for reporting or future imports, convert them to global custom fields.
As a workaround, you can complete one import, convert your local fields to global custom fields and then duplicate the project without tasks or sections to retain only the global fields and then import the next CSV into that project. Ensure that the custom field options match exactly to avoid creating duplicate local custom fields.
To be detected as multiple options, multi-select values should have a comma (",") between them. If this is missed, all options are imported as a single block of text. This formatting needs to be done manually before importing.
There are three different opportunities to import data from a CSV file into Asana:
Importing data via CSV will not update any existing tasks in the project. The CSV importer can only add tasks to a project.


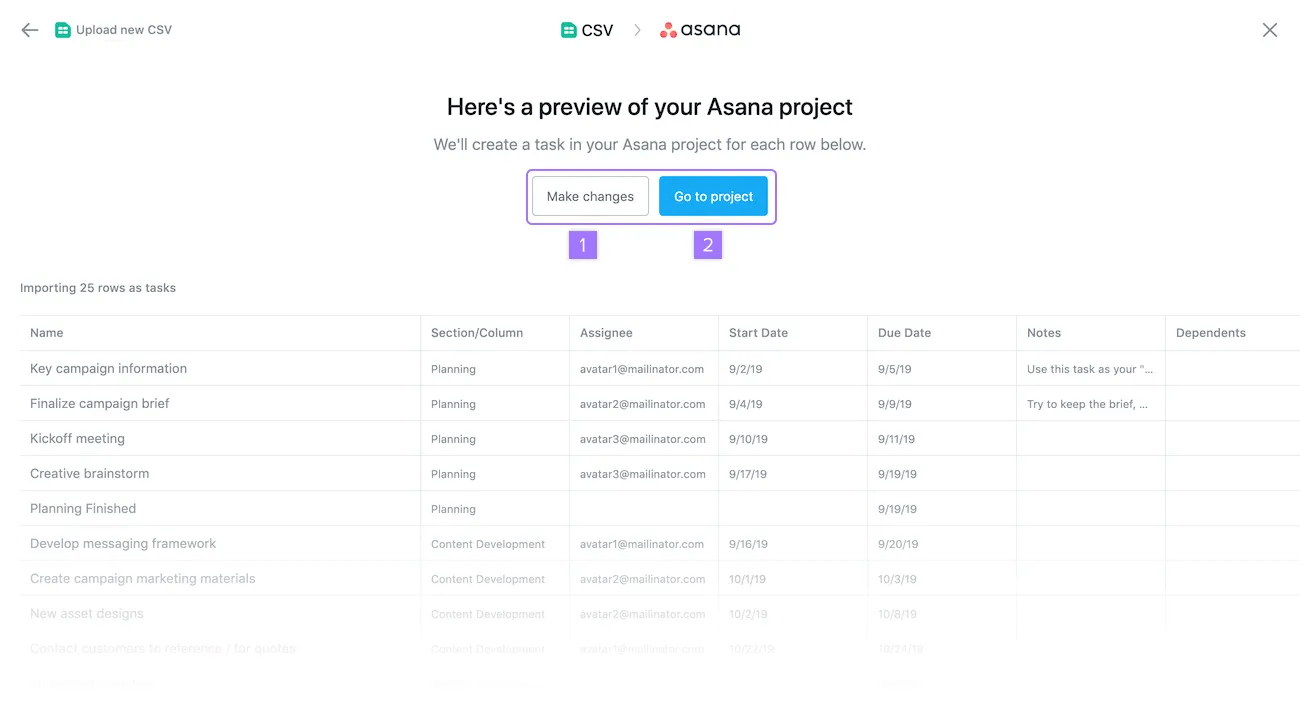
After selecting your file to import, you can preview your project and make changes to it if necessary.
Always click Make changes before completing the import. This step allows you to review the data and correct any mistakes or change custom field types. If the desired custom field type is not available, it indicates a formatting issue in the CSV that needs fixing.
The Task Name must be the first column, followed by Description, Sections, and Assignee, with other fields following in a specific order as outlined in the article.
Custom fields created via CSV import are local to the project, not global, and must be manually converted to global custom fields if you want to use them for reporting or future imports.
Collaborator email addresses should be separated with a comma without any spaces between them in the Collaborators column.
No, CSV import can only add new tasks to a project and cannot update any existing tasks.
Looking for a better way to manage your work? Get started with a free Asana trial. Try for free