CAPABILITIES
ASANA AI
Company Type
If you've been trialling Asana Starter or Advanced, you may have decided that it's the right solution for your team. In order for your access to paid features to continue uninterrupted when your trial period is over, you have the option to add payment details before the trial end date. This results in your chosen plan beginning as soon as your trial ends, and ensures you don't lose access to paid features like rules, goals, and universal reporting - even for a moment.
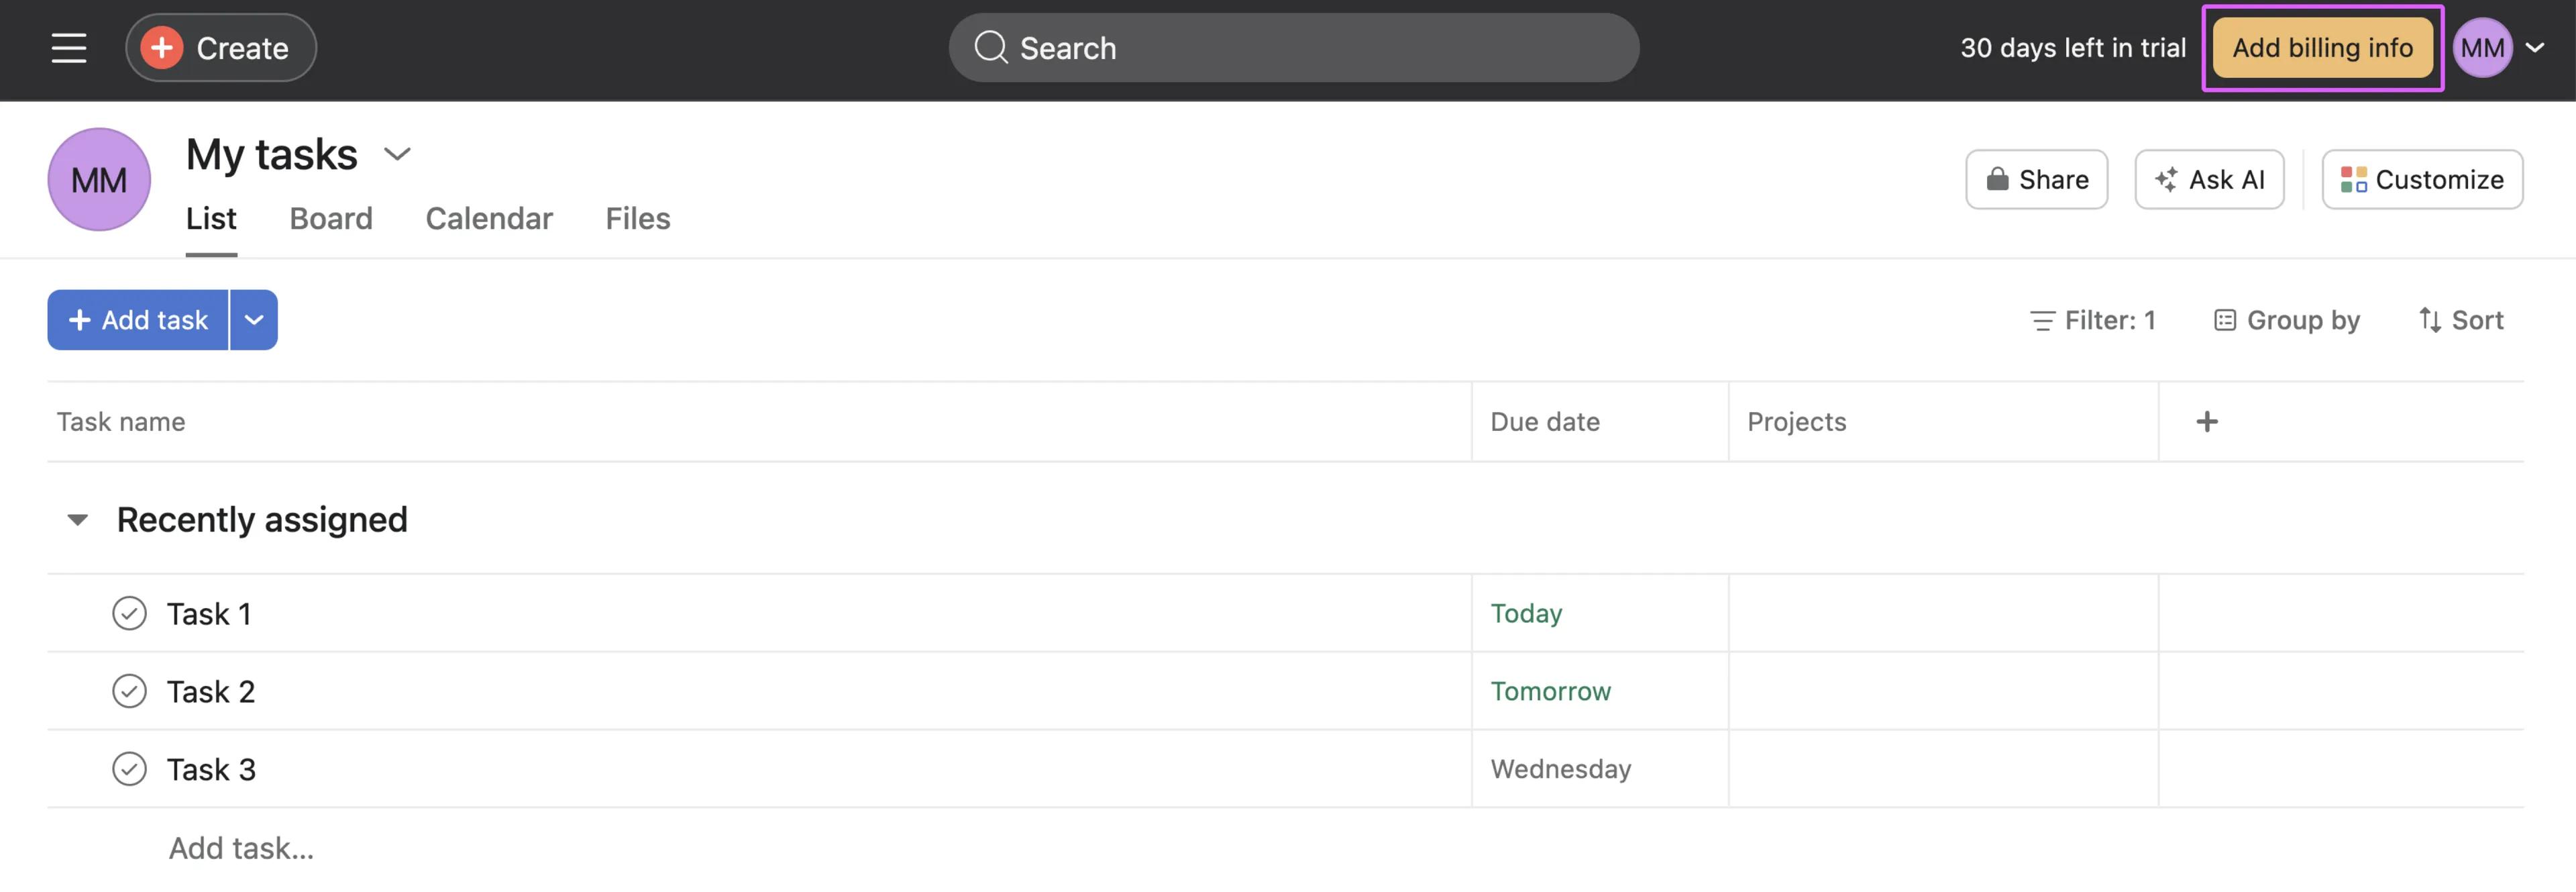
To add payment details to your trial, click Add billing info in the top-right corner of Asana.
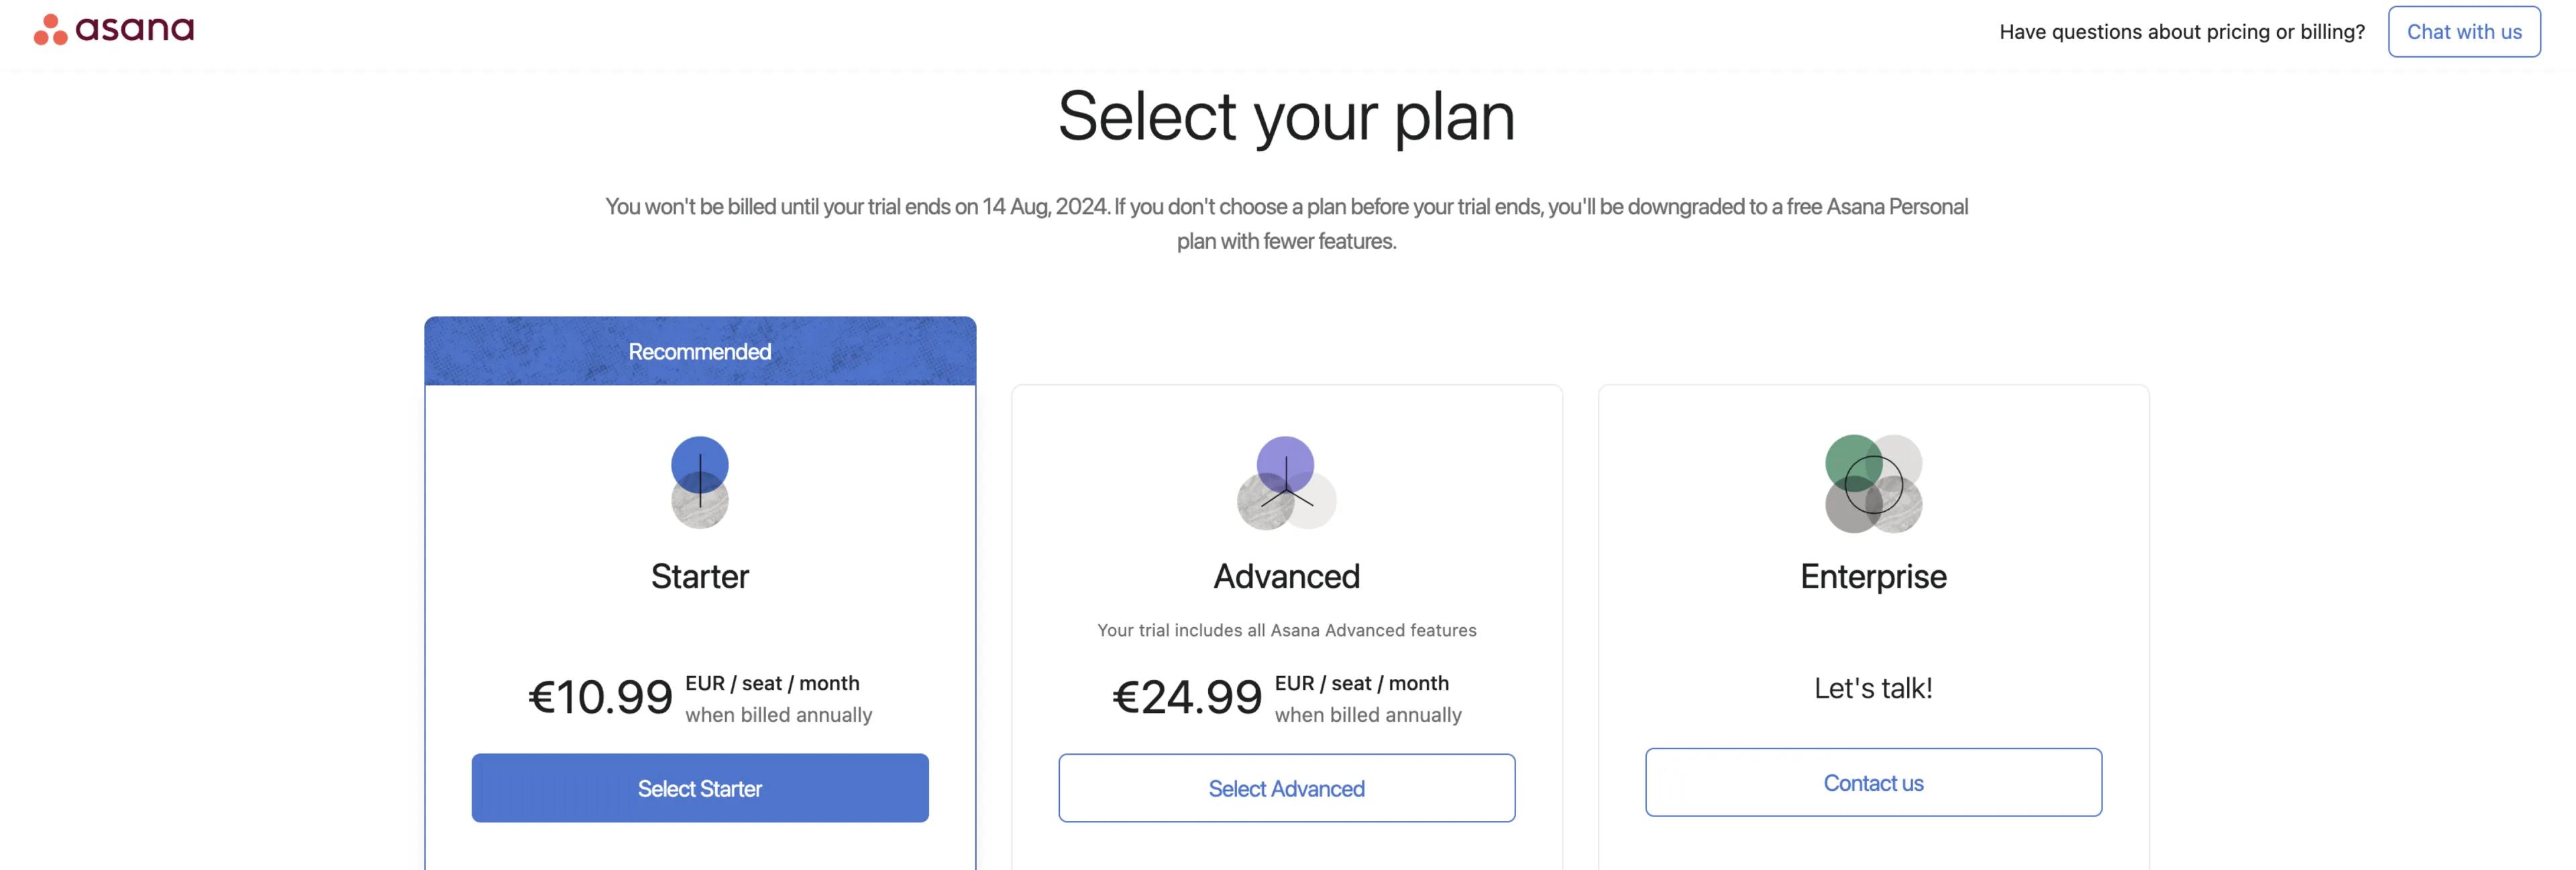
Next, you'll be prompted to select your plan. You can choose between automatically beginning a Starter or Advanced plan when your trial ends. If you'd like to begin an Enterprise or Enterprise+ plan, click Contact us to talk with our sales team.
Finally, add your payment details and click confirm. Once the trial period ends, your new paid Asana plan will begin automatically. 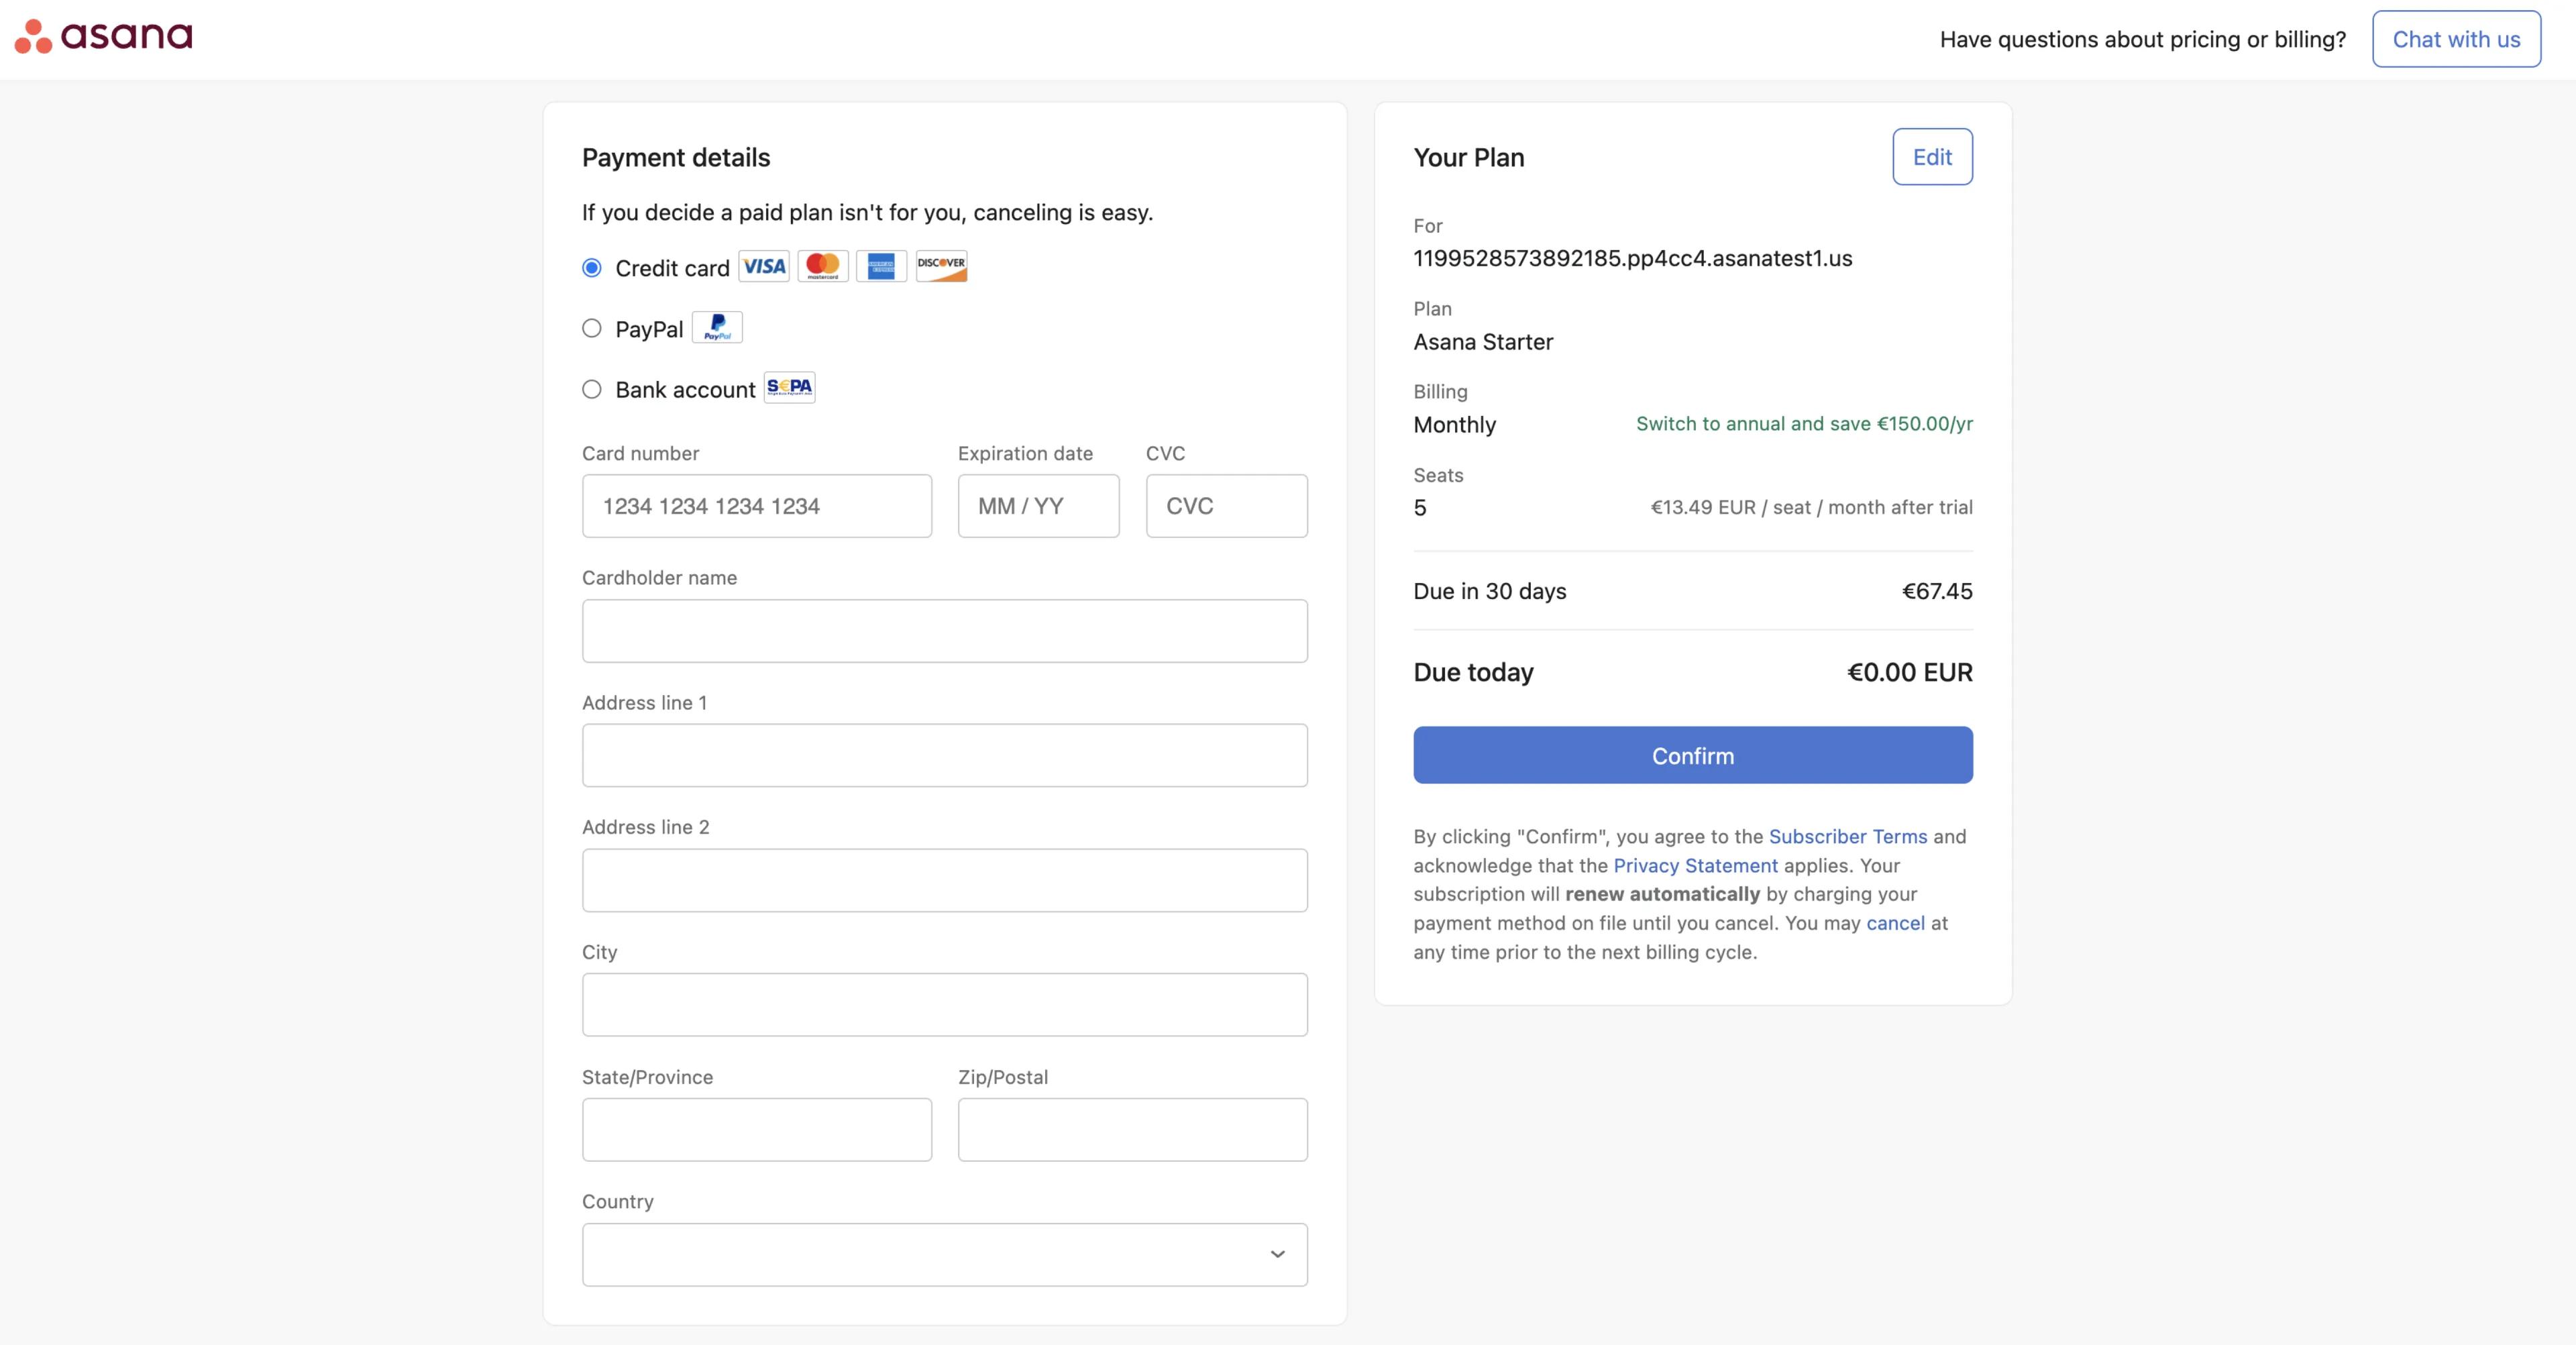
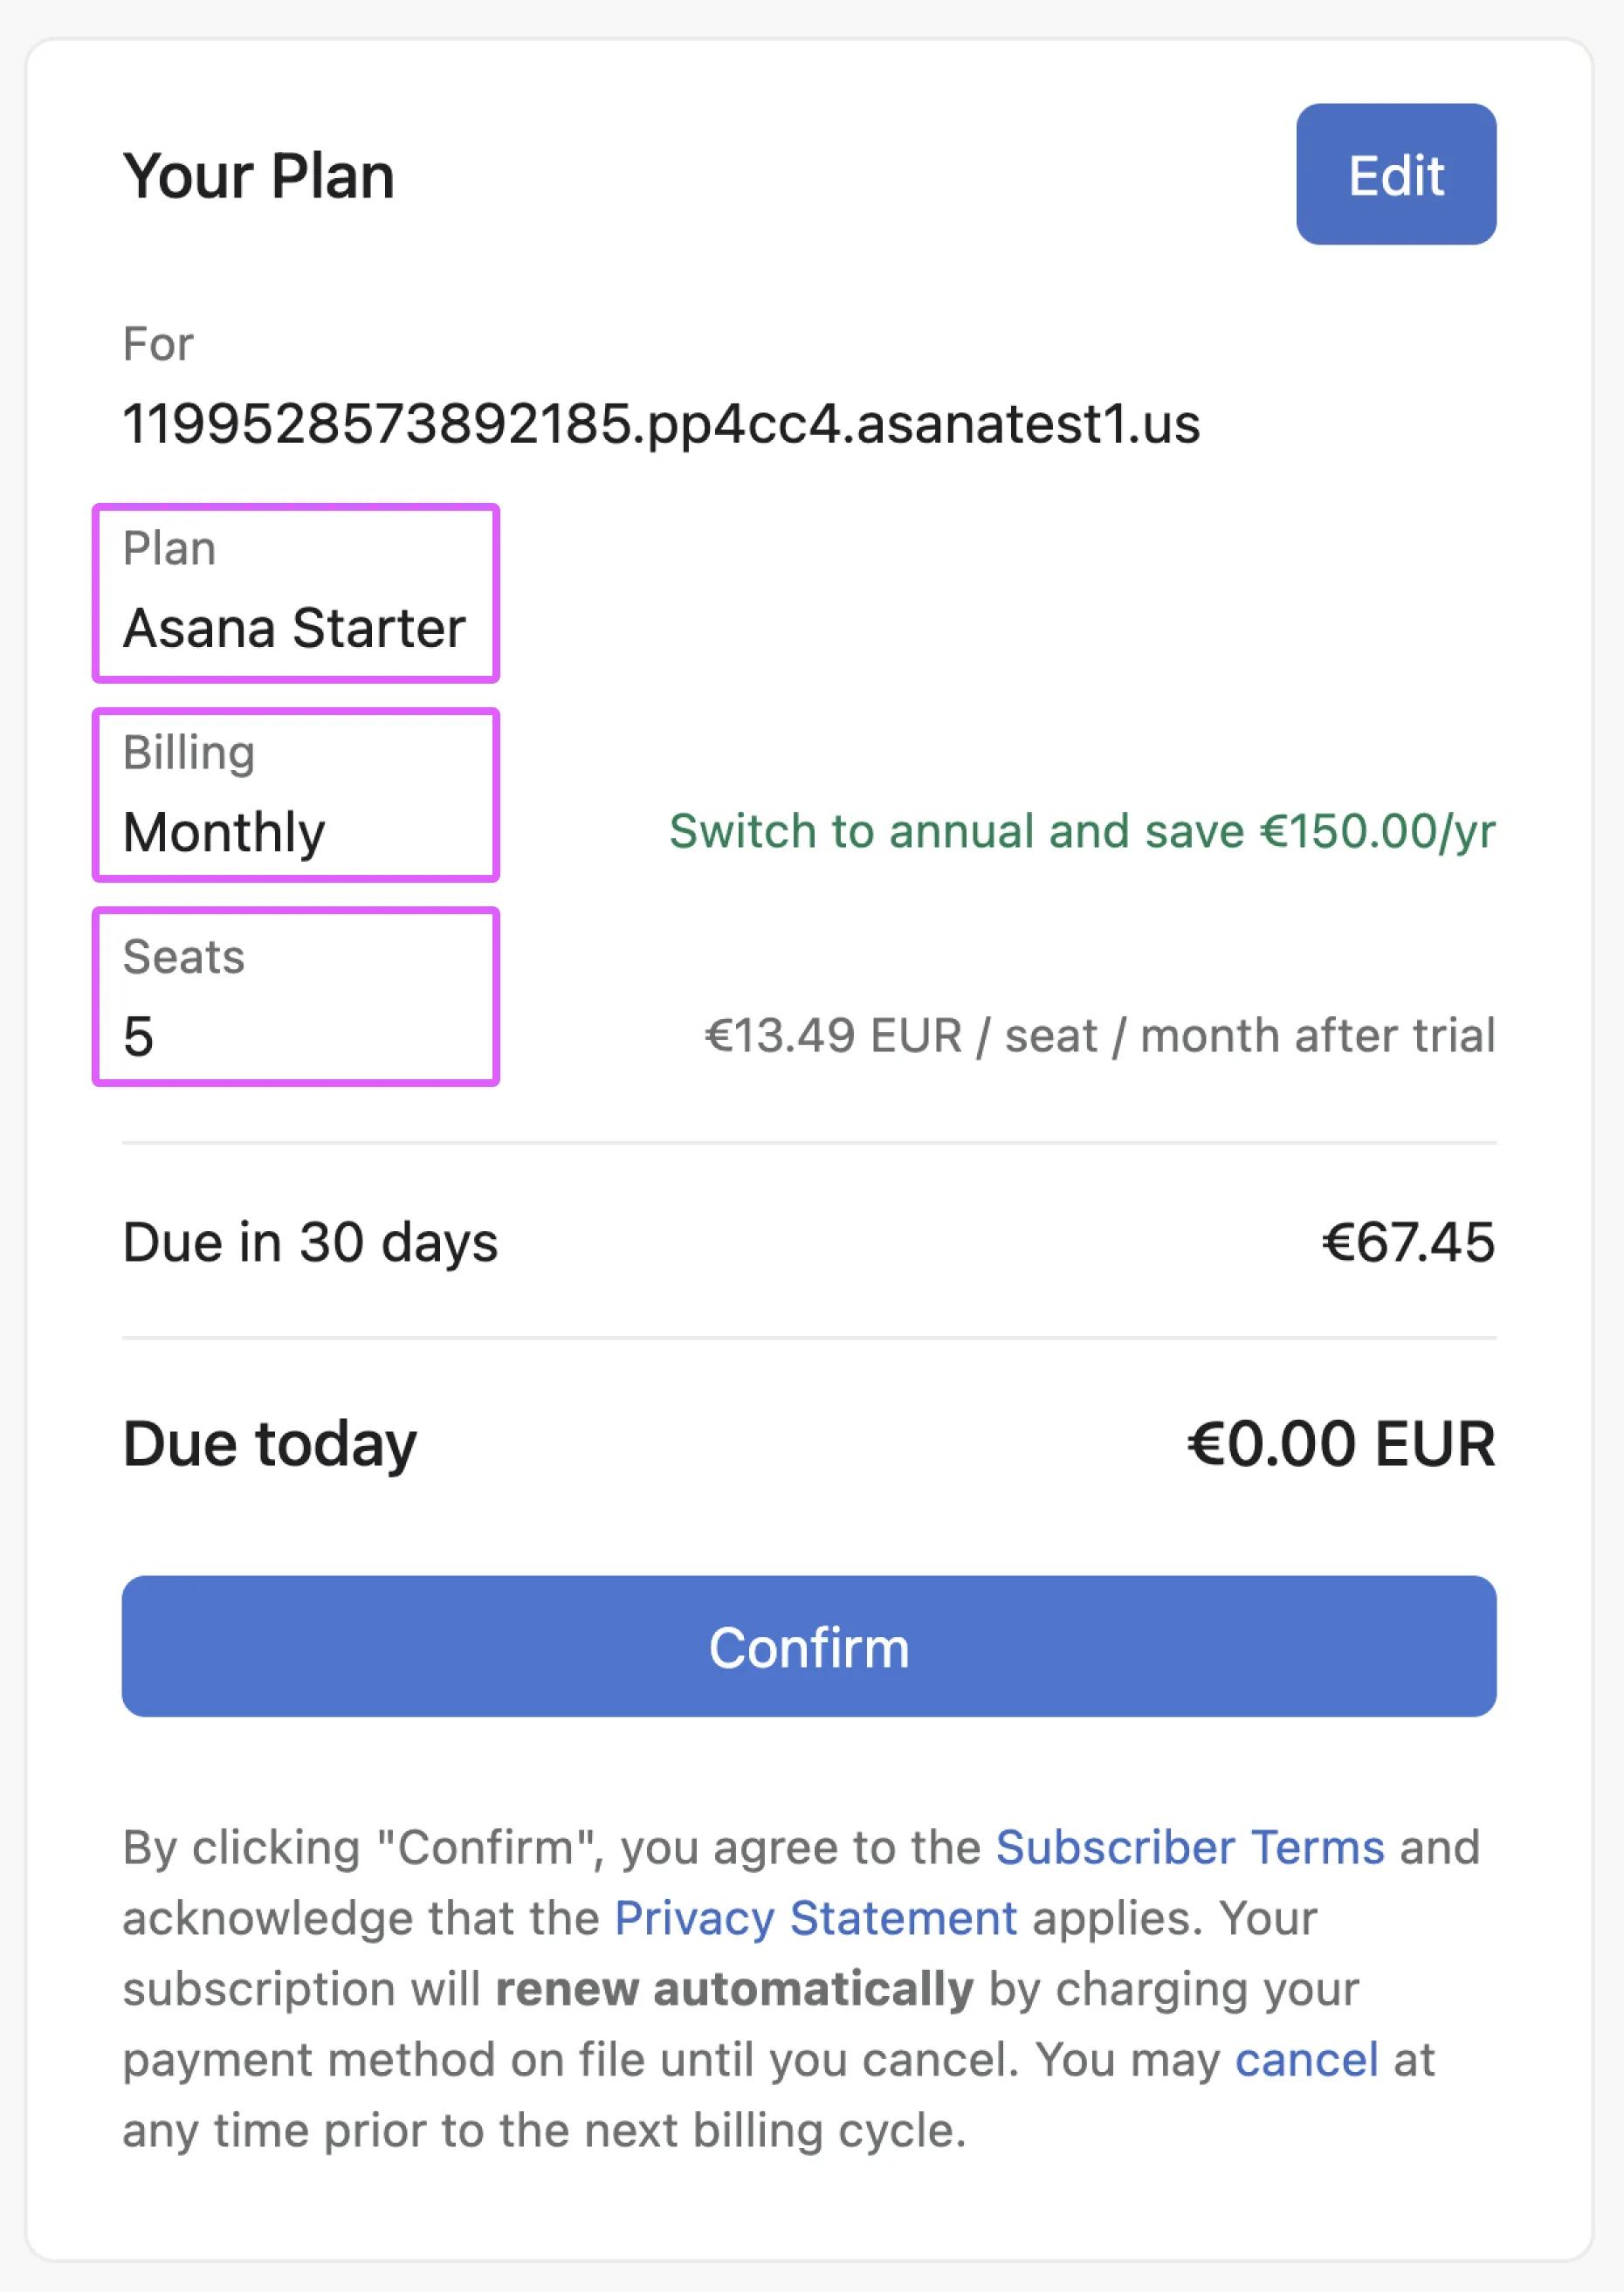
Be sure to check that you've selected the correct details for your upcoming plan.
Plan: Asana Starter or Asana Advanced
Billing: Monthly or Annual
Seats: 5 seats are selected in this example, but you can change this number by clicking Edit.