Note
Note
Any attribute data synced to Asana via SCIM is available to all downstream Asana features, including AI features like Asana Intelligence (Dash). If you do not want a specific attribute surfaced in these features, remove or unmap it from your SCIM configuration in your identity provider, such as Okta or Microsoft Entra ID, before it syncs to Asana.
Set up an Asana Service Account for SCIM
Every SCIM integration — regardless of identity provider — authenticates using an Asana Service Account token. Set this up once before following any of the IdP-specific steps below.
- Sign in to Asana with an admin account and open the Admin Console from your profile photo in the top bar.
- Go to the Apps tab, then select Service accounts.
- Select Add Service Account.
- Under Permission scopes, select Scoped permissions and enable User provisioning (SCIM). If you don't want your identity provider to create, rename, or modify Asana teams, leave the team-related scopes unchecked.
- Save your changes and copy the generated API token. You'll paste this into your identity provider's SCIM configuration in the steps below.
Note
Keep this token secure. Anyone with the token can provision and deprovision members in your organization.
Okta
Features
Super admins can easily provision and deprovision users in Asana from Okta. The integration relies on the SCIM protocol and supports:
- Create members: members assigned to the Asana app in Okta are automatically added to your Asana organization.
- Update profile attributes: attributes such as name, title, and department sync from a member's Okta profile to Asana.
- Import members: members created in Asana can be imported into Okta, either matched against existing Okta users or created as new ones.
- Import groups: Asana teams can be imported as Okta groups. Okta does not allow you to manage membership of imported groups.
- Push groups: Okta groups and their members can be pushed to Asana as teams and team members.
- Link groups: existing Asana teams can be linked to Okta groups after importing teams from Asana.
- Deactivate members: members are deactivated (deleted) in Asana if they're unassigned from the Okta app.
Not currently supported: reactivating members, and deleting Asana teams from Okta.
Requirements
- You're a super admin for an organization in Asana on the Enterprise, Enterprise+, or Legacy Enterprise tier. [VERIFY before publishing — one internal source states this as "admin" on "Enterprise tier" only, rather than super admin across all three tiers. Confirm the correct requirement with engineering/support; see Open question #5 in the reorg proposal.]
- You have an Okta plan that supports Lifecycle Management provisioning.
- You've completed Set up an Asana Service Account for SCIM above.
Before you enable deactivation, read this: deactivating a member in Okta doesn't just pause their Asana access — it deletes their account in Asana, the same as removing them from the Asana UI. There's no separate "deactivated but recoverable" state. Similarly, overriding a member's username at the application level in Okta will delete the Asana account tied to their previous username, if that account was active. Keep both in mind before you enable Deactivate Users in Step 3 below or apply a username override.
Steps
Step 1: Add Asana’s Okta integration app to your Okta account
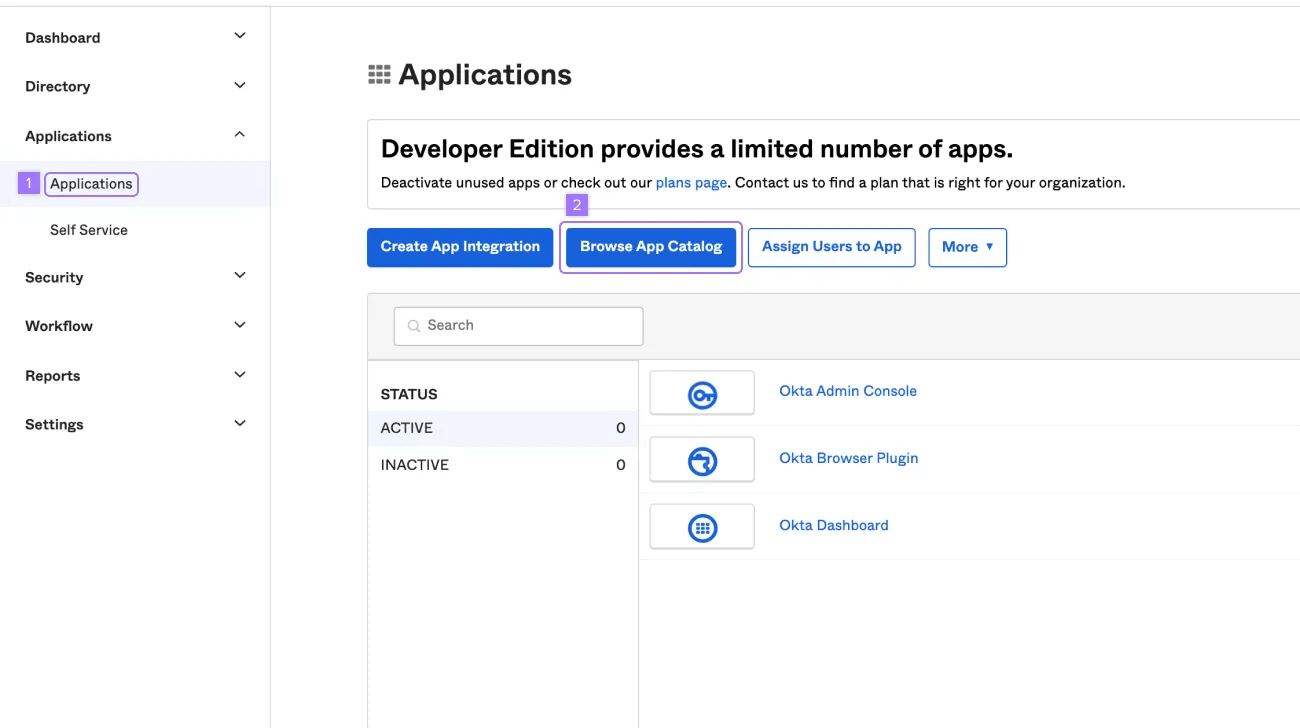
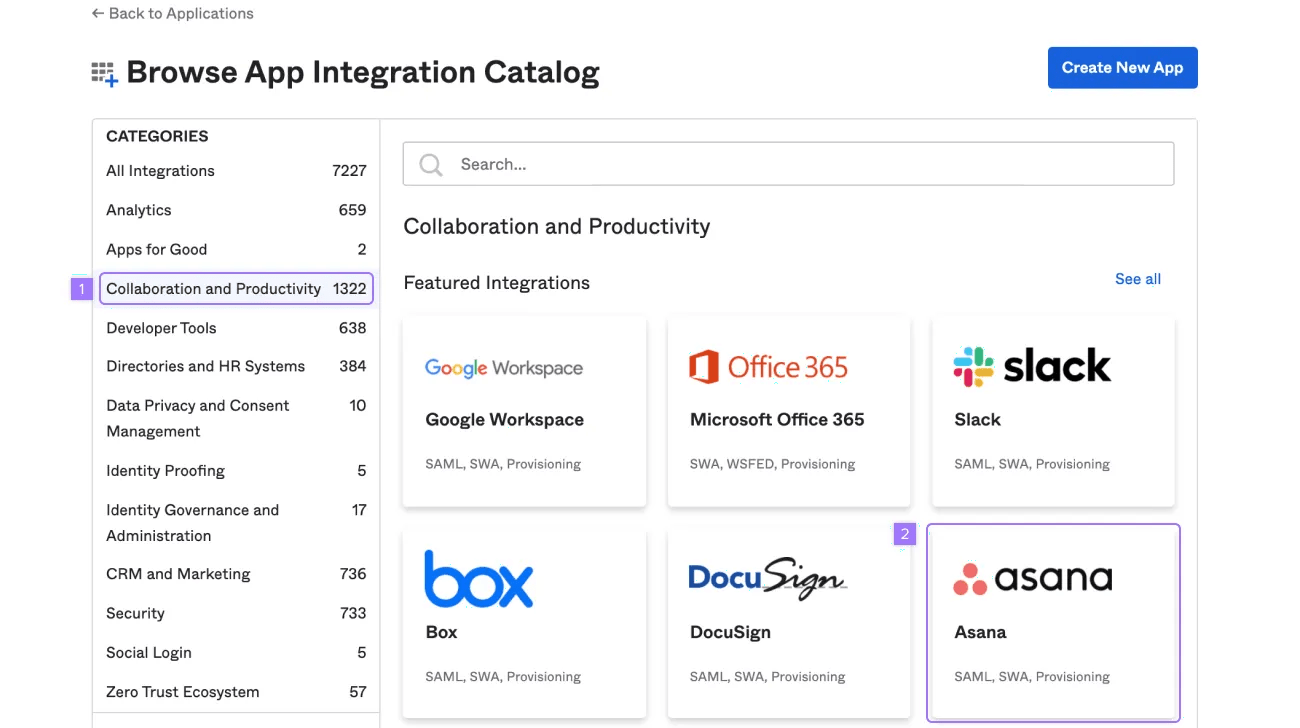
Log in to Okta and add Asana's integration app to your org from the App Integration Catalog under Applications.
To add Asana:
- Click Collaboration and Productivity
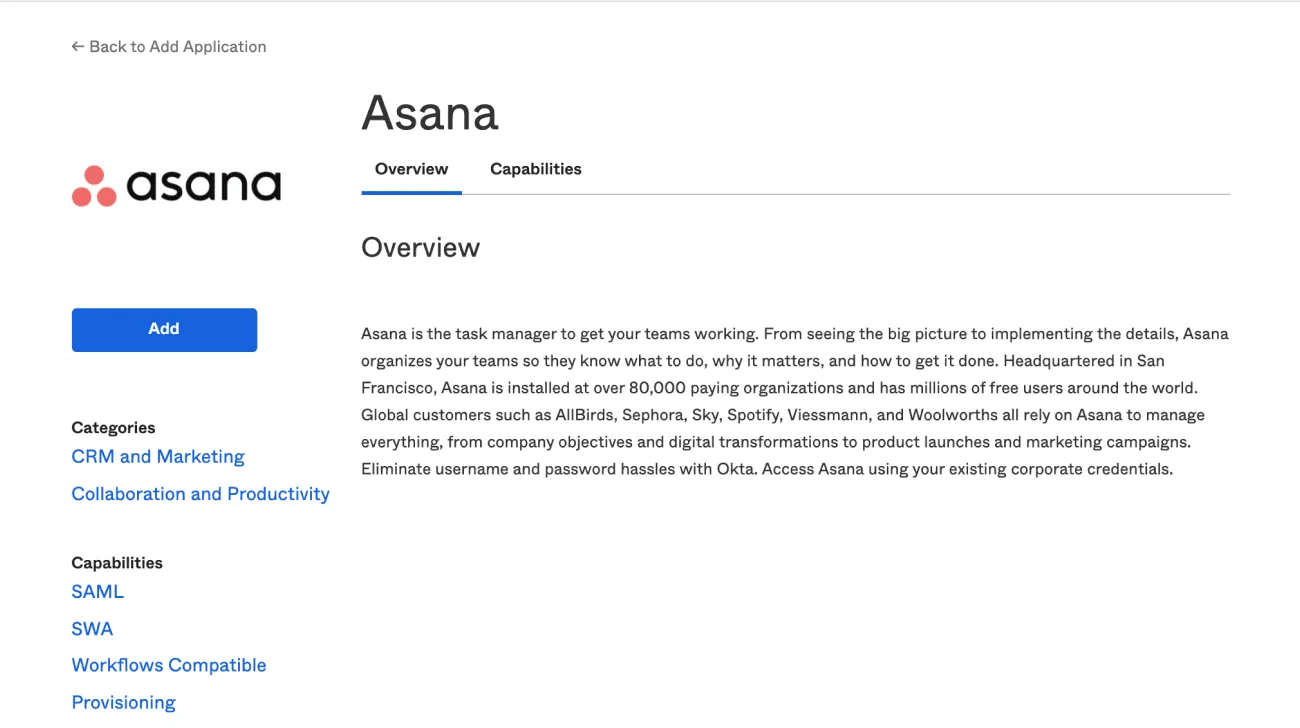
- Click Asana
Step 2: Connect your Asana account to your Okta account
In Asana: generate a Service Account token as described above and copy it.
In Okta:
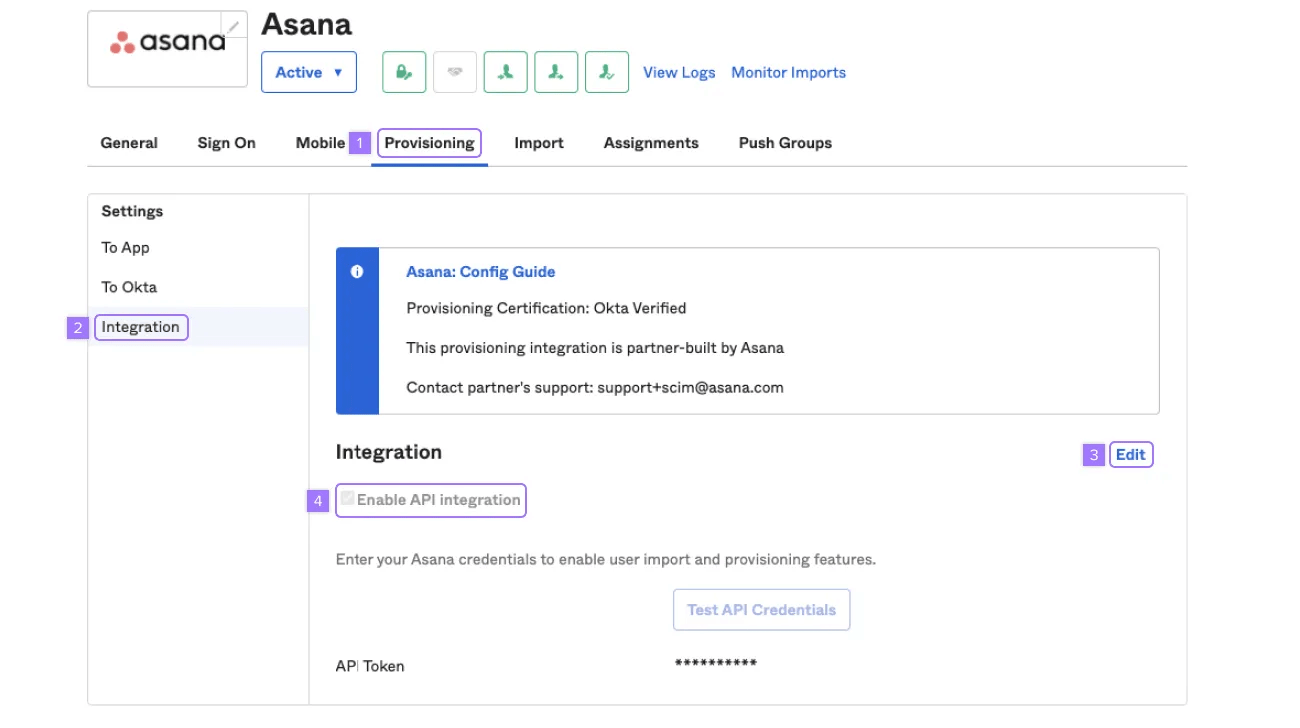
- Under Applications, open the Asana application and click the Provisioning tab.
- Under Settings, click Integration, then Configure API Integration.
- Check Enable API Integration, paste your Service Account token into the API Token field, and click Test API Credentials to confirm the connection.
- Click Save.
Step 3: Set up provisioning options for Asana in Okta
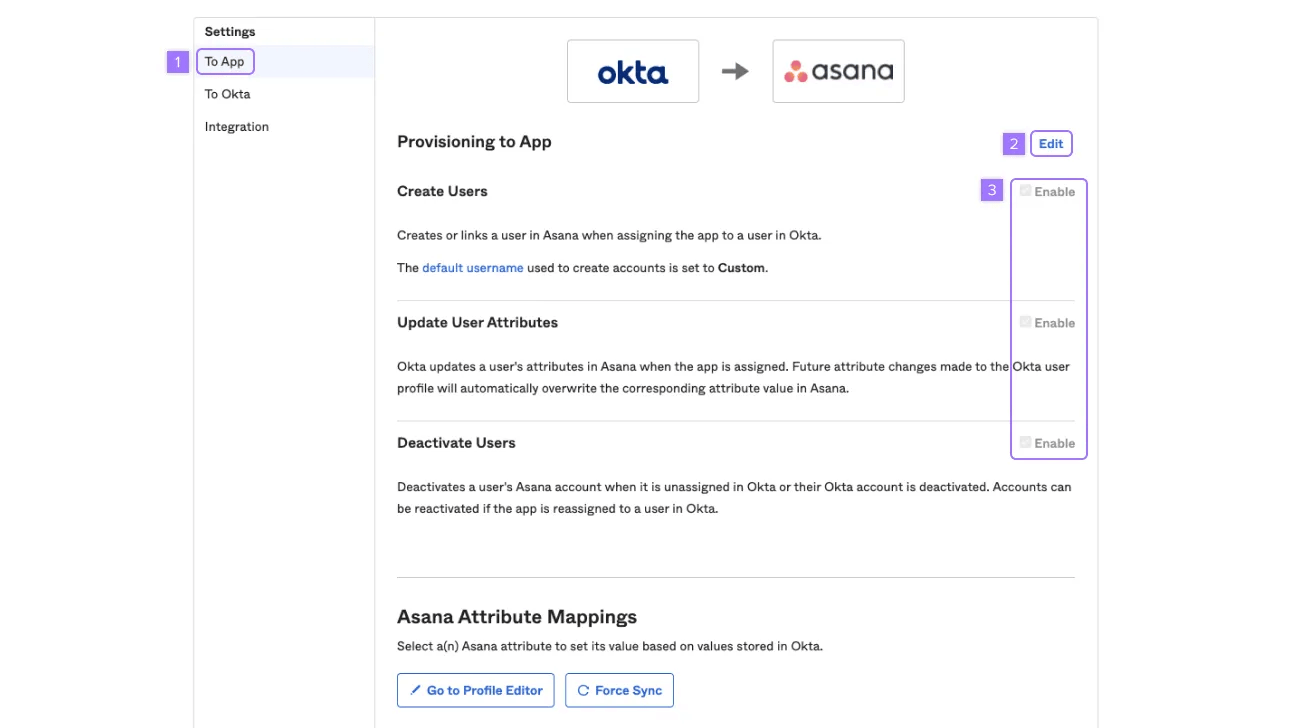
- On the Asana app's Provisioning tab, click To App, then Edit.
- Enable the provisioning options you want. We recommend enabling Create Users, Update User Attributes, and Deactivate Users.
- Click Save.
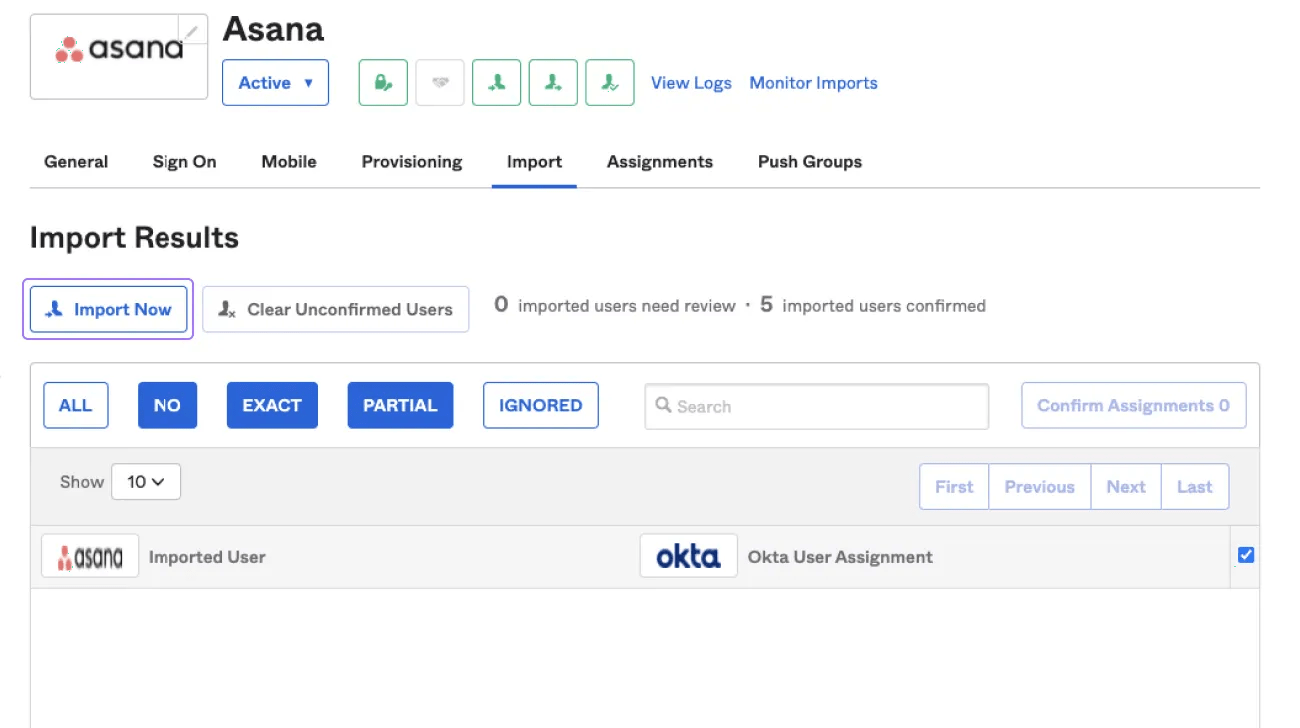
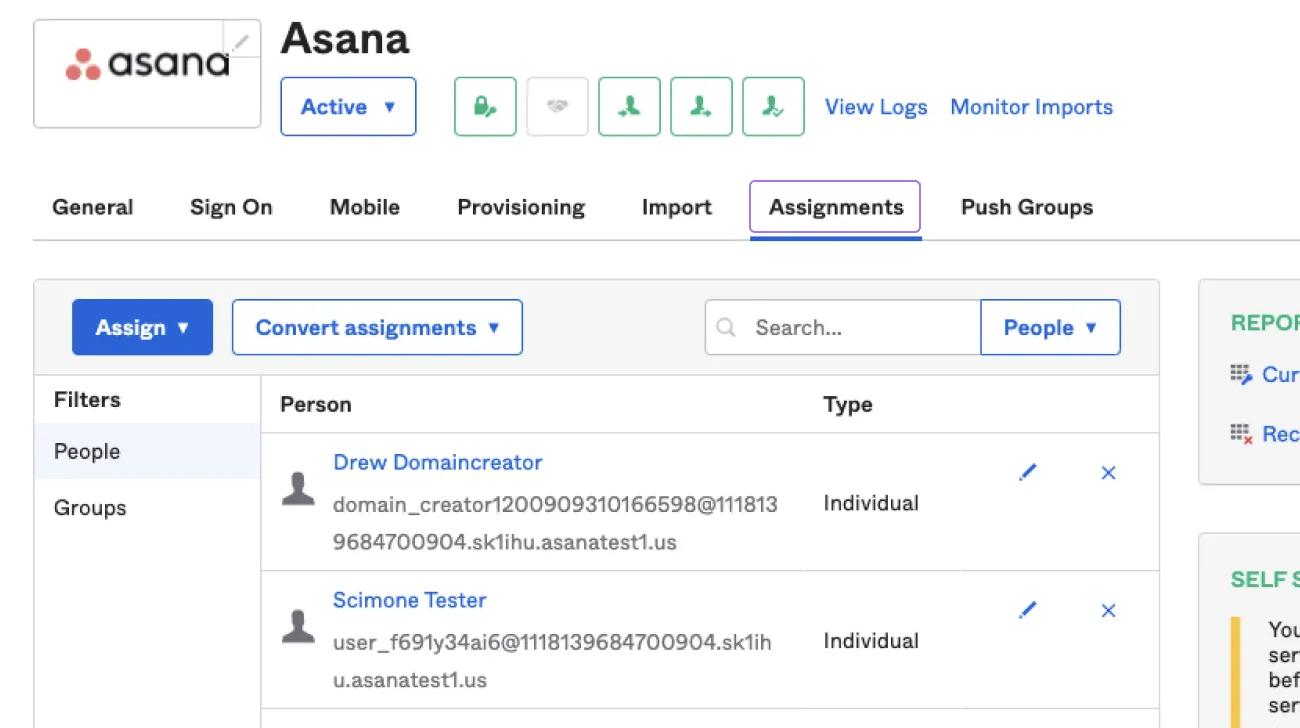
- Use the Import tab to reconcile members detected in Asana with your Okta directory, and the Assignments tab to manage who's provisioned — assigned members stay automatically in sync with your Asana member list going forward.
To set up provisioning options:
- Under the Settings sidebar click on To App
- Click on Edit at the top right
- Enable user provisioning options for the Asana app and click Save to apply integration settings
Note
We recommend you enable Create Users, Update User Attributes, and Deactivate Users.
Step 4: Map provisioned users into teams in Asana
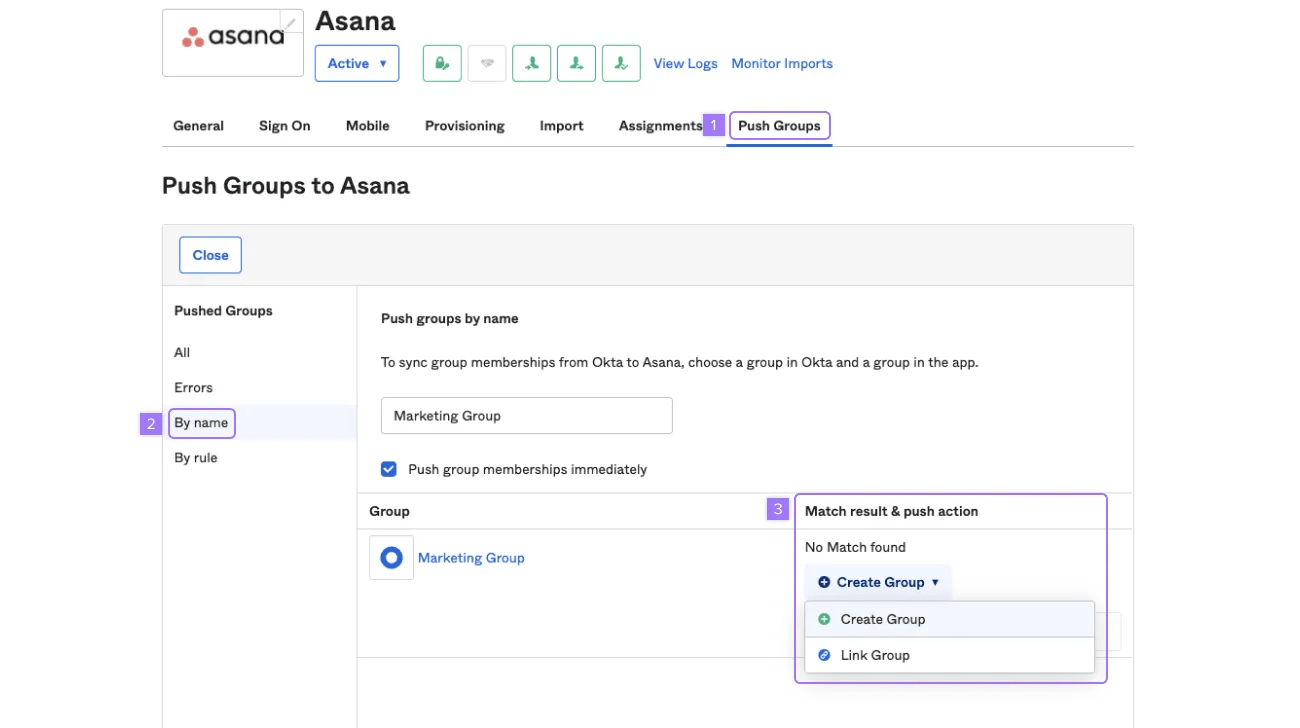
You can push new Okta groups into Asana as teams, or link Okta groups to existing Asana teams.
- In the Asana app in Okta, click Refresh App Groups to pull in any recent changes from Asana.
- Go to the Push Groups tab and search for the group by name.
- From the match results, choose Link Group to map to an existing Asana team, or Create group to create a new one.
- Click Save.
Deleting a team in Asana isn't supported from Okta. Use the Teams tab in the Asana Admin Console instead.
Step 5: Configure attribute mappings for Asana
On the Asana app's Provisioning tab, under Asana Attribute Mappings, choose Create or Create and Update for each attribute you want to sync. Supported attributes:
|
Attribute
|
Type
|
Notes
|
|---|
|
userName
|
String
|
Required. Must be a unique email address matching your Asana organization's domain.
|
|
name.formatted
|
String
|
The member's full name. Use this — name.givenName and name.familyName are not supported individually. If formatted doesn't match what's set for given/family name, formatted takes precedence and can silently override those fields.
|
|
emails.value
|
String
|
Member's email address.
|
|
emails.primary
|
Boolean
|
Marks the primary email. Only one email may be marked primary.
|
|
title
|
String
|
The member's job title.
|
|
department
|
String
|
The member's department.
|
|
preferredLanguage
|
String
|
Only applied when the member is first created. Later updates to this field in Okta aren't reflected for existing members.
|
|
active
|
Boolean
|
Whether the member's account is active in Asana.
|
If you want to stop syncing a specific attribute, remove or unmap it in Okta — Asana doesn't provide a separate exclude control. Removing a mapping stops future syncs; it doesn't delete data that's already synced.
Step 6: Update an existing Asana–Okta integration
To pick up new attributes or capabilities on an integration you already have running:
- On the Integration page under Provisioning, click Edit.
- Uncheck Enable API Integration and click Save.
- Click Edit again, recheck Enable API Integration, re-enter your API token, and click Save.
- Re-enable the provisioning features you want.
Other things to know
- Emoji in names will break imports. Okta only supports characters encoded with 3 bytes or fewer, so member or group names containing emoji will fail to import.
- Provisioned members' emails must match your Asana organization's domain. Guests continue to be provisioned and managed only through the Admin Console's Members tab.
- See the deactivation and username-override warning above if you skipped ahead to this section — it applies regardless of when you enabled those settings.
Microsoft Entra ID
Asana's Microsoft Entra ID integration is configured primarily through Microsoft's own provisioning tutorial, since the setup lives entirely in the Entra admin center. Complete these Asana-specific steps first, then follow Microsoft's walkthrough for the Entra-side configuration.
Requirements
- An Asana organization on an Enterprise plan or better, with a member account that has admin permissions.
- A Microsoft Entra account with the Application Administrator, Cloud Application Administrator, or Application Owner role.
- You've completed Set up an Asana Service Account for SCIM above and have your token ready.
Steps
- Add Asana from the Microsoft Entra application gallery (a separate app from any existing SSO integration is recommended while testing).
- Follow Microsoft's tutorial: Configure Asana for automatic user provisioning with Microsoft Entra ID to:
- Enter your Asana tenant URL and the Service Account token you generated above under Provisioning > Tenant URL, and test the connection.
- Define who's in scope for provisioning (by assignment or by attribute-based scoping filter).
- Review and confirm attribute mappings for users and groups.
- Start provisioning and monitor status via Microsoft's provisioning logs.
Because this configuration happens in the Entra admin center, refer to Microsoft's tutorial for up-to-date screenshots and navigation — Asana's attribute-mapping and Service Account requirements above stay the same regardless of Microsoft's UI changes.
Google Workspace
If you use Google Workspace as your identity provider and want to set up SCIM provisioning with Asana, contact your account executive or Asana support for current setup guidance.
OneLogin
Asana's OneLogin integration is configured directly in OneLogin. Follow OneLogin's SCIM provisioning setup guide for Asana for step-by-step instructions.
If you're configuring SCIM with an identity provider that isn't natively integrated with Asana, see Asana's developer documentation on supported SCIM attributes for the full list of accepted attributes.
SCIM deprovisioning customization
When a member is deprovisioned from Asana via SCIM or the API using a Service Account token, Asana automatically creates a "Previously assigned tasks" project containing their public tasks. You can configure who owns that project:
- In the Admin Console, go to the Security tab and open Member removal settings.
- Turn on the setting to assign a super admin (or All super admins) as the owner of the "Previously assigned tasks" project.
- Optionally, choose whether to include completed tasks.
This customization only applies when a member is removed via SCIM or the API with a Service Account token — not when removed manually through the Asana UI. For more on what happens when a member is removed, see User deprovisioning.